
The Settings section has been reorganized into clear groups, so you can quickly find what you need — from location details and branding to module configuration (payments, products, payroll) and system-wide parameters.
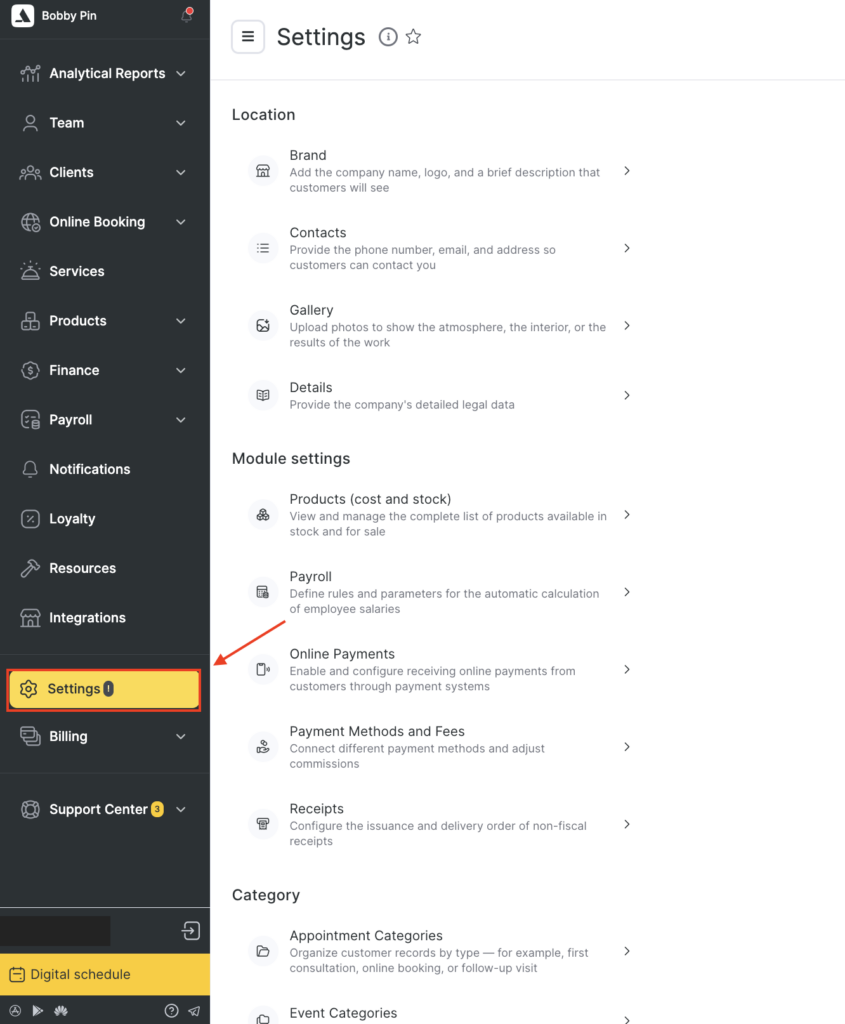
How to open Settings
- Open Administration mode.
- Go to Settings.
- Choose the section you want to configure.
Important: Some settings may be available only to certain roles. If you don’t see a section, ask your manager/admin to check your permissions.
Settings structure overview
The Settings page is divided into 4 main groups:
- Location — information clients see + legal/business data
- Module settings — configure how key modules work (products, payroll, payments, receipts)
- Category — create and manage categories used across the system
- System settings — global parameters (country, language, timezone, integrations)
Location settings
These sections control how your business is presented and what contact and legal information is stored.
Brand
Add your company name, logo, and short description that clients will see. Read in more detail here.
Contacts
Provide your phone number, email, and address so clients can contact you. Read about this in more detail here.
Gallery
Upload photos to show your atmosphere, interior, or work results. Read about this section in detail in this article.
Details
Add your company’s detailed legal data. Read about information about this section here.
Note
Location settings are usually the first things to update after creating a new account or adding a new location.
Module settings
These sections affect how Altegio modules behave and how calculations/financial flows work.
Products
View, create and manage the full list of products available in stock and for sale at your company. Read about this section in detail in this guide.
Payroll
Define rules and parameters for automatic salary calculation for your team. Read detailed guide on how to do it in the Configuring Compensation Deductions in Payroll Calculation article.
Online Payments
Enable and configure receiving online payments from clients through payment systems. Read about available options and settings here.
Payment Methods and Fees
Connect different payment methods and adjust commissions/fees.
Read in more detail in this article.
Receipts
Configure the issuance and delivery order of non-fiscal receipts.
Important
If you change payment methods/fees or receipt logic, it can impact reports and finance workflows. Make changes carefully and test if possible.
Category settings
Categories help you organize data and make filtering/reporting easier.
Appointment Categories
Organize appointments by type (for example: first consultation, online booking, follow-up). Learn more about this section here.
Event Categories
Create event types to tag them easily in the schedule. Learn more about this section here.
Client Categories
Group clients (VIP, new, regular, etc.) to better manage your client database. Check about this section in more detail in this article.
Tip
Categories are super useful for analytics and segmentation — set them up early, and keep naming consistent.
System settings
These are global parameters for your account/location and technical configuration.
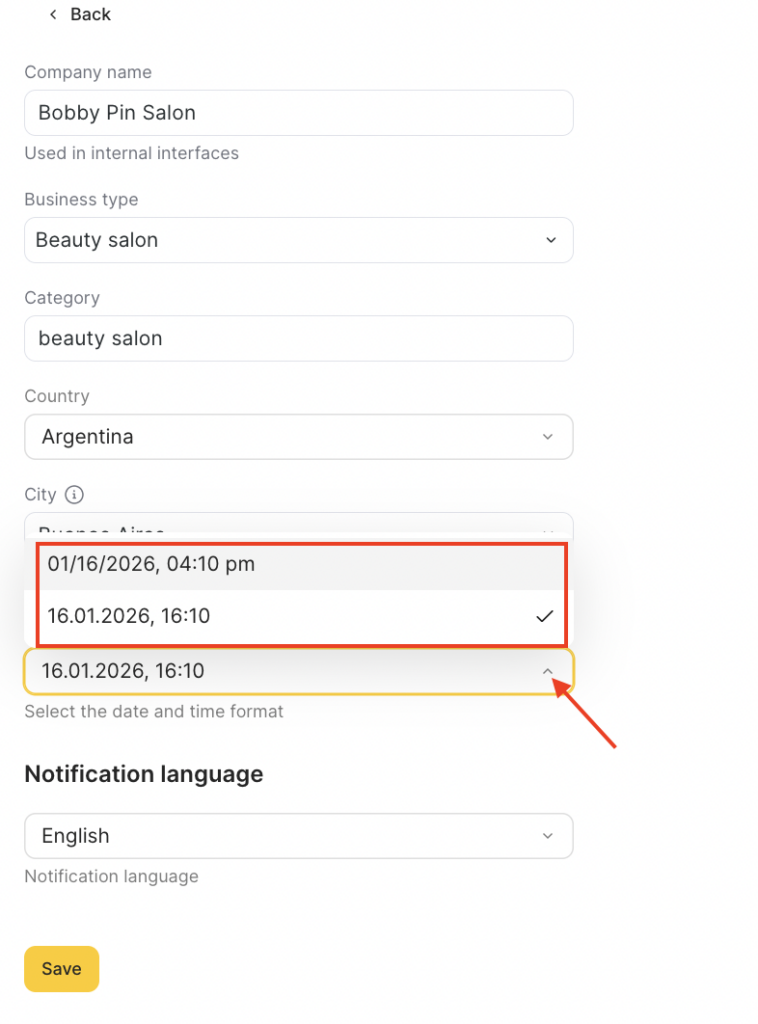
General
Set country, industry, time zone, time format, and language.
What you can set here
- Notification language
Sets the language used for client notifications (SMS, emails, messages.)
- Company name
The name of your business as it appears in Altegio’s internal interfaces (for example, in the admin panel and internal lists).
- Business type
Helps Altegio tailor some defaults and structure (for example, salon/clinic workflows and recommended setup).
- Category
A more specific label for your business (for example, “beauty salon”). It can be used for internal grouping and system logic depending on your account setup.
- Country and City
Defines your location. This affects things like available local options and can also impact formats and regional settings.
- Date and time format
Controls how dates and times are displayed across the system.
Chains
Add information about the company’s chain affiliation: applicable for multi-location businesses. Read more in this article.
For developers
In this section you can add technical information and tools that are required for integration. Read in more detail in this article.
Analytics
Client Churn
Set the time period used to determine when a client is considered lost if they have not visited for a while.
This setting helps standardize churn analytics and gives you a clearer view of client retention over time. Read in more detail in this article.
Inventory Settings
Configure product cost settings and define restrictions for operations when stock is insufficient.
This section helps you manage inventory behavior more accurately and avoid errors when working with products and stock balances. Read more in this article.
Digital Schedule Settings
Configure how appointments are displayed in the digital schedule, including columns, statuses, filters, and available actions.
Use this section to adapt the schedule layout and behavior to your team’s workflow. Read more about this section in the article.