The Altegio and virtual KOMPaaS integration allows you to interact with clients more efficiently by providing convenient call routing with call recording and support for all Altegio services. Notifications about calls received through virtual KOMPaaS are displayed in the Altegio interface, and the client card opens during the call.
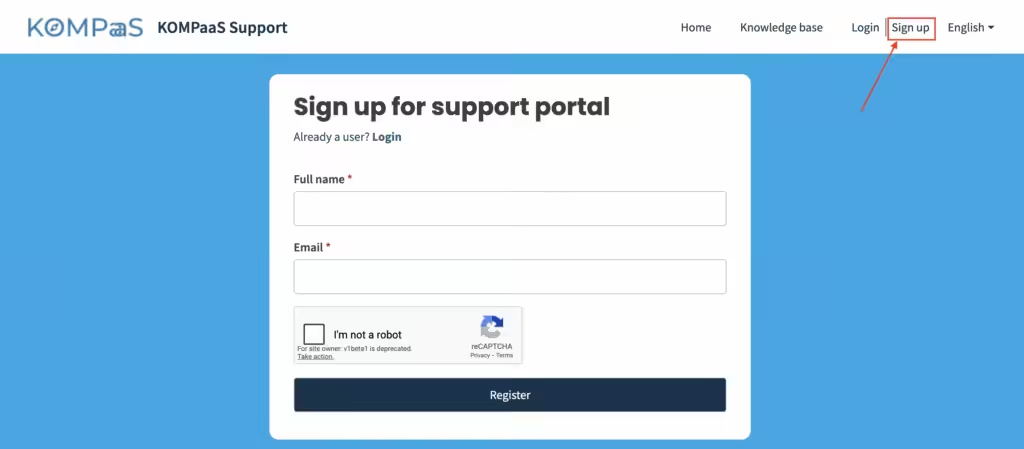
Before setting up the integration, register using the link on the Kompaas.tech website.
If the registration page shows endless loading, click the Shopfront button in the upper-right corner.

Then click the Registration button in the upper-right corner and complete the registration process.
Connection
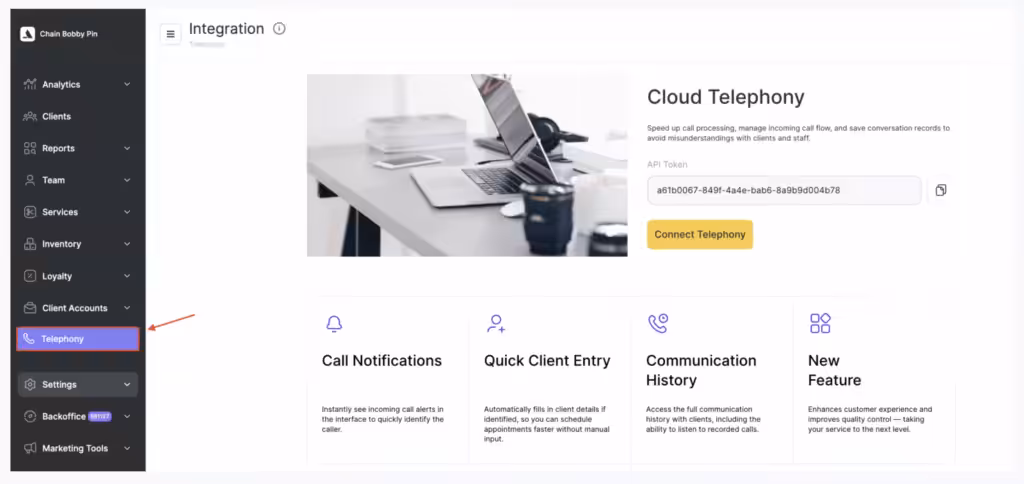
- In the chain interface, go to the Telephony section and copy the telephony token. For detailed instructions on setting up IP telephony in the chain interface, see the article Setting up IP telephony in a chain.
- Go to your KOMPaaS personal account or register on the website.
- Open the Integrations and API v2.0 section. Click the Altegio integration folder, then click Create integration.
- Select the required virtual PBX and paste the token you copied into the clipboard into the Chain telephony token field.
- Click Save. The integration setup is complete.
After these settings are applied, additional sections will appear in the Telephony section of the Altegio interface: Integration, Routing, Routes, and Calls, and the integration status will change to Integration connected.
How to connect the Altegio package
- Go to Services 2.0 > Management tab > Integrations in the left-side menu, and click the plus (+) button.
- Select the package and click Connect.
- Confirm by clicking Connect.
Option 2
- You can also open Services 2.0 via the link in the tooltip in the marketplace.
How to connect the integration in the Altegio marketplace
- Make sure you are authorized in Altegio.
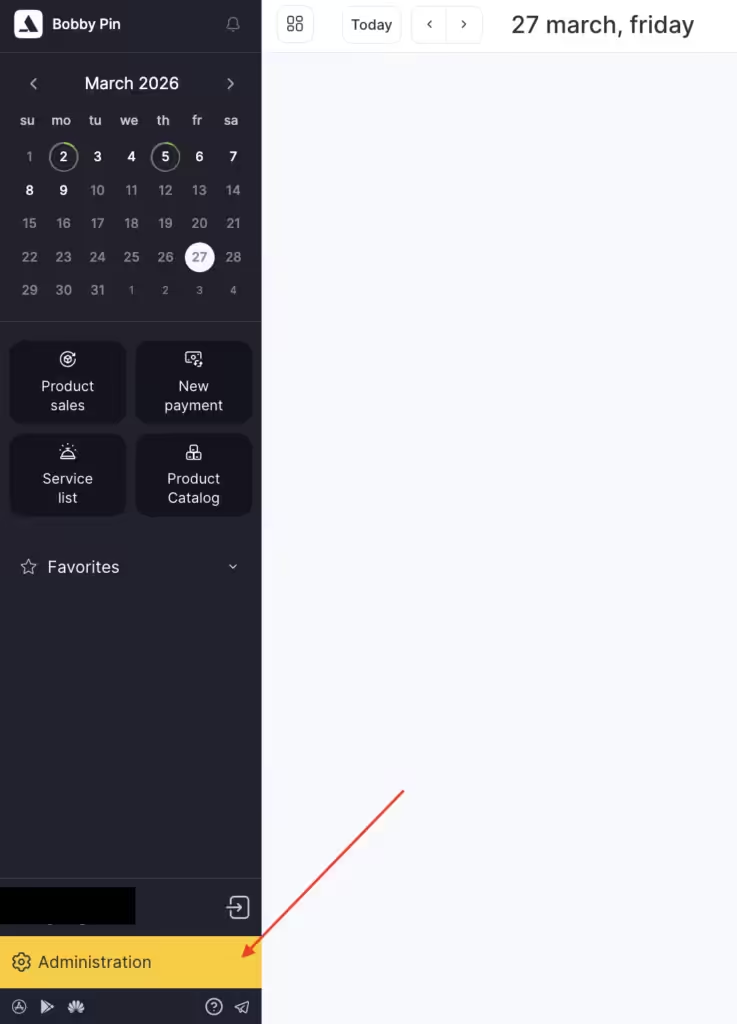
- Go to Administration mode.
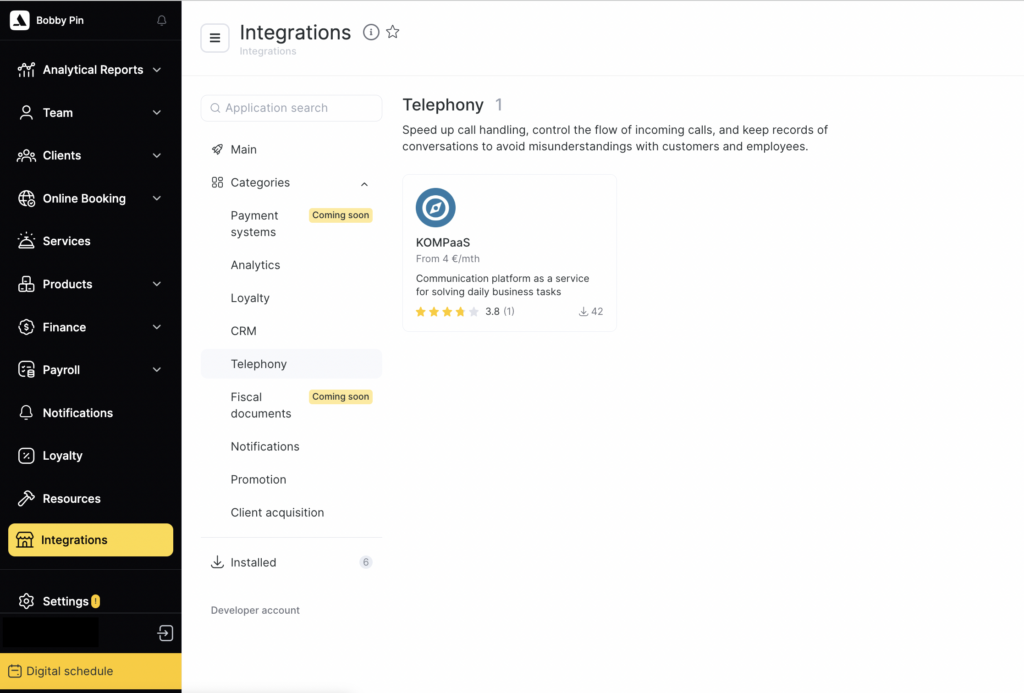
- In the left-side menu, open the Integrations section.
- Go to Telephony and select the KOMPaaS app.
- In the next window, click Connect.
Select the chain and confirm the permissions.
Enter your KOMPaaS account registration details and click Log in. If you do not have an account, click Register.
Your integration has been created. For it to work, do not forget to connect a paid package.
Setup
- Choose the users who should receive information about incoming client calls. To do this, in the chain interface go to Telephony > Routes.
- Click Add route and specify the following information:
- Name.
- Click Add and select the user and branch.
- Choose where to save the call history for the route.
- Click Save.
- Define the route that will be triggered when an incoming call is received. To do this, go to Telephony > Routing and click Add rule.Specify:
Type — Phone or SIP. If each branch in the chain has its own separate phone number, select Phone. If the chain uses one shared number and the branch is selected via a voice menu, select SIP.
Identifier — if each branch in the chain has its own separate phone number, enter the branch phone number in the format 1XXXXXXXXXX (without the + sign). If the chain uses one shared number and the branch is selected via a voice menu, enter the subscriber’s short number in the virtual PBX. To view subscriber numbers, go to Virtual PBX > Settings > Numbering plan > Subscriber numbers in your KOMPaaS personal account.
Route — one of the routes created earlier.
Click Save.