
You can set up a schedule and start working on the calendar both in the web version of Altegio and in the mobile application. All data is automatically synchronized.
If you have already set a schedule in the web version and started making appointments, you will be able to see all of this in the mobile application. At the same time, in the app you can also set up a schedule, create, edit and delete appointments, work with visits (change status, make payments, apply loyalty programs).
Creating appointment #
To create an appointment in the mobile app:
- Go to the Schedule tab in the bottom panel.
- Select a team member and time, tap an empty slot, and in the pop-up window choose the exact time for the appointment.
In the same window, you can create a group event or add a break to the team member’s schedule.
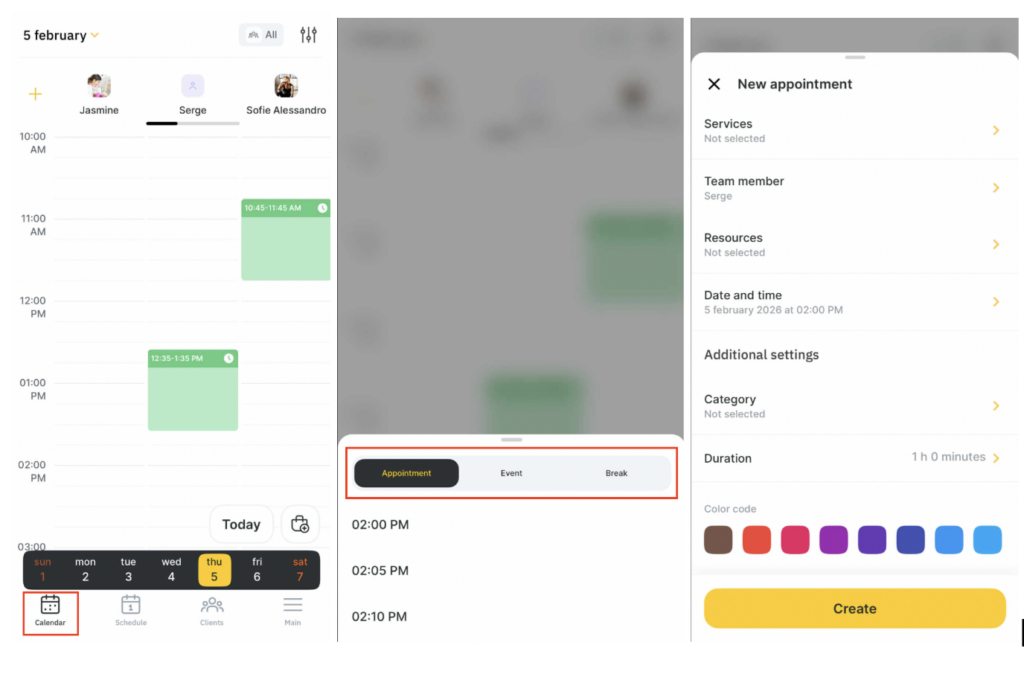
- In the new window that opens, enter all the required appointment details:
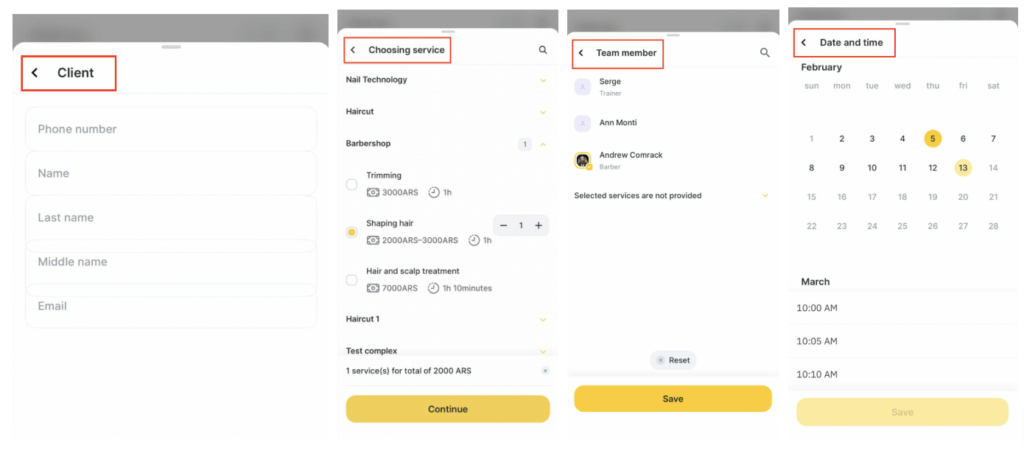
- Select a client. If the client is new, enter their phone number, name, email, and tap Continue. If the client already exists in the client database, select them from the list.
- Select a service. Only services assigned to the selected team member will be available for booking.
- The team member, date, time, and service duration will be filled in, but you can change them if needed.
Fill in additional appointment settings if needed:
- Choose the appointment color and category (for example, the Team member is important category indicates the client wants to book only with a specific professional). Custom appointment categories can be created in advance in the web version — see more here.
- Fill in additional appointment fields (if they have been created). Additional fields can be created in the chain interface in the web version — read in detail in the article.
- Add a comment to the appointment.
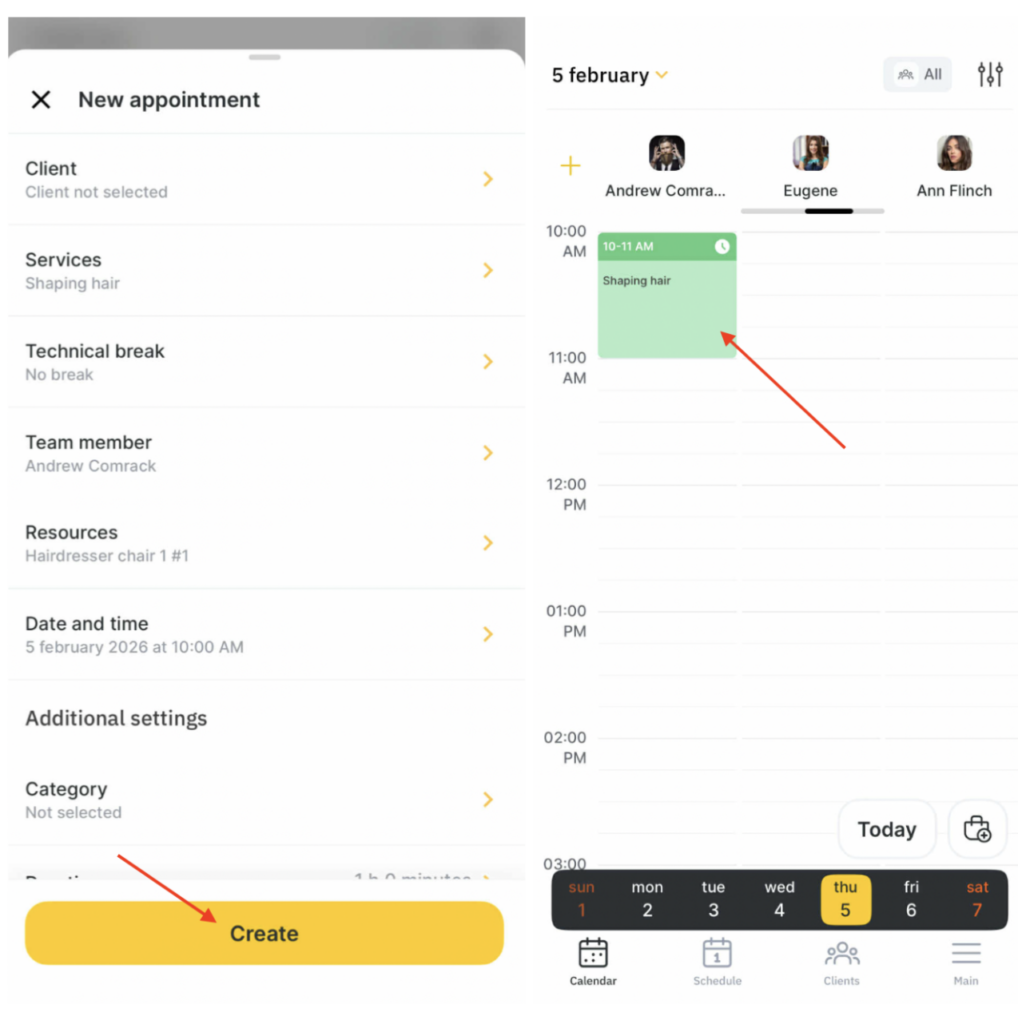
- Tap Create.
After that, the appointment will appear in the calendar, and you can work with it.
Working with appointment #
Once created, you can view, edit, reschedule and delete the appointment.
- Click the appointment to continue working.
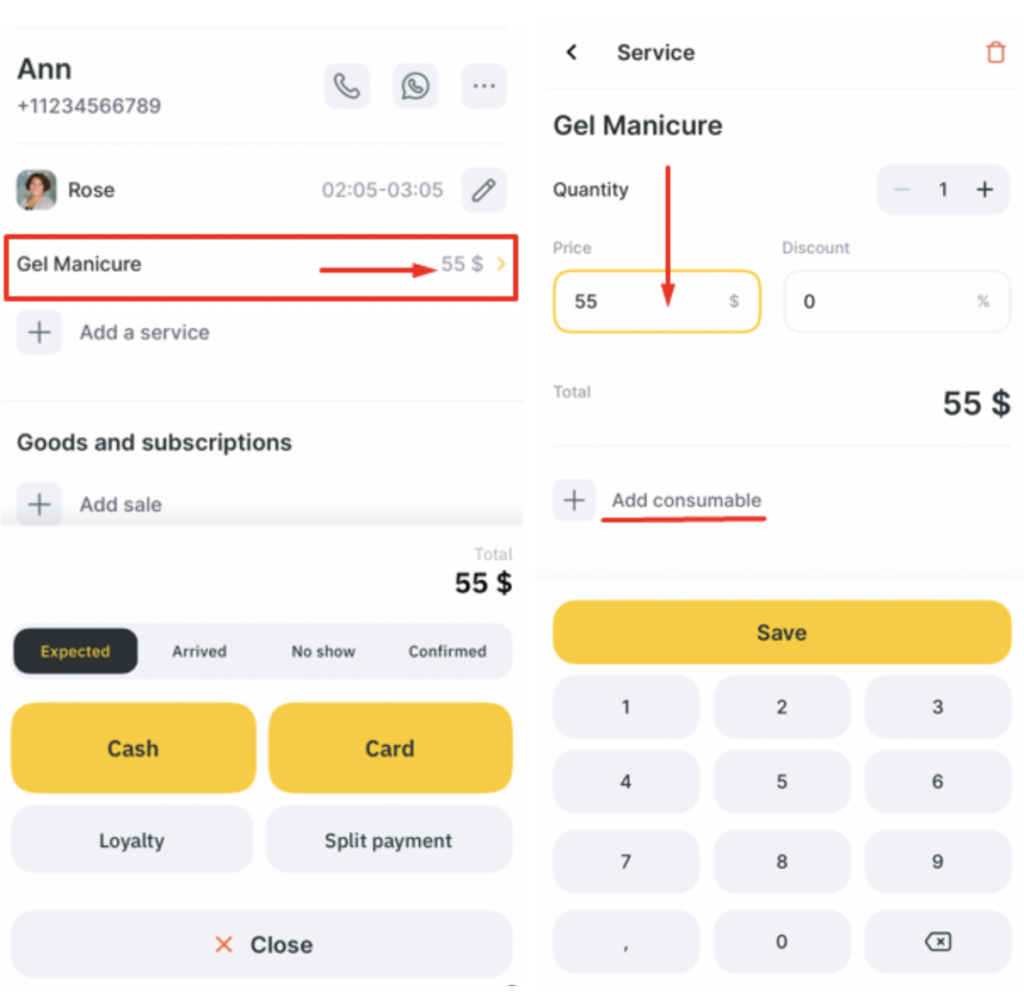
- If necessary, change the service price, add a discount, consumable or change the quantity. To do this, click the service name in the visit.
- The Quantity is regulated by the – and + buttons.
- The Price and Discount fields can be edited, to change them, click the number and enter a new value. After the changes click the Save button.
- Click the + Add a consumable button to add it. After clicking the button, select an action in the menu: Add a consumable or Apply bill of materials. In the same section you can edit the consumables added to the visit or delete them. You can delete the added consumable by clicking its name and the trash icon. To edit an already added consumable, click its name in the appointment window.
- To delete a service from the appointment, click the trash icon in the upper right corner.
- To quickly switch between fields, you can use the arrow buttons next to the Save button.
- To add a new service to the visit, click the + Add a service button.
In the opened window select a service from the list or use the search. Specify the quantity of services and click Add.
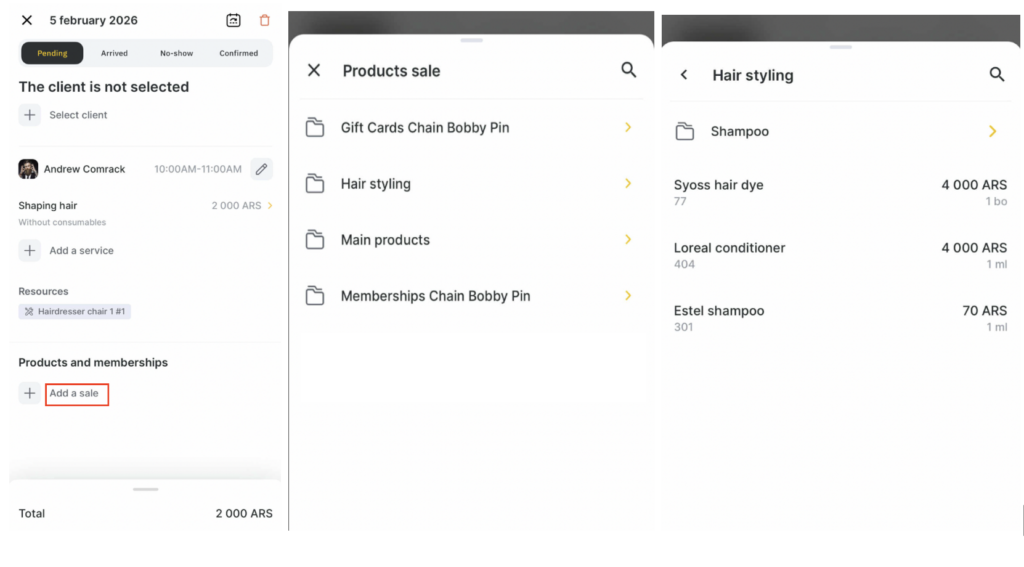
- To add a product for sale to the visit, click the + Add sale button.
In the opened window select a product from the list or use the search. Edit the information about the sale of the product (if necessary). The Price and Discount fields can be edited, to change them, click the number and enter a new value. You can also change the team member selling the product and the inventory.
If you sell a membership or a gift card with a code, enter the membership/gift card code in the appropriate field at the top. To generate the code automatically, click the round arrow button.
After the changes click Add a product or Sell membership/gift card.
You can delete the added product by clicking its name in the Products and memberships field and the trash icon.
Note
The sale of products and its cancellation in the mobile application is possible only in the visit tab.In order for products and consumables to be added to visits in the mobile app, they must first be created in the web version of the program. Read more here.
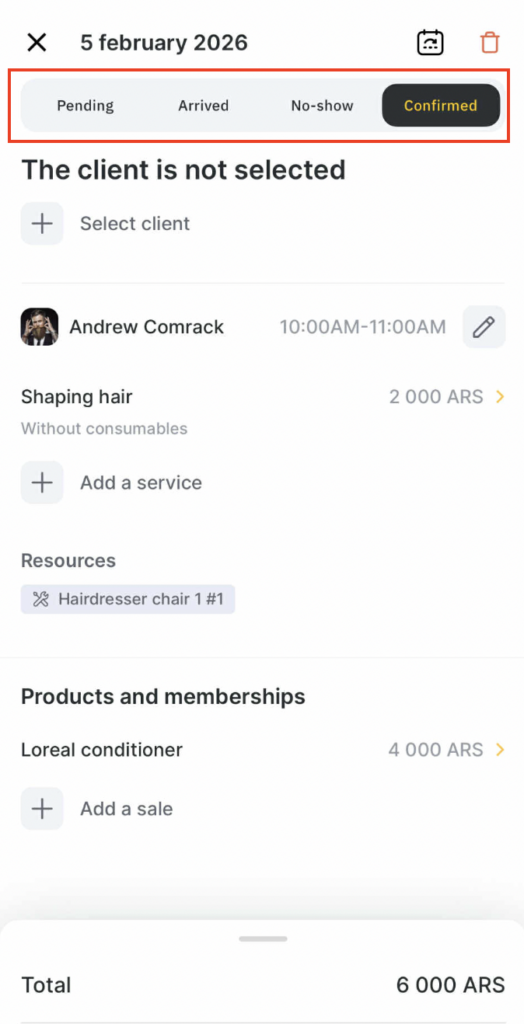
- Make an appointment. Here you can change the status of the visit (Expected, Arrived, No show, Confirmed) and proceed to payment.
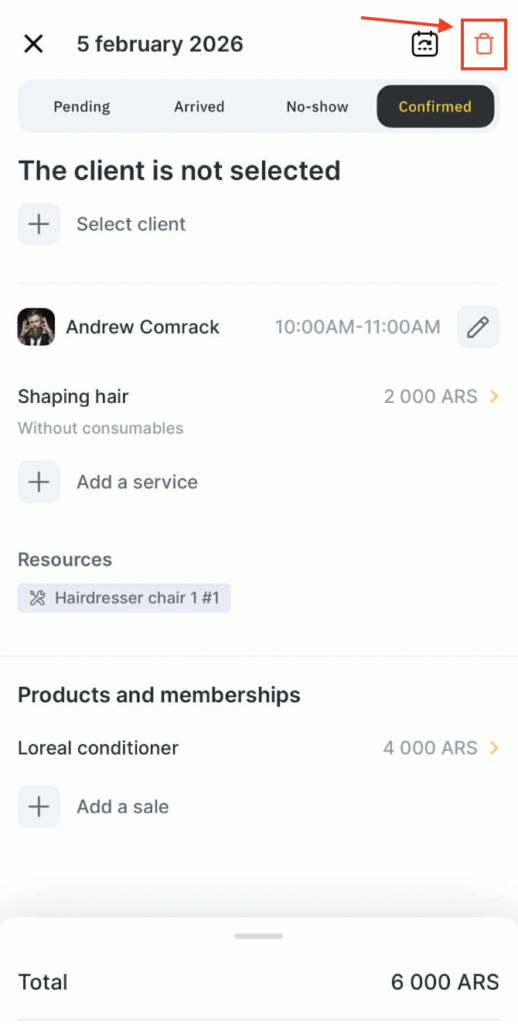
- To delete the appointment, click the trash icon in the upper right corner. After clicking this button, the pop-up message will appear: “Are you sure you want to delete the appointment?”, click Yes to delete it.
Visit payment #
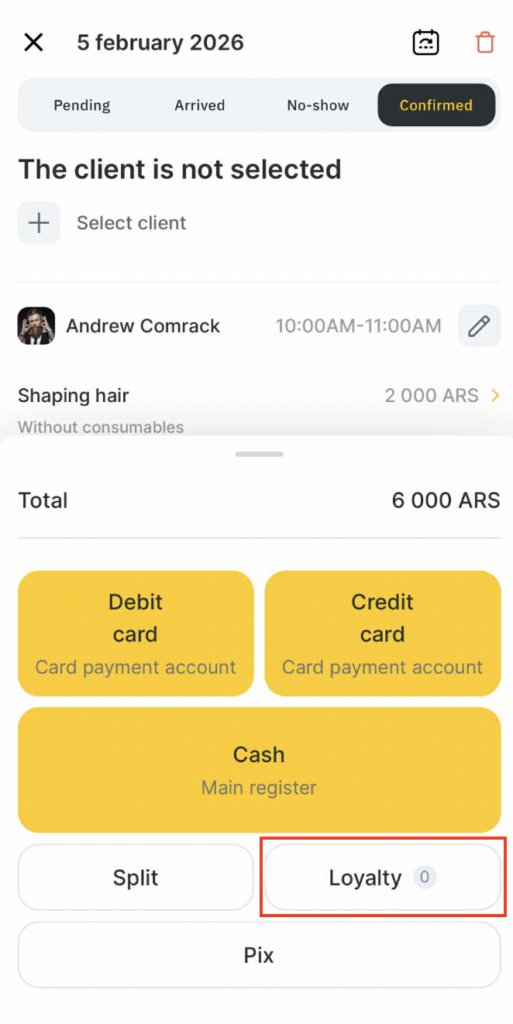
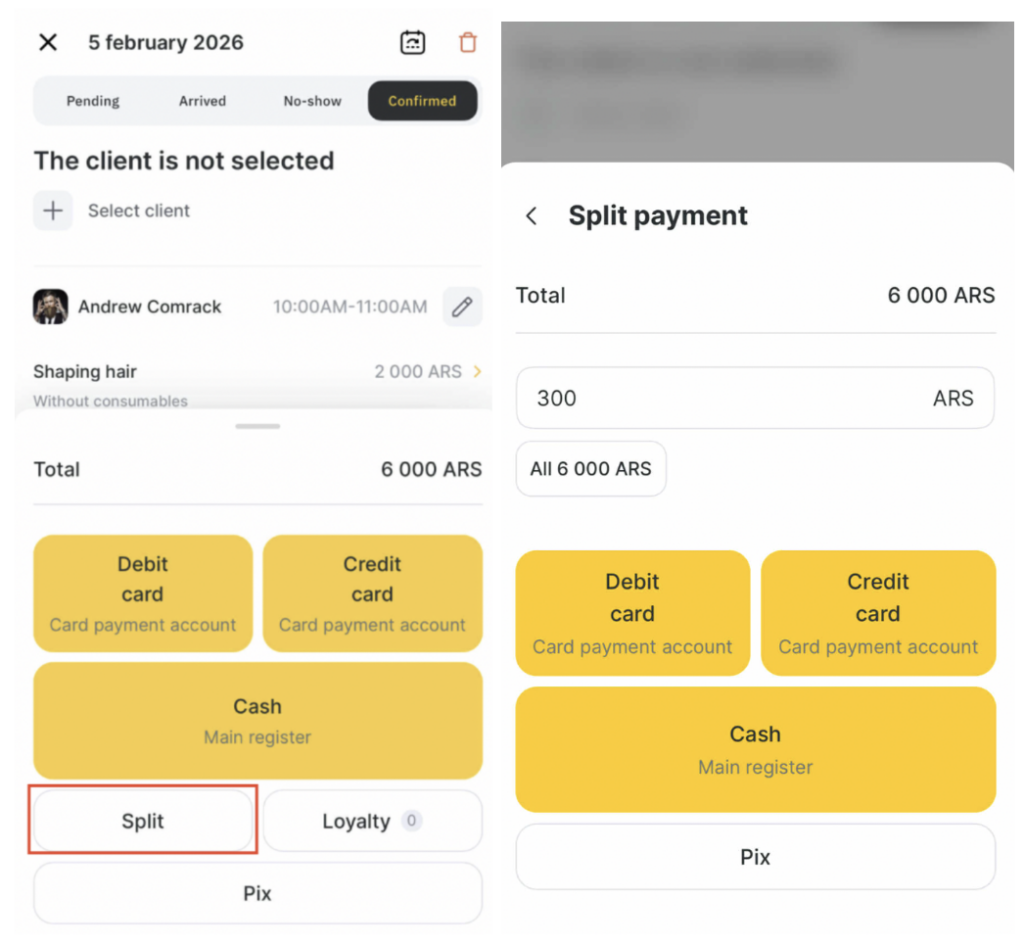
You can pay for the appointment using the quick payment buttons: Cash and Card, or Split payment.
You can also apply loyalty programs in a visit.
The Loyalty block displays all customer loyalty available for use in this visit. If you need to apply loyalty that is not attached to the client, use the code search (the search field in the Loyalty block).
Split payment: #
- To perform a split payment click the Split payment button.
- Enter the amount to be paid, select the appropriate payment type and click the Pay button.
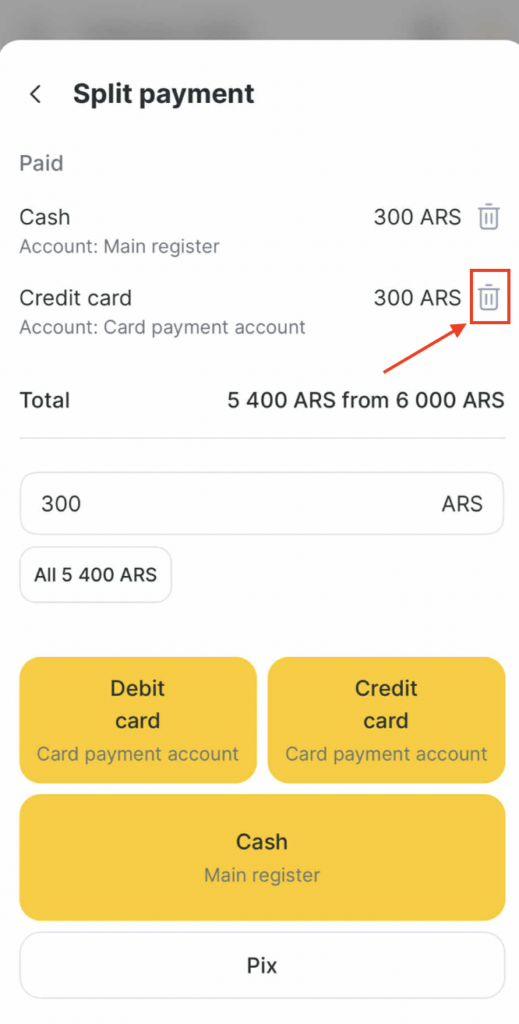
- Click the Add payment button.
- Select the required payment type and click Pay. If necessary, change the amount if the payment needs to be split again.
You can delete the payment using the trash button next to the amount of the payment made.
Interaction with the client #
If a client is added to the appointment, you can contact him directly from the visit window, you can also view information from the card if you have the appropriate rights.
Interaction is carried out using the buttons next to the client’s name 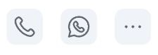
You can make a phone call to the client or contact on WhatsApp (if the client is not registered on it, an error will appear). To view client data, click the button with three dots.
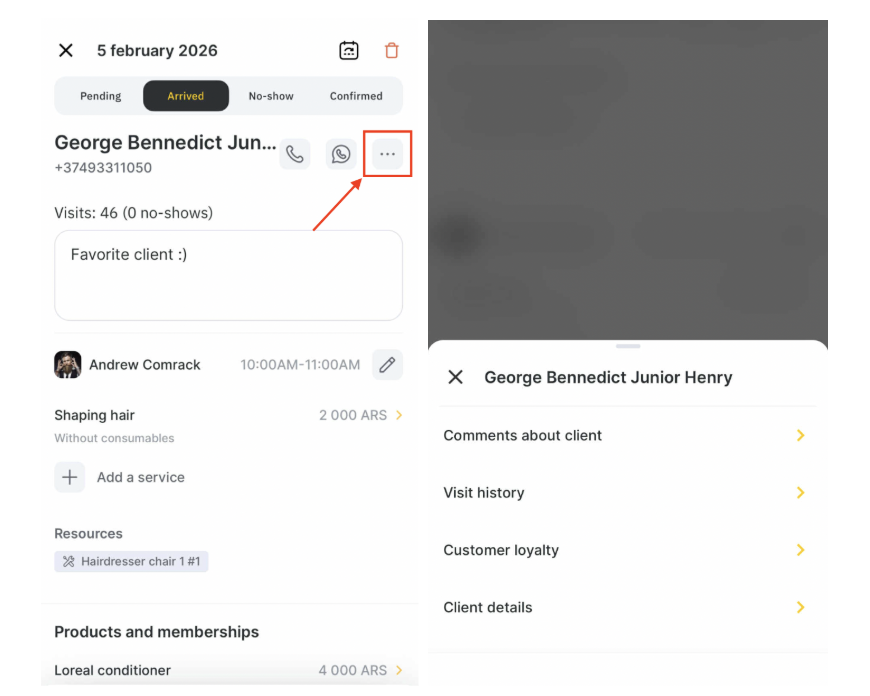
Select actions:
- Client details. Here you can edit the card with the client’s data: name, phone number, Email, gender, date of birth, additional field (if created, you can read more in the article). You can also view the number of visits, how much was sold and paid, the balance (this is the difference between the Sold and Paid values), add the card number, importance class, prediscount and upload files.
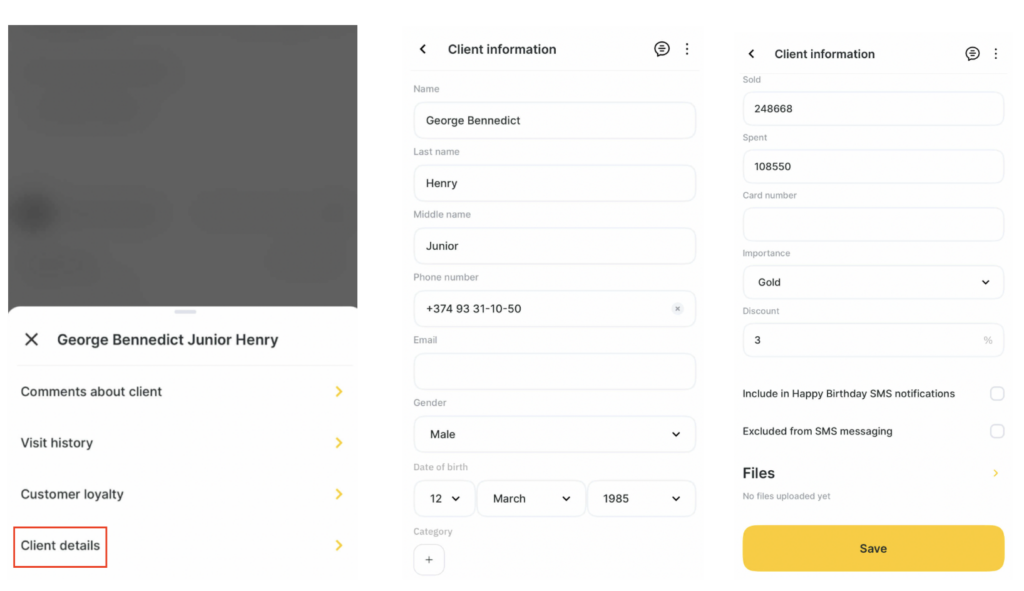
Important
On IOS it is only possible to upload photos to the client’s card, on Android, other formats are also available (all formats are available: jpeg, jpg, png, gif, doc, doxc, pdf, xls, xlsx, txt).
If you have an SMS aggregator connected, you can also add a client to the Birthday greeting newsletter or exclude a client from the SMS newsletter list.
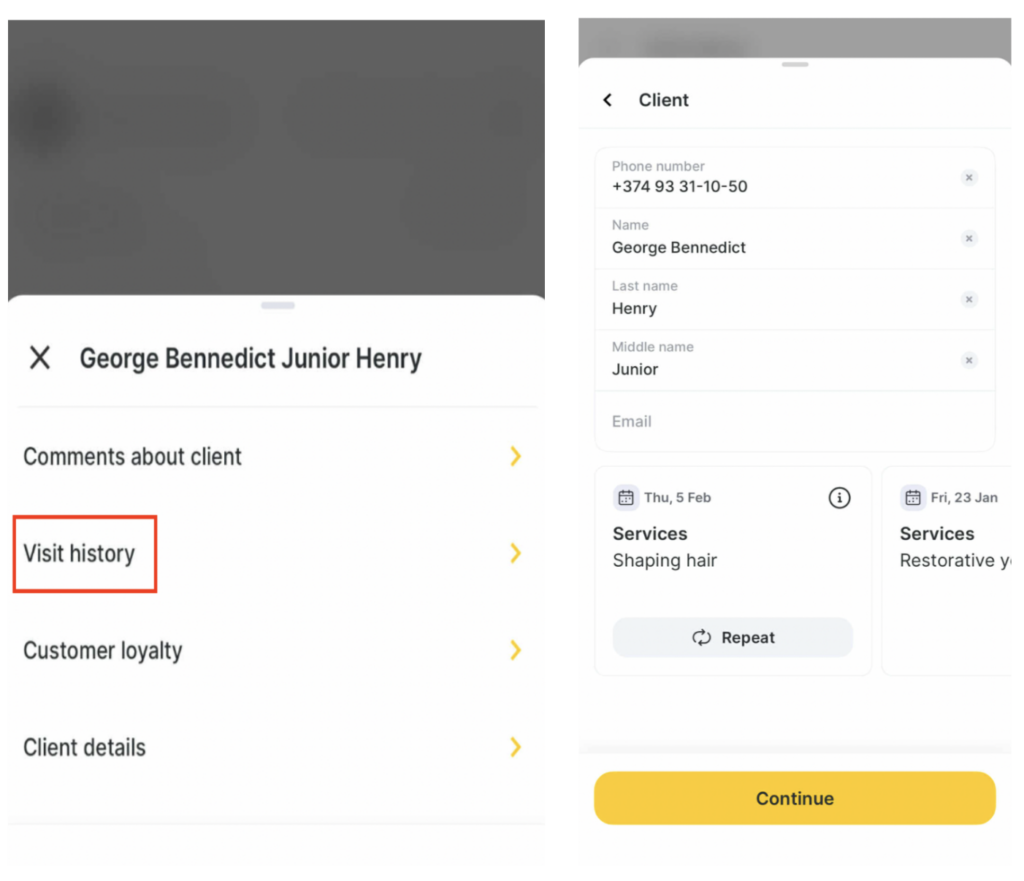
- Visit history. The opened page will display the entire history of the client’s visits with information about the appointments. To see more detailed information about the appointment, click the arrow field.
- Customer loyalty. Here you can view information on loyalty programs valid for the client (cards, promotions, memberships and gift cards), and issue a card. Loyalty is configured in the chain interface in the web version of the program. See the detailed information here.

To issue a loyalty card, click the + button in the upper right corner. In the opened window select the type of card, enter its number (or leave the field empty, then the number will be generated automatically) and click Add a card.

