Altegio now offers the ability to set up technical breaks for individual services.
After a client’s visit, it’s often necessary to prepare for the next appointment — for example, to rest, tidy up the workspace, prepare tools, etc. That’s exactly what technical breaks are for.
Now, there’s no need to include break time in the service duration. Clients won’t have to wait before their appointment, and the administrator won’t need to manually add breaks to the appointment calendar. Breaks will be set automatically once the new setting is enabled. If necessary, you can adjust the technical break in the calendar or booking window — for example, change its duration manually or remove it.
Clients will not see technical breaks during online booking, but they will be taken into account when displaying available booking times.
Important #
Technical breaks are still being improved and will be available to all Altegio users in the future. If this setting is not yet available for you, please contact Altegio technical support or your account manager (their contact details can be found under Overview > Summary). Your feedback will also be very helpful to us as we continue improving technical breaks.
At the moment, the setup and management of technical breaks is available only in the web version, but in the near future, technical breaks will also be displayed in the Altegio mobile app.
Setting Technical Breaks for All Appointments
#
This setting is useful if you need to add a technical break after every appointment. In this case, there’s no need to set up a break for each service individually. However, if you want to configure breaks for specific services only, you can still do that — more on this later in the article.
You can also set the break duration if the appointment includes multiple services.
To set up technical breaks for all appointments and define the total break duration:
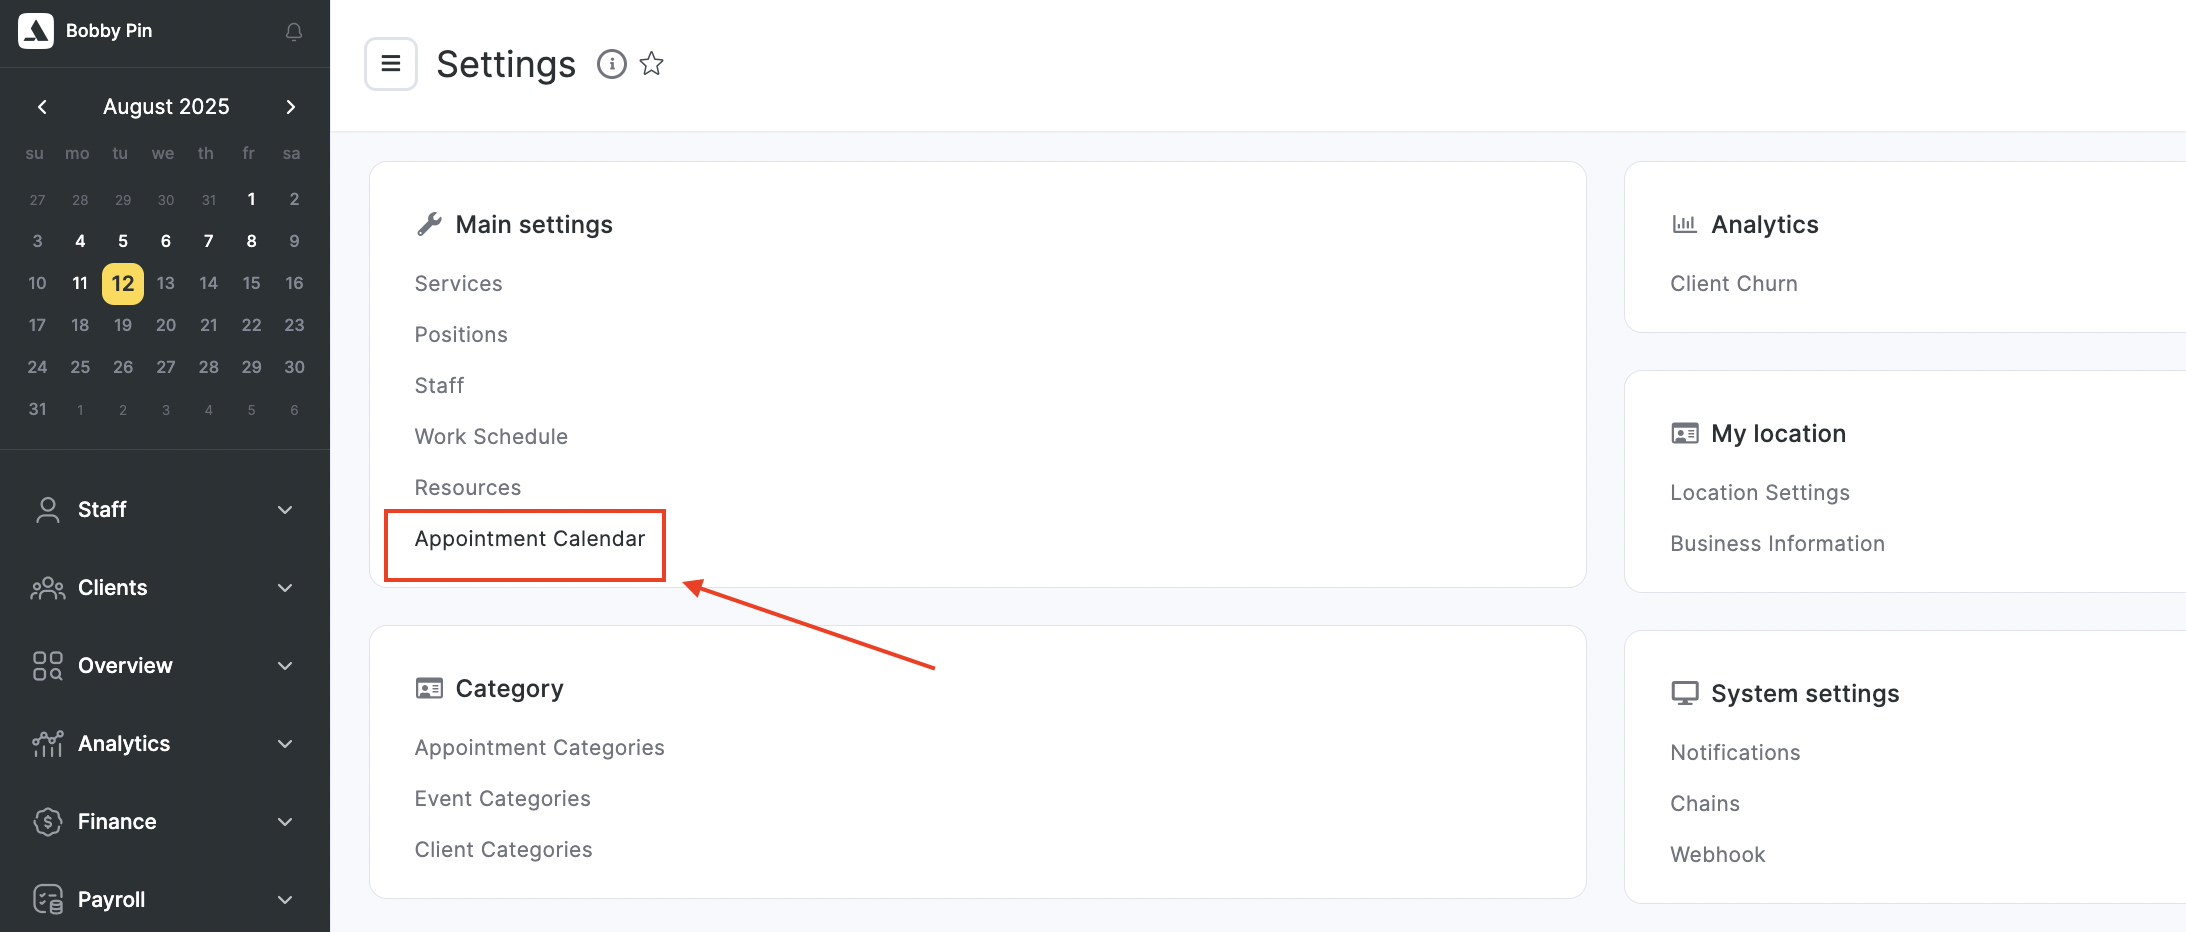
In the main menu, go to Settings > Main Settings > Appointment Calendar.
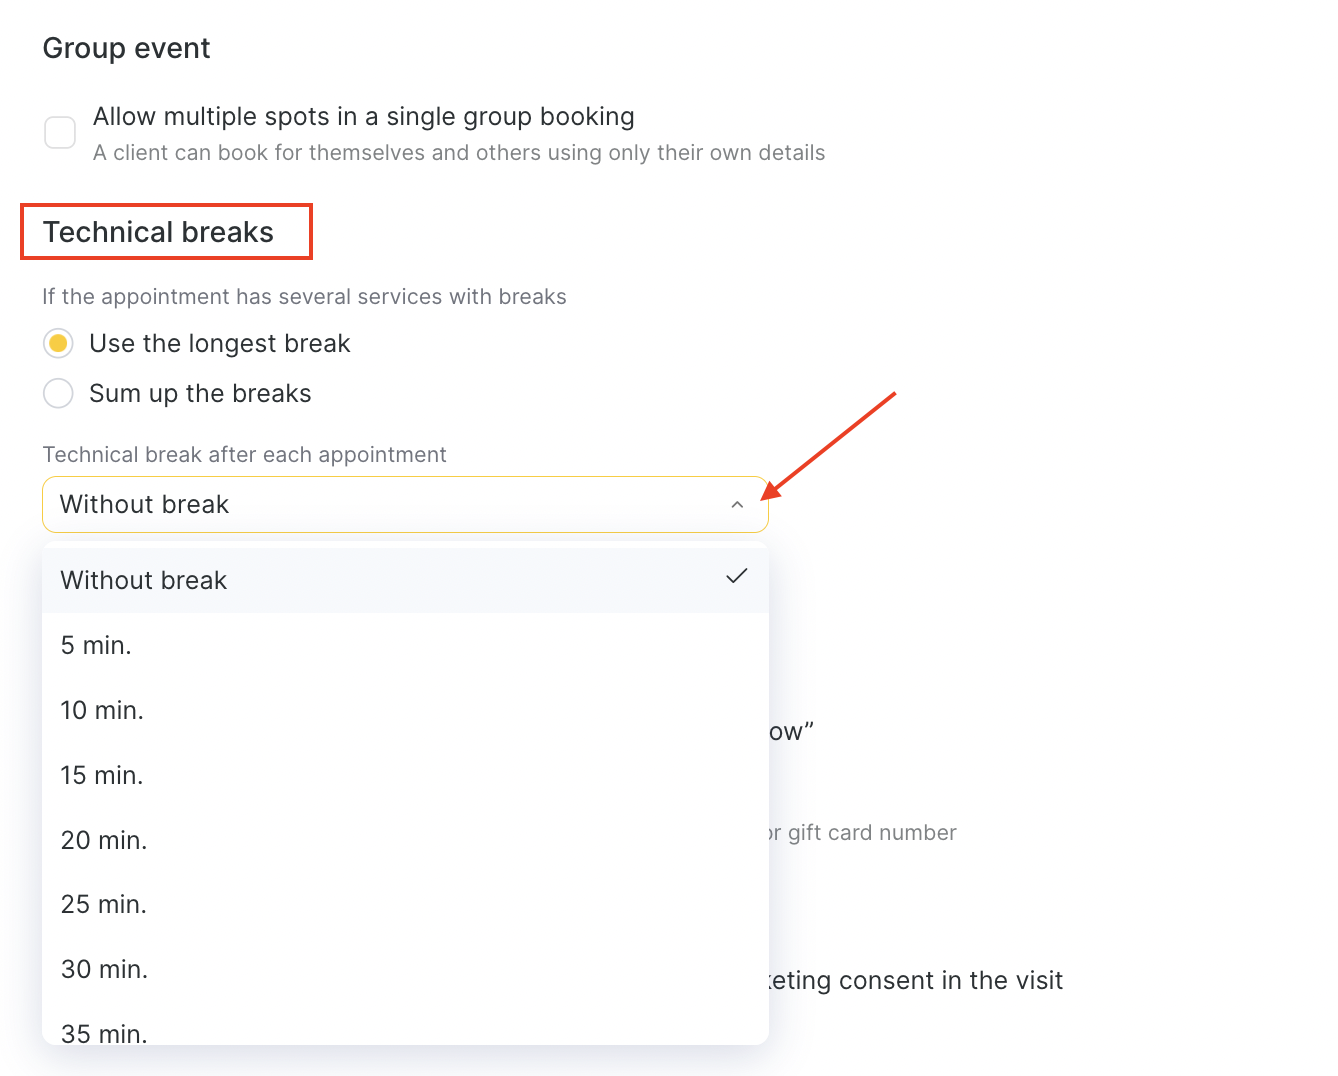
- In the Technical breaks section, choose how the break duration will be calculated if the appointment includes multiple services with breaks:
- Use the longest break — the system will apply the maximum break duration from either the calendar settings or the specific service settings.
Example: The appointment includes “Haircut” with a technical break of 30 minutes and “Hairstyling” with a general technical break of 15 minutes for all services. In this case, a 30-minute break will be automatically added. - Sum up the breaks — the break will be calculated as the sum of the values set for the branch or for the individual services.
Example: The general break for all services is 15 minutes. If the appointment includes 2 services, the total break will be 30 minutes; if there are 3 services — 45 minutes, and so on. Or, if one service has a technical break of 10 minutes and the general branch break is 15 minutes, then for two services the total break will be 25 minutes.
Important #
The total duration of all technical breaks in an appointment cannot exceed 1 hour.
- In the Technical break after each appointment field, select the break duration for all services — from 0 (no break) to 1 hour, in 5-minute intervals. This setting will be applied to all appointments. If needed, the technical break can still be adjusted in the appointment calendar or booking window — for example, you can change the duration manually or remove it.
- Click Save at the bottom.
Setting Technical Breaks for a Service #
This setting is useful if different services require different technical break durations and the general setting for all appointments is not suitable. You can use both options — set a general break duration for most services, and configure specific breaks for certain services as needed. The setting for a specific service takes priority over the general setting for all appointments.
To set up technical breaks for a specific service:
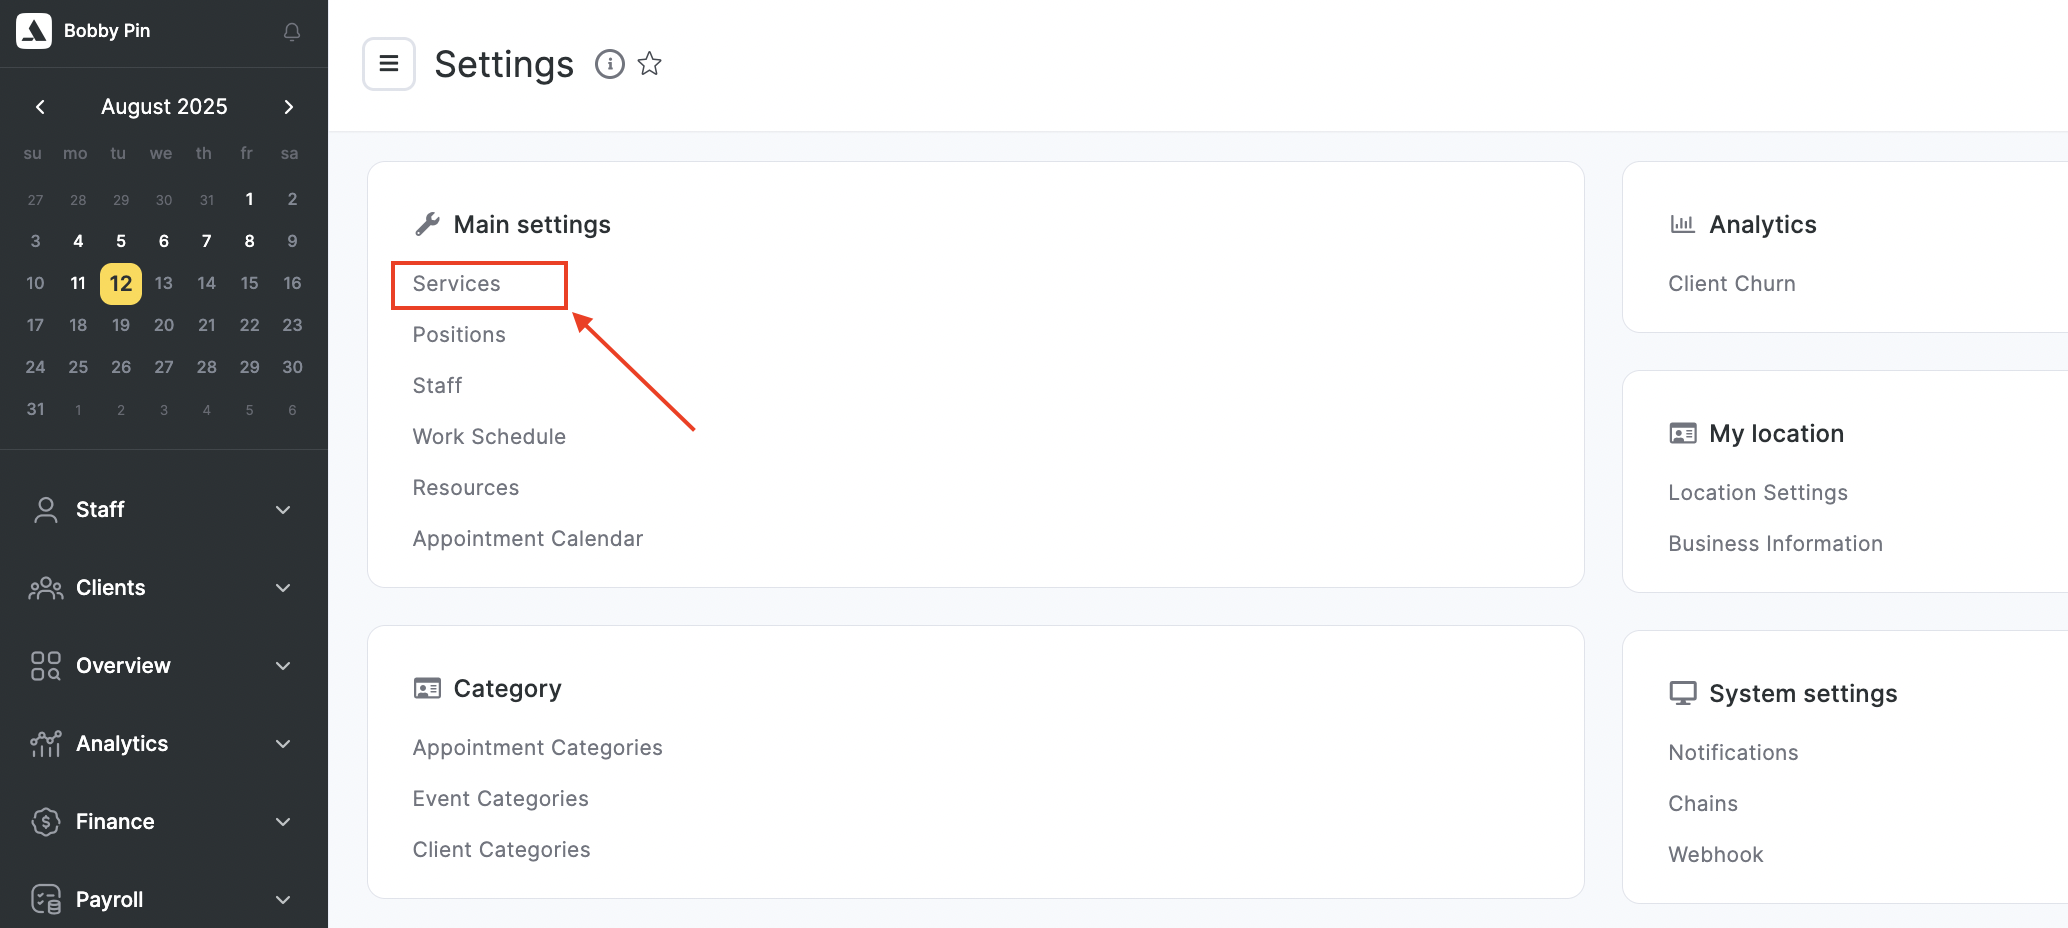
In the main menu, go to Settings > Main settings > Services.
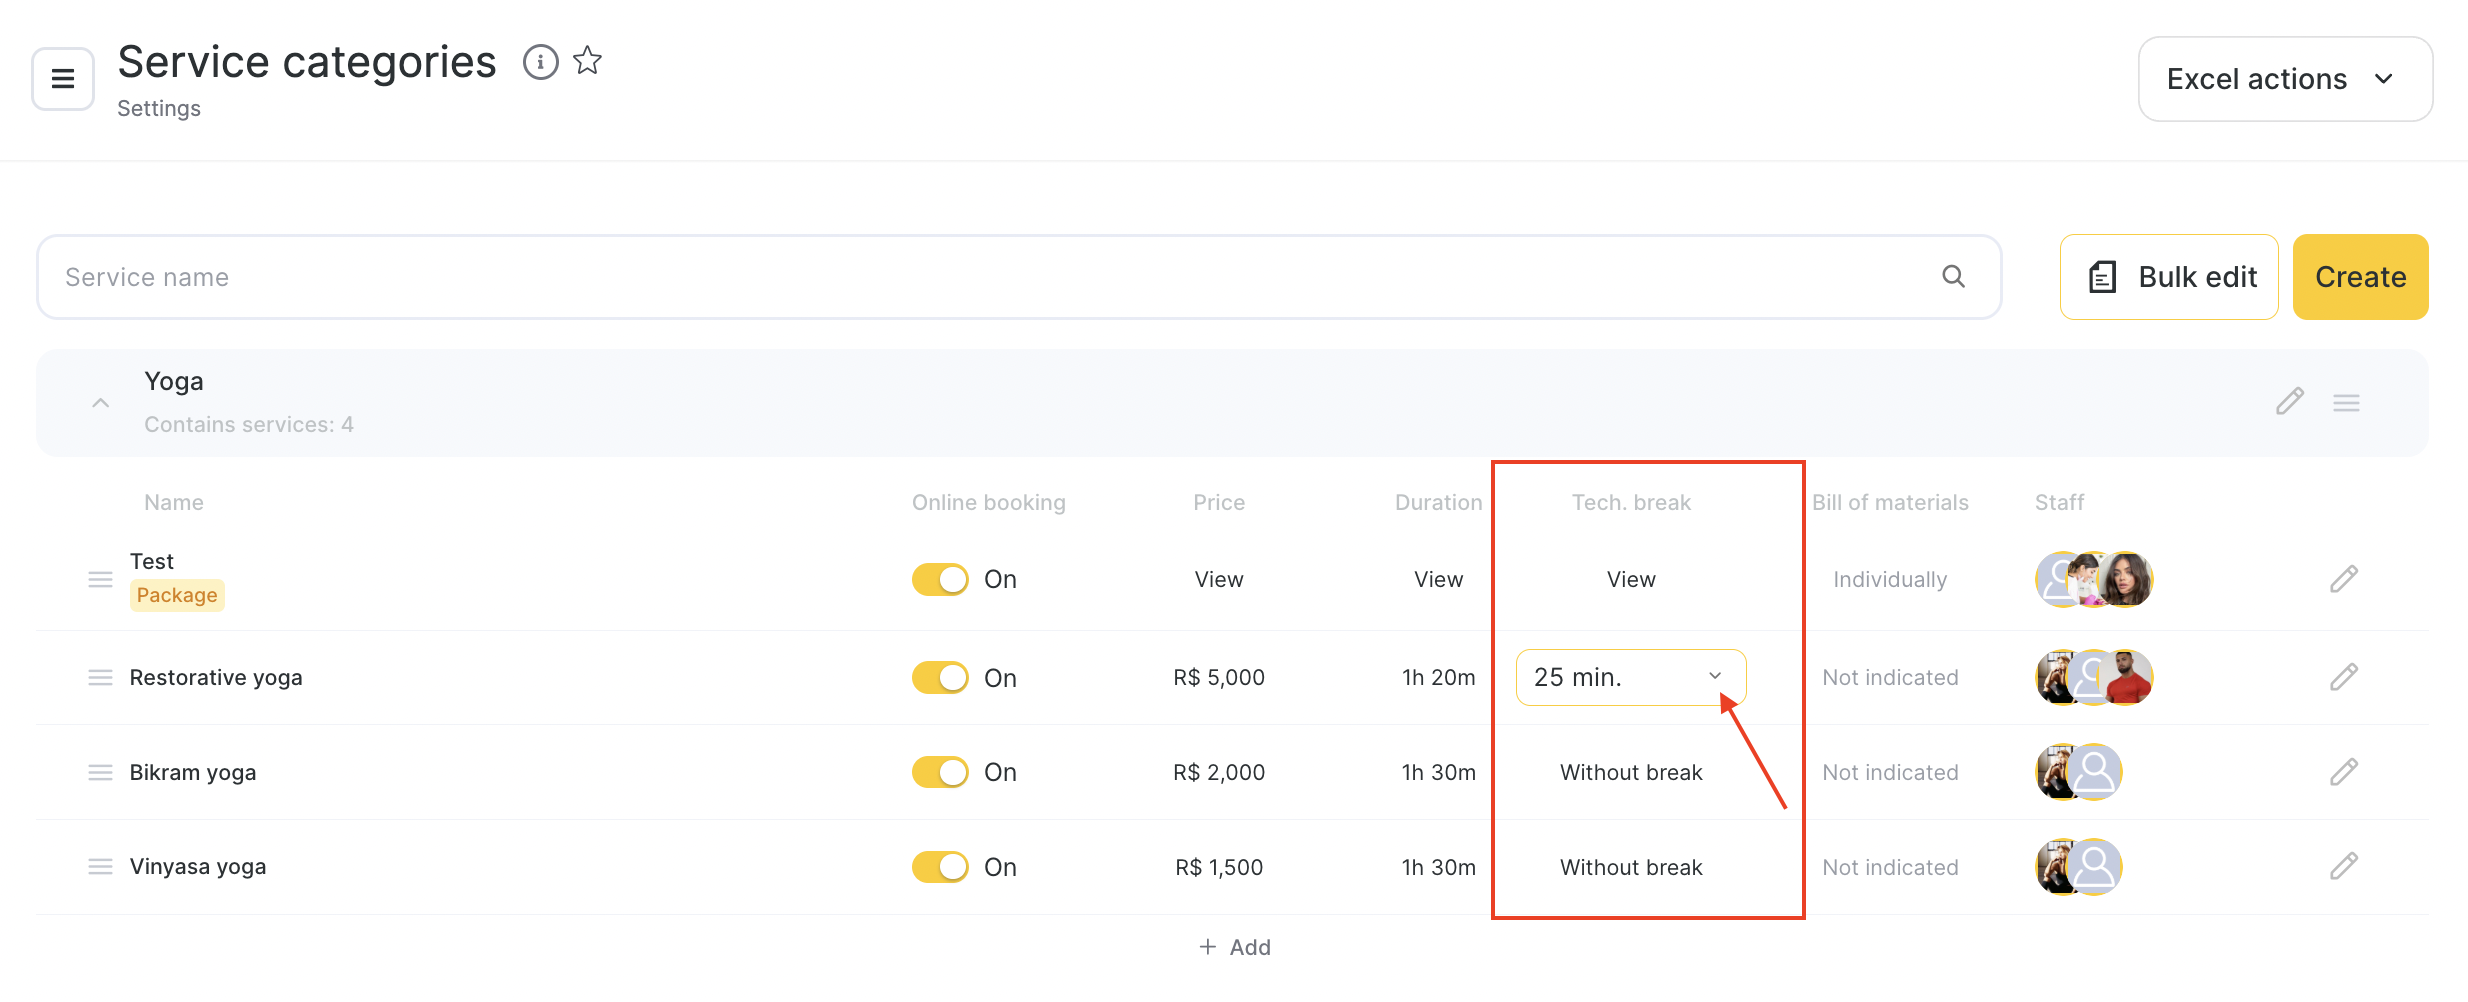
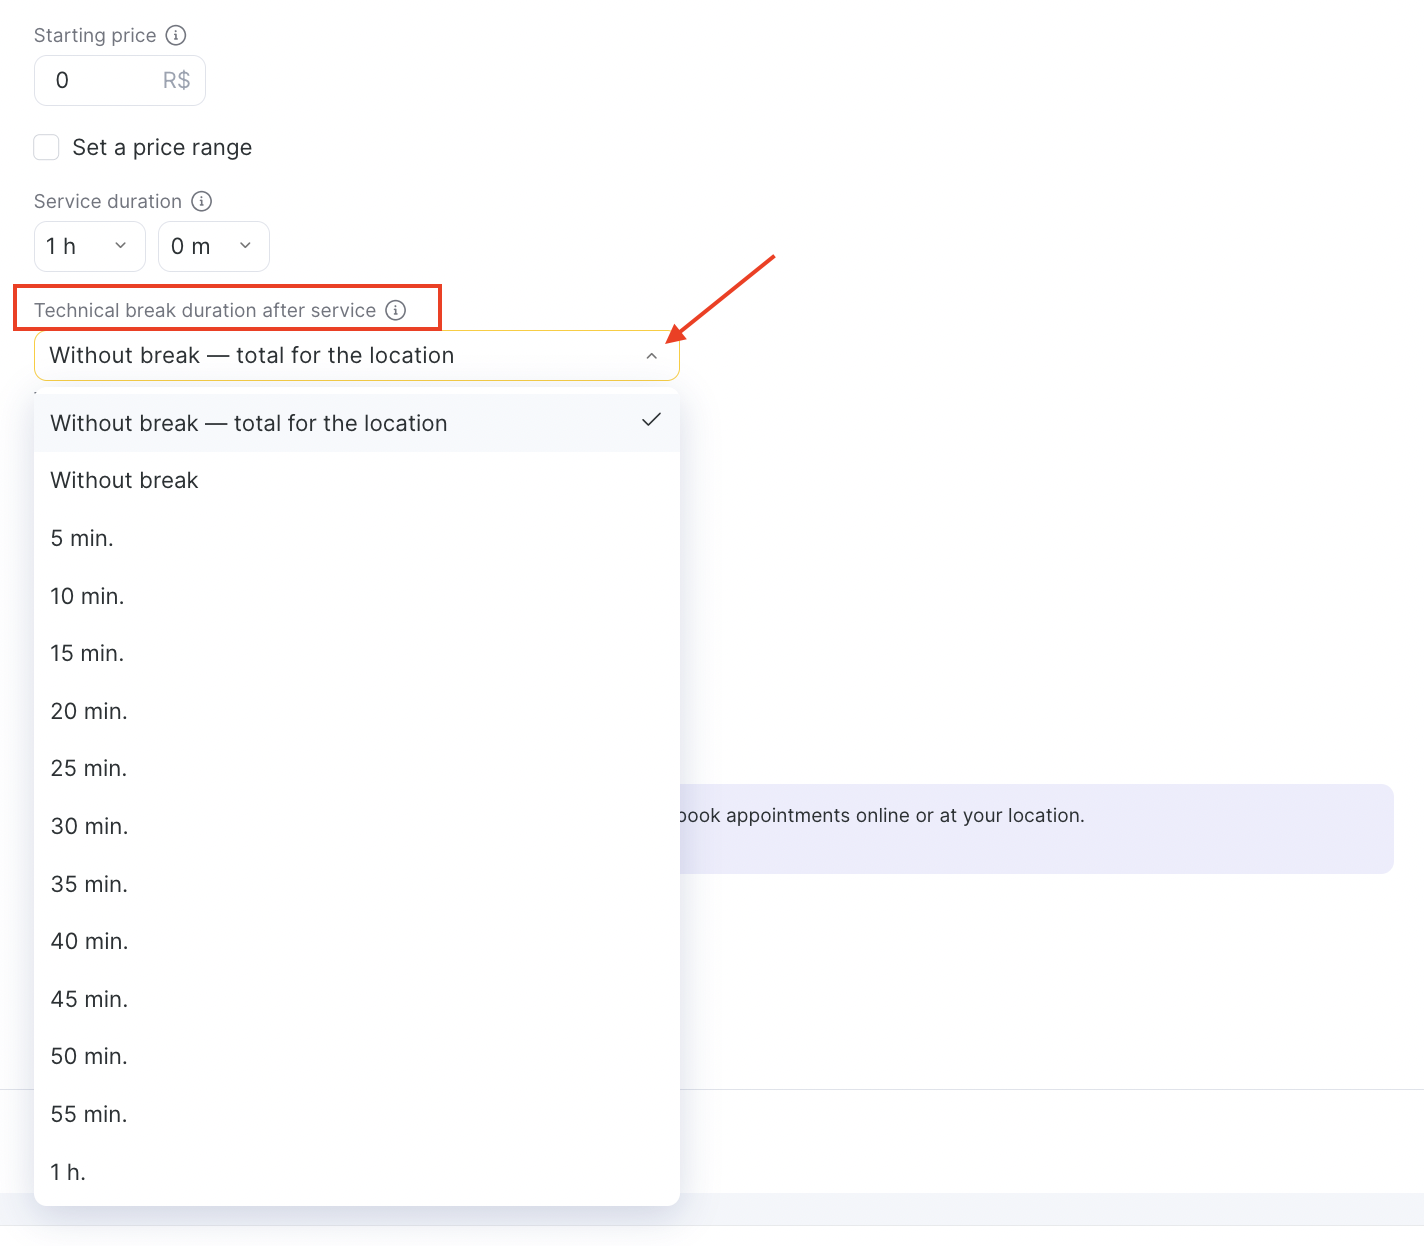
Expand the category containing the desired service. In the list of services, in the Technical break section, select the break duration — from 0 (no break) to 1 hour, in 5-minute intervals. The setting will be saved automatically after selection.
You can also enable a technical break in the service settings when editing or creating a new service. To do this, click the service name or the edit button.
In the Main Settings tab, in the Technical break after appointment field, select the break duration — from 0 (no break) to 1 hour, in 5-minute intervals, and click Save at the bottom.
You can also set a general break for the location if it is configured in the appointment calendar settings.
Uploading Technical Breaks from Excel #
You can now bulk add technical breaks for different services via Excel. To do this:
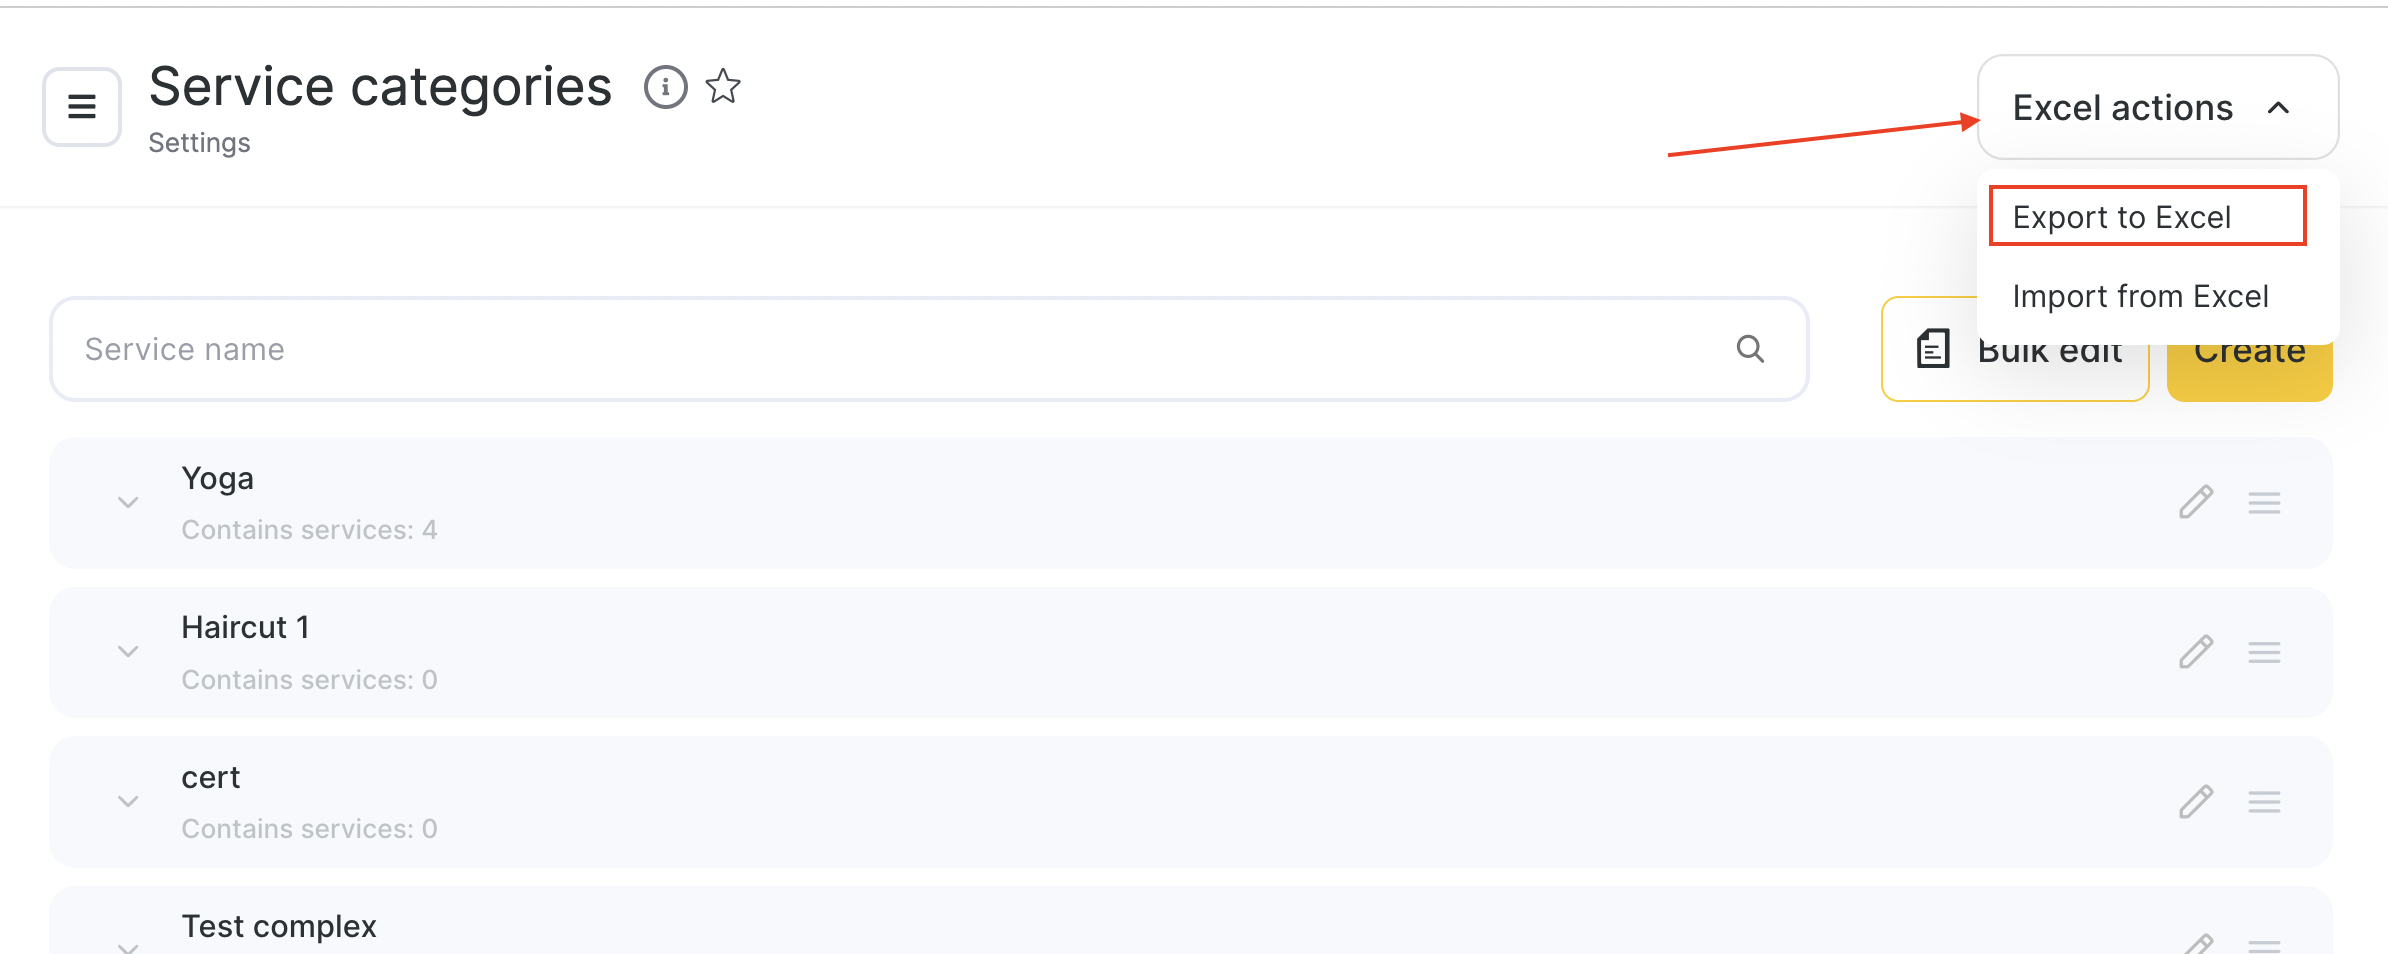
- Export your services to Excel by clicking Excel actions → Export to Excel.
- In the exported file, a new column Tech. break will appear. In this field, you can specify the technical break duration in seconds.
- To set No break, enter
0. - To apply the branch’s default technical break setting, enter
Default. - To set a specific technical break value, enter it in seconds, in multiples of 5 minutes.
Example: 5 minutes = 300 seconds. The maximum value is 3,600 seconds (1 hour). When uploading, enter only the number, e.g.,300.
Enter the required values in the file and upload it by clicking Excel actions → Import from Excel.
Working with Technical Breaks in the Calendar and Appointment Window #
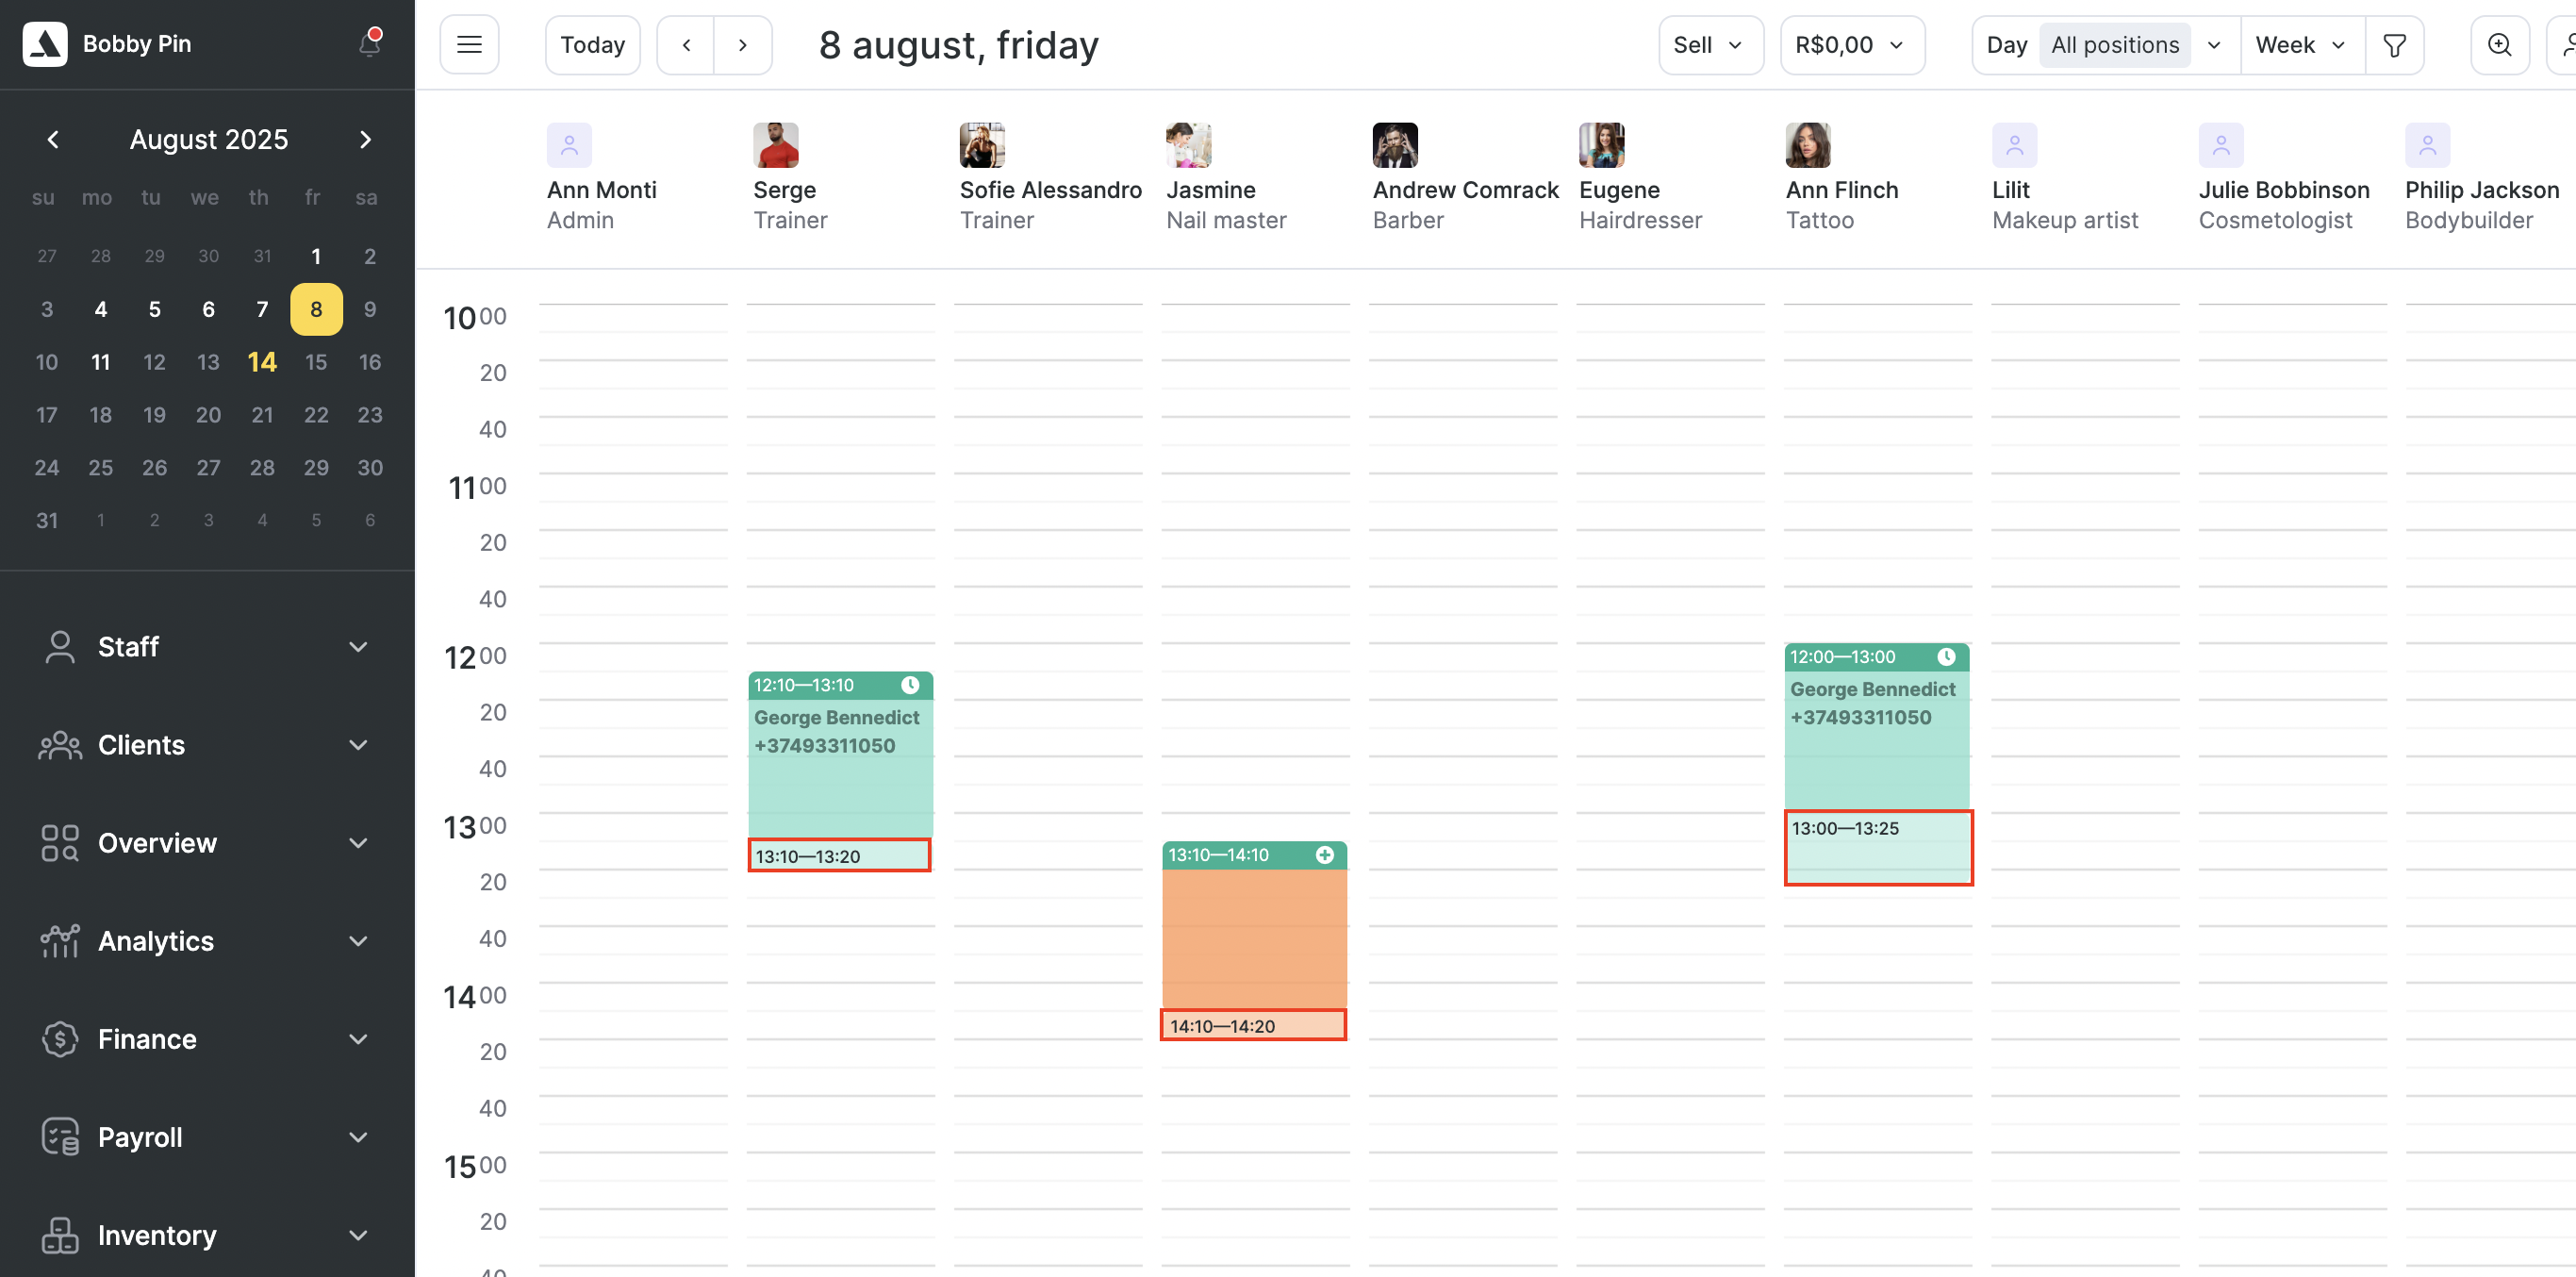
Once you’ve set up technical breaks for all appointments or specific services, they will appear in the appointment calendar, the appointment window.
When creating or editing an appointment, a Technical break section will appear in the upper-left corner of the window, allowing you to add, edit, or remove the technical break.
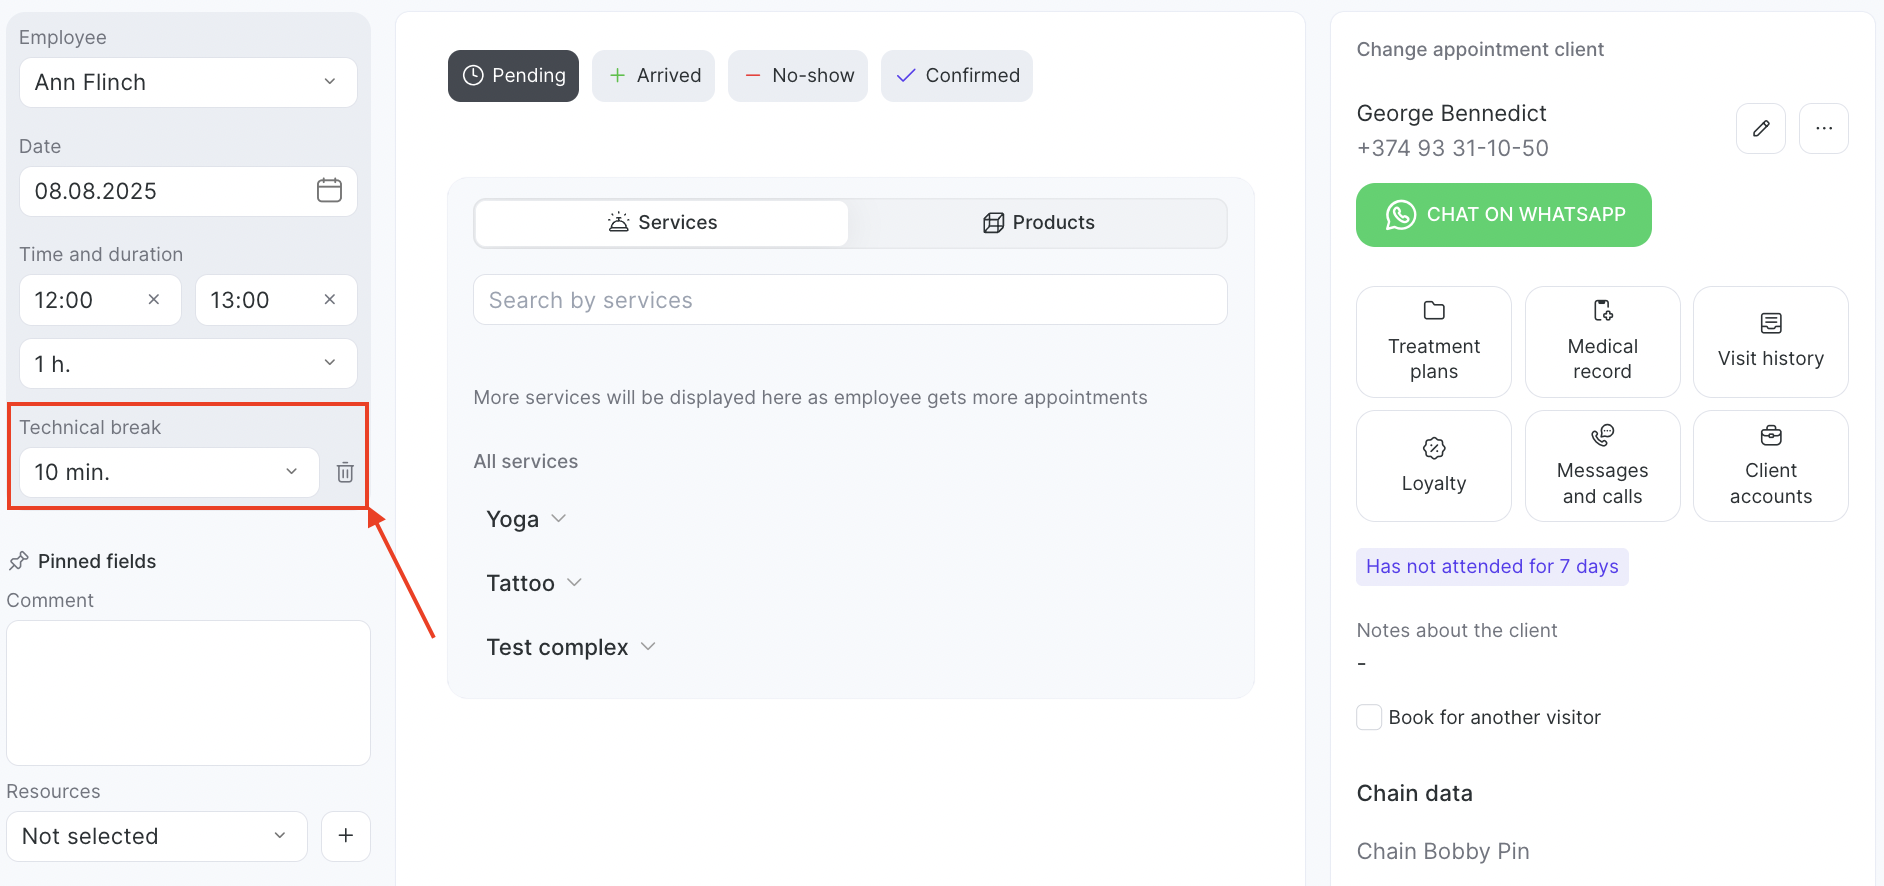
Even if a technical break is not enabled for the location or service, you can still add it manually in the appointment.
If a technical break has already been added to the appointment, you can edit or delete it in the appointment window by clicking the Edit button.
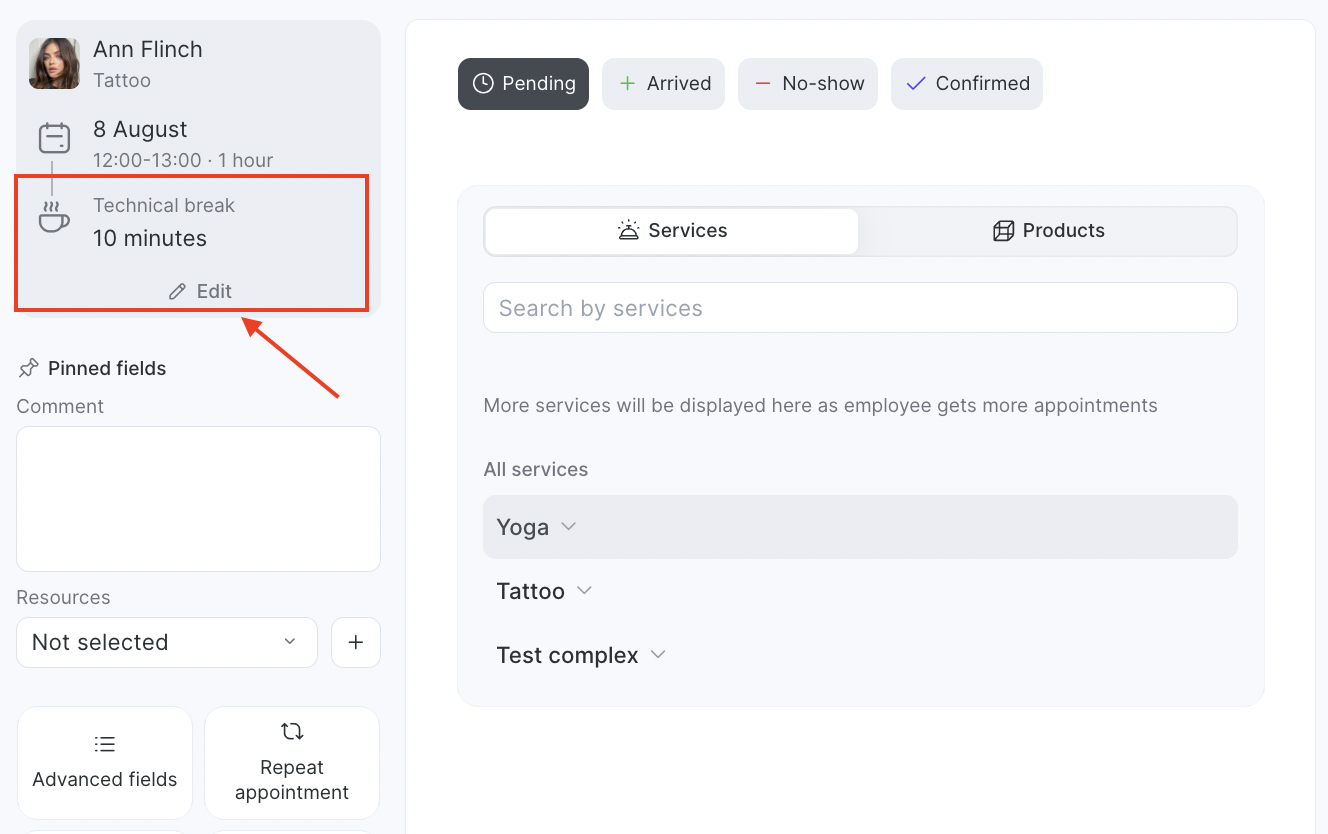
In the Appointment Calendar, technical breaks are displayed directly below the appointment. The color of the technical break matches the appointment color, but appears slightly lighter.
Clicking on a technical break will open a menu with the options to Edit or Delete it.
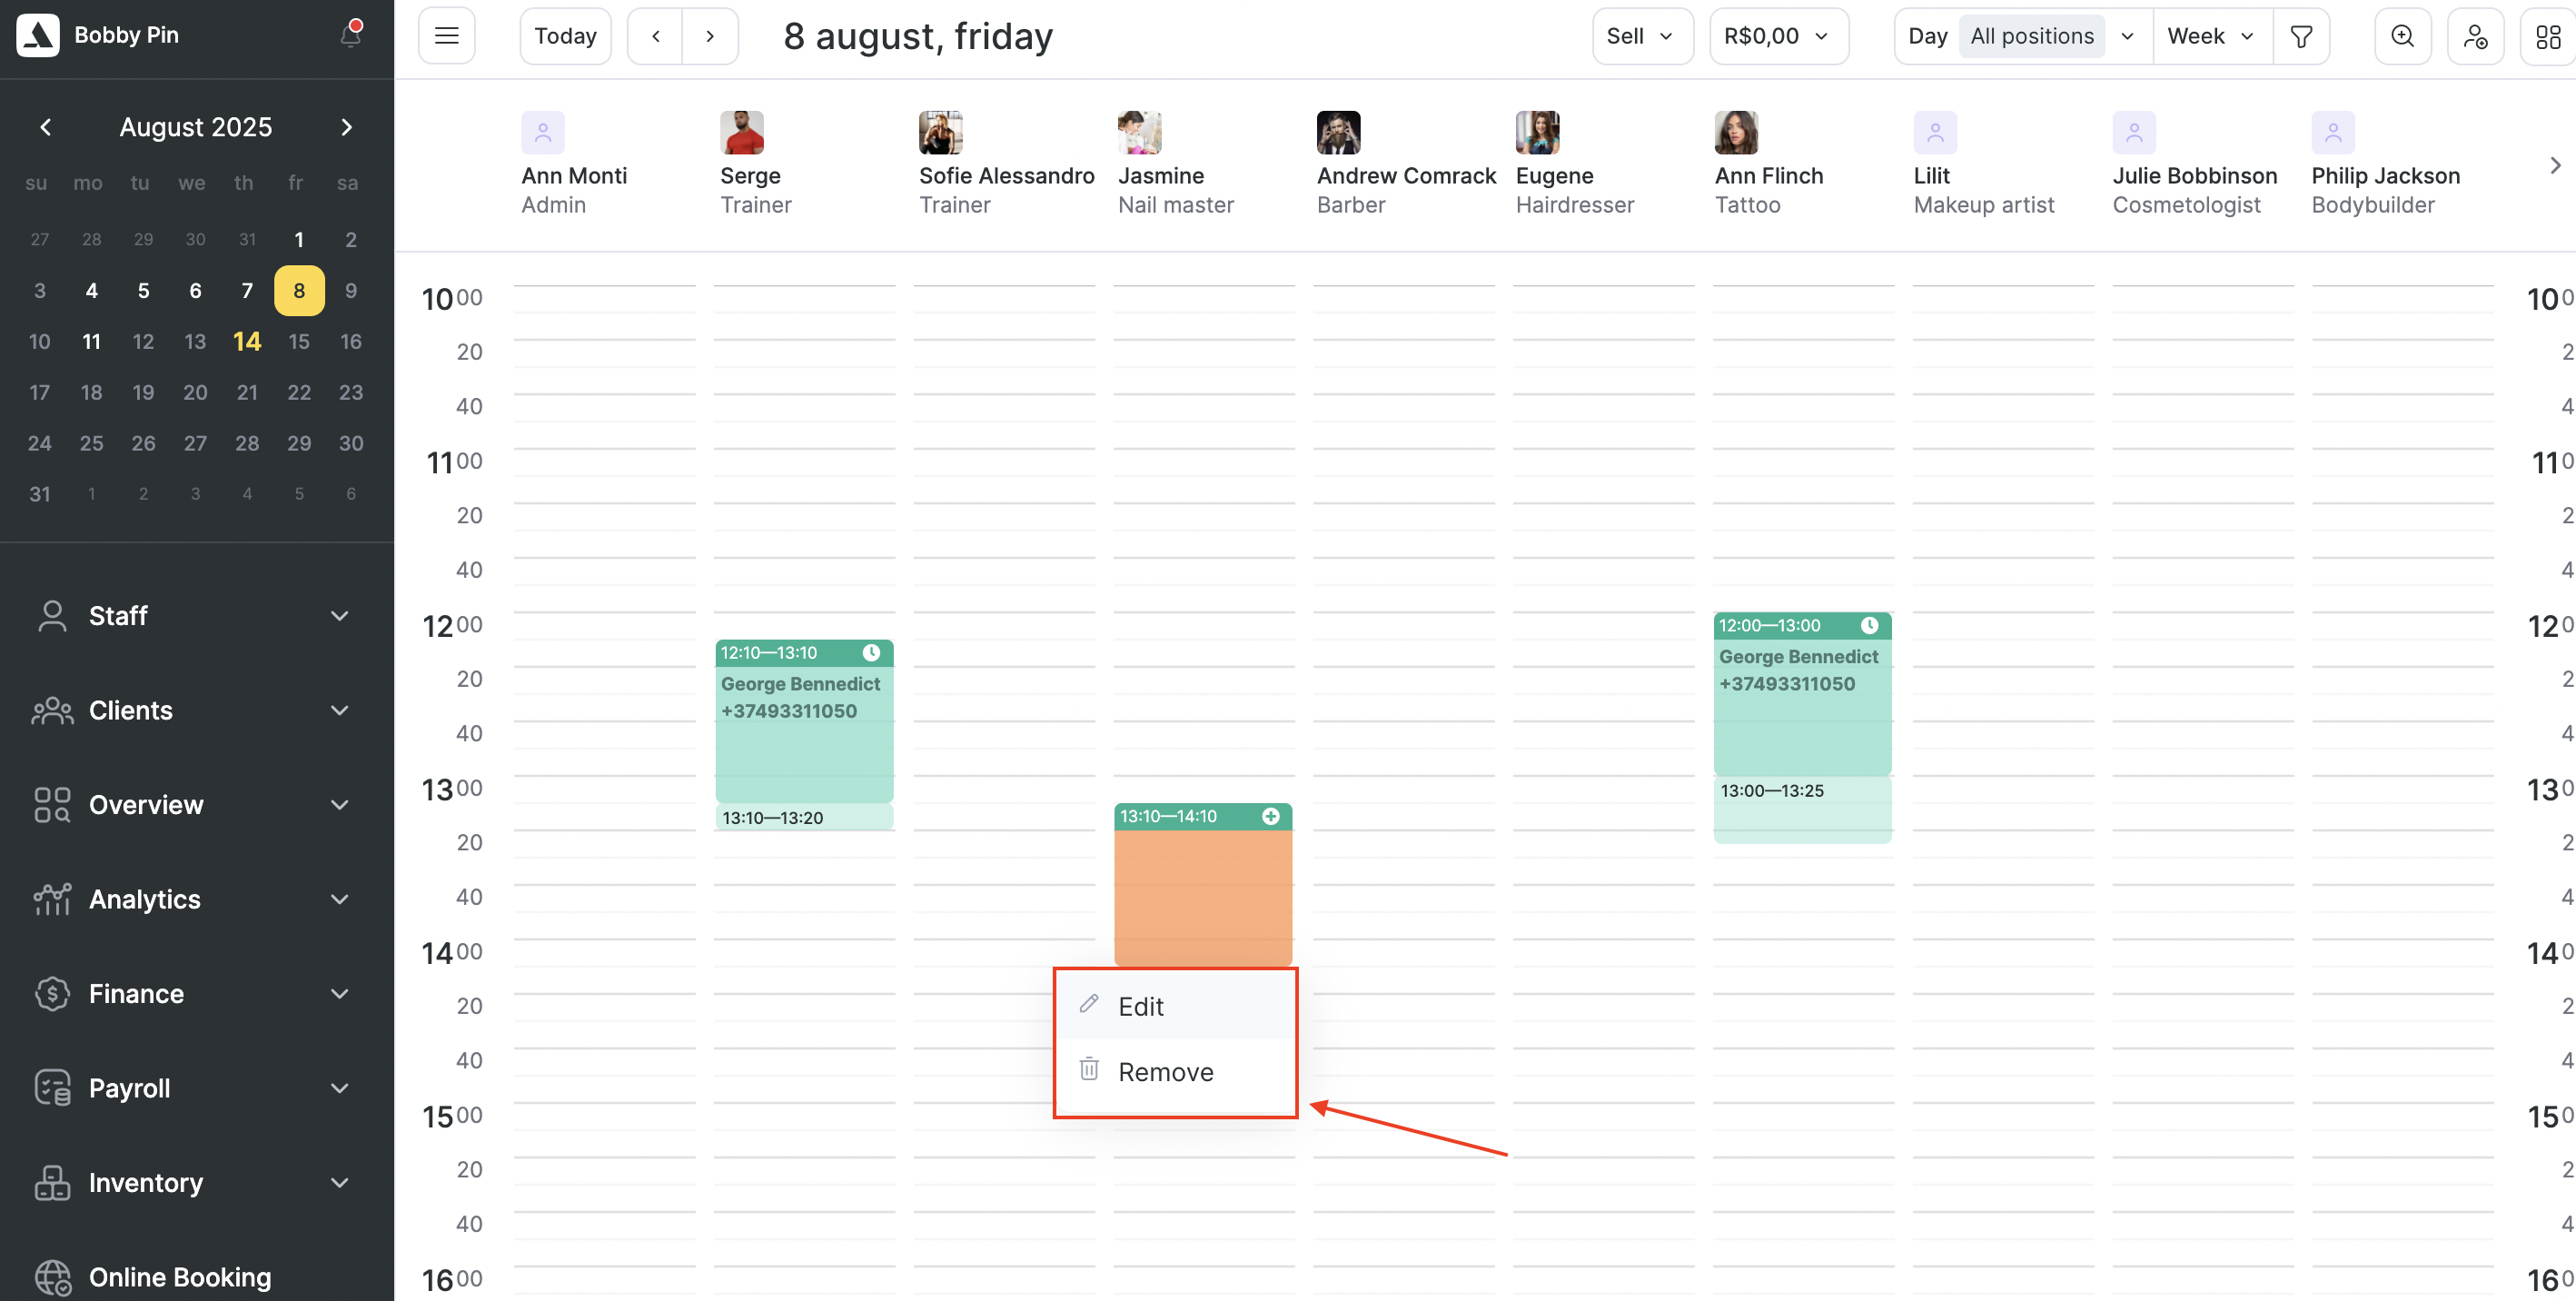
When editing, select the desired duration and save the changes.
You can also change the duration of an existing technical break by stretching or shrinking it in the appointment calendar, similar to how you adjust the duration of an appointment.
How Technical Breaks Work in Online Booking #
Once a technical break is enabled in the settings, it will be taken into account when displaying available booking times, while the service duration shown to the client will remain the same.
Let’s look at different scenarios with specific examples.
Example #1
- Employee working hours: 10:00 to 18:00 without breaks.
- One existing appointment: 13:00–14:00.
- Service “Haircut” duration: 1 hour + a 30-minute technical break enabled for this service.
- Available booking interval: every 10 minutes.
When displaying available online booking slots for the “Haircut” service, times will be shown starting from 10:00 in 10-minute steps — for example: 10:10, 10:20, and so on, up to 11:30.
The next available booking time will be 14:00, because the time between 11:40 and 13:00 is already occupied — the service plus technical break requires 1.5 hours, so it won’t fit in that gap.
The last available booking time will be 16:30, as the employee’s working hours end at 18:00.
Example #2
- Employee working hours: 10:00 to 18:00, with a regular break from 12:00 to 13:00.
- No existing appointments.
- Service “Haircut” duration: 1 hour + a 30-minute technical break enabled for this service.
- Available booking interval: every 10 minutes.
In this case, when displaying available online booking slots for the “Haircut” service, times will be shown starting from 10:00 in 10-minute steps — for example: 10:10, 10:20, and so on, up to 10:30.
Since the employee has a regular break at 12:00 and the service plus technical break requires 1.5 hours, it will no longer fit starting at 10:40.
The next available time will be 13:00, and then every 10 minutes until 16:30, as there are no other bookings and the employee works until 18:00 — same as in Example #1 above.
Example #3
- Employee working hours: 12:00 to 18:00 without breaks.
- No existing appointments.
- Service “Haircut” duration: 1 hour + a 30-minute technical break enabled for this service.
- Available booking interval: every 2 hours + a 2-hour delay before the appointment start (setting Time before appointment start).
In this case, the “Haircut” service will only have three available booking slots: 12:00, 14:00, and 16:00.
Notes
- Resources in all cases will be occupied for both the service duration (if a technical break is set for it) and the duration of the technical break itself.
- If the appointment calendar settings include Split booking when adding services with different resources, the technical break will be added to the booking(s) that contain the service with the technical break. If this setting is disabled, the technical break will be applied at the end of the entire booking.
- To configure technical breaks, you must have access rights in Settings > Access to Services > Edit service.