Altegio now features a new version of the group event window. Just like in the new version of the visit window, you can now manage all key client booking tasks in the central part of the window—add products for sale, including memberships and gift cards, set individual discounts, apply loyalty, and accept payments—without switching between tabs or appointments.
Additional event-related actions have moved to the left panel, while client-specific actions are now on the right.
Read on to learn more about setting up and managing group events in the new design.
Creating and Configuring a Group Service #
To work with group events, you first need to create group services. To do this:
- Create a service category under Settings > Main settings section > Services. A category is a folder with several types of similar services or tasks. A detailed guide on creating categories can be found in this article.
- After creating a category, create a group service. Instructions for creating and setting up a service are described in detail in this article. The difference between a group and individual service is that for a group service, you must select the “Group” type and set its capacity.
Go to Settings > Main settings > Services. Select a service and enter edit mode, or create a new one.
In the General settings tab, check the Group event box in the Type field and set the Total capacity (“Maximum number of slots”). Then click Save.

- Assign the created group service to the team who will provide it. Instructions on how to do this can be found in this article.
Important
For group services, you cannot change online booking settings per team member. Online booking can only be enabled or disabled for the entire service.
Creating a New Event #
To create a new event, click on the desired date in the calendar to open the schedule for that day. Select a team member and the time for the booking. Click the New Booking button, which appears when hovering over an available time slot in the calendar.
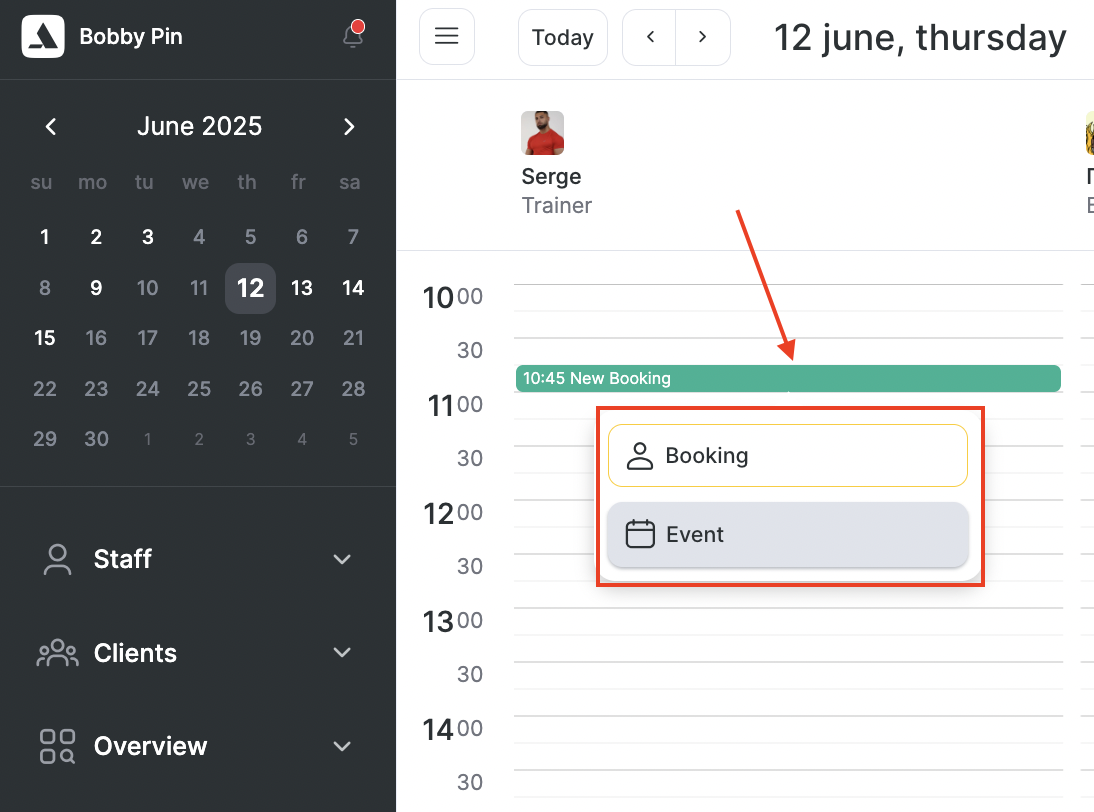
If the Appointment Calendar settings specify the booking type as “All Types,” choose the “Event” type.
If the Calendar is set to “Group,” clicking “New Booking” will automatically select an event.
- In the newly opened window, in the top-left corner:
Select the team member. By default, it will select the member for whom the event is being created.
Date and time will also be pre-filled based on the selected slot. You can change them if needed.
Duration will auto-fill based on the service settings but can be adjusted.
- In the central part of the window:
Select a service. Only group services are available for events.
The number of slots (capacity) will auto-fill from the service settings, but you can change it if needed. It must be greater than zero. Service and number of slots are required fields; the rest are optional.
Optionally, add resources by clicking the arrow in the “Resources” field and selecting from the list. More on resources is here.
You may also select a color, event category, and add a comment.
- Click “Save.”
If online booking is enabled for the group service, clients can book via the widget.
Editing Events and Booking Clients
You can edit and delete all event settings. Select the event in the calendar, click it, make changes, and save.
To delete an event, click “Delete event.” You can also delete events under Reports > Events (see article).
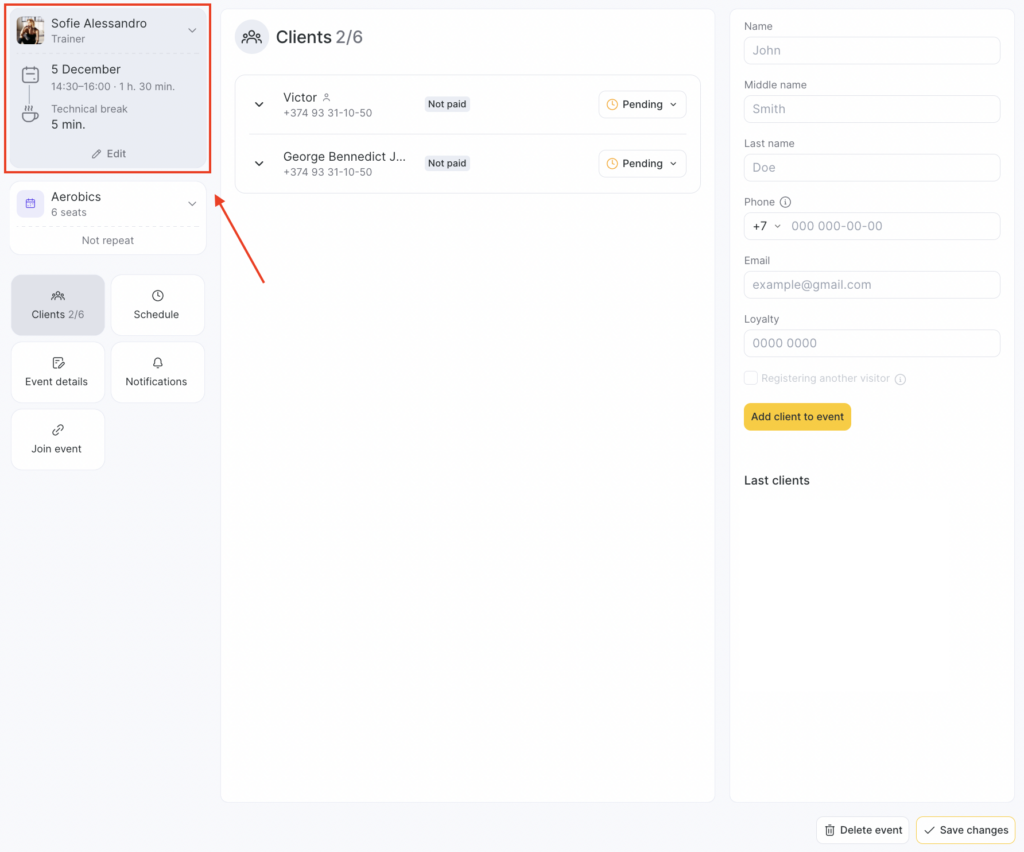
Employee, Date, Time, and Duration
In the top-left of the new event window is a section showing the assigned team member, date, time, and duration. This section is collapsed by default but can be expanded to edit.
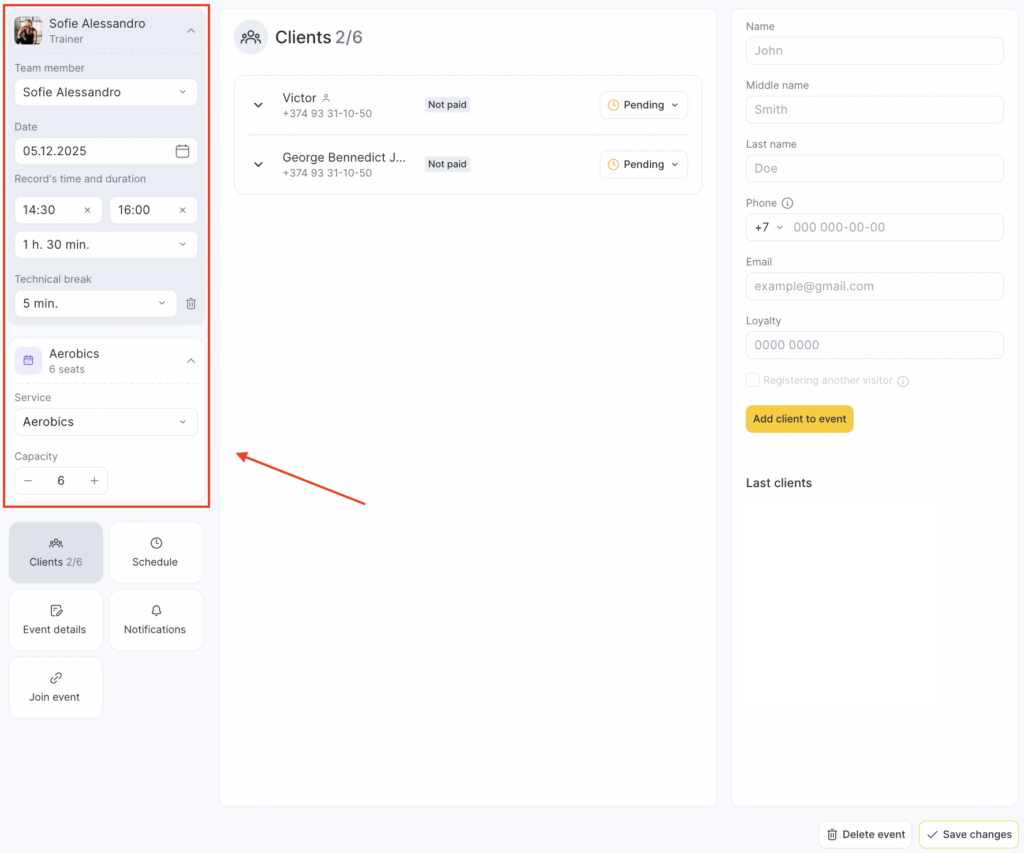
Editing the Service #
Below the team member section is the service-related one. It is also collapsed by default and can be expanded for edits.
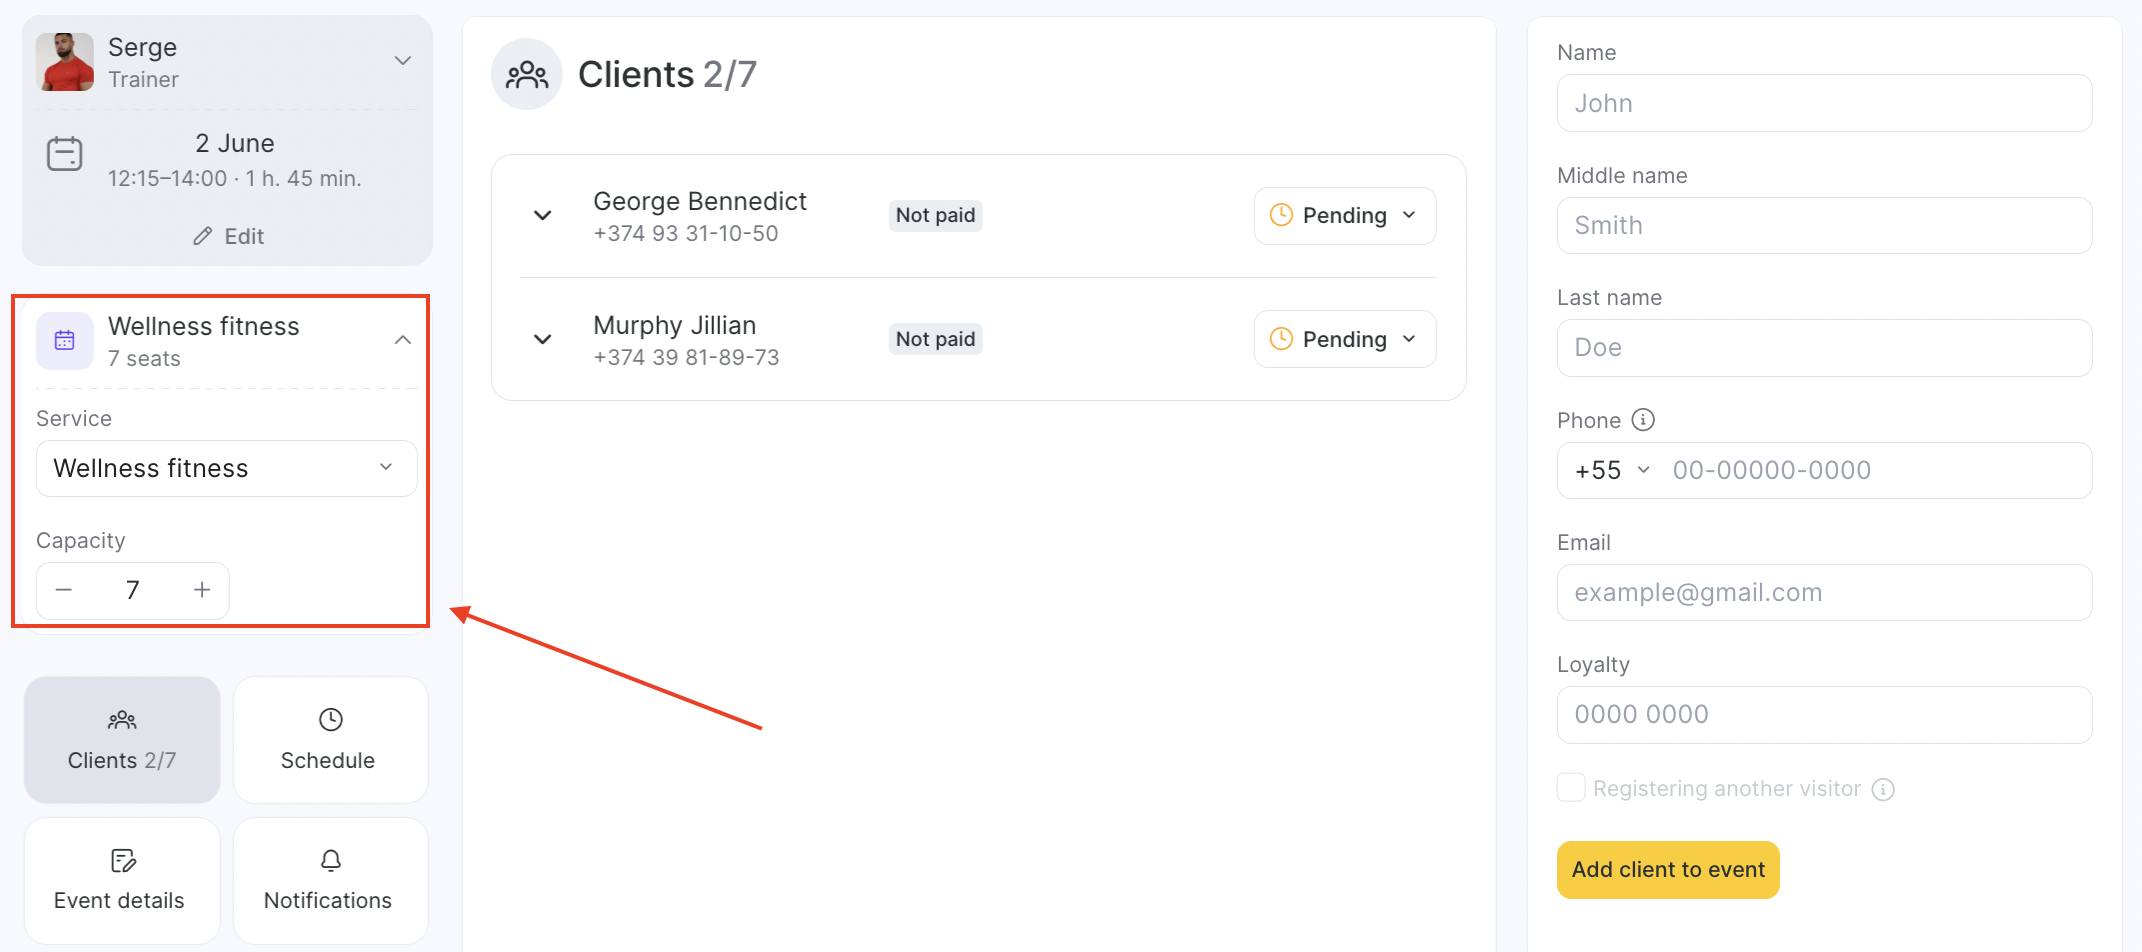
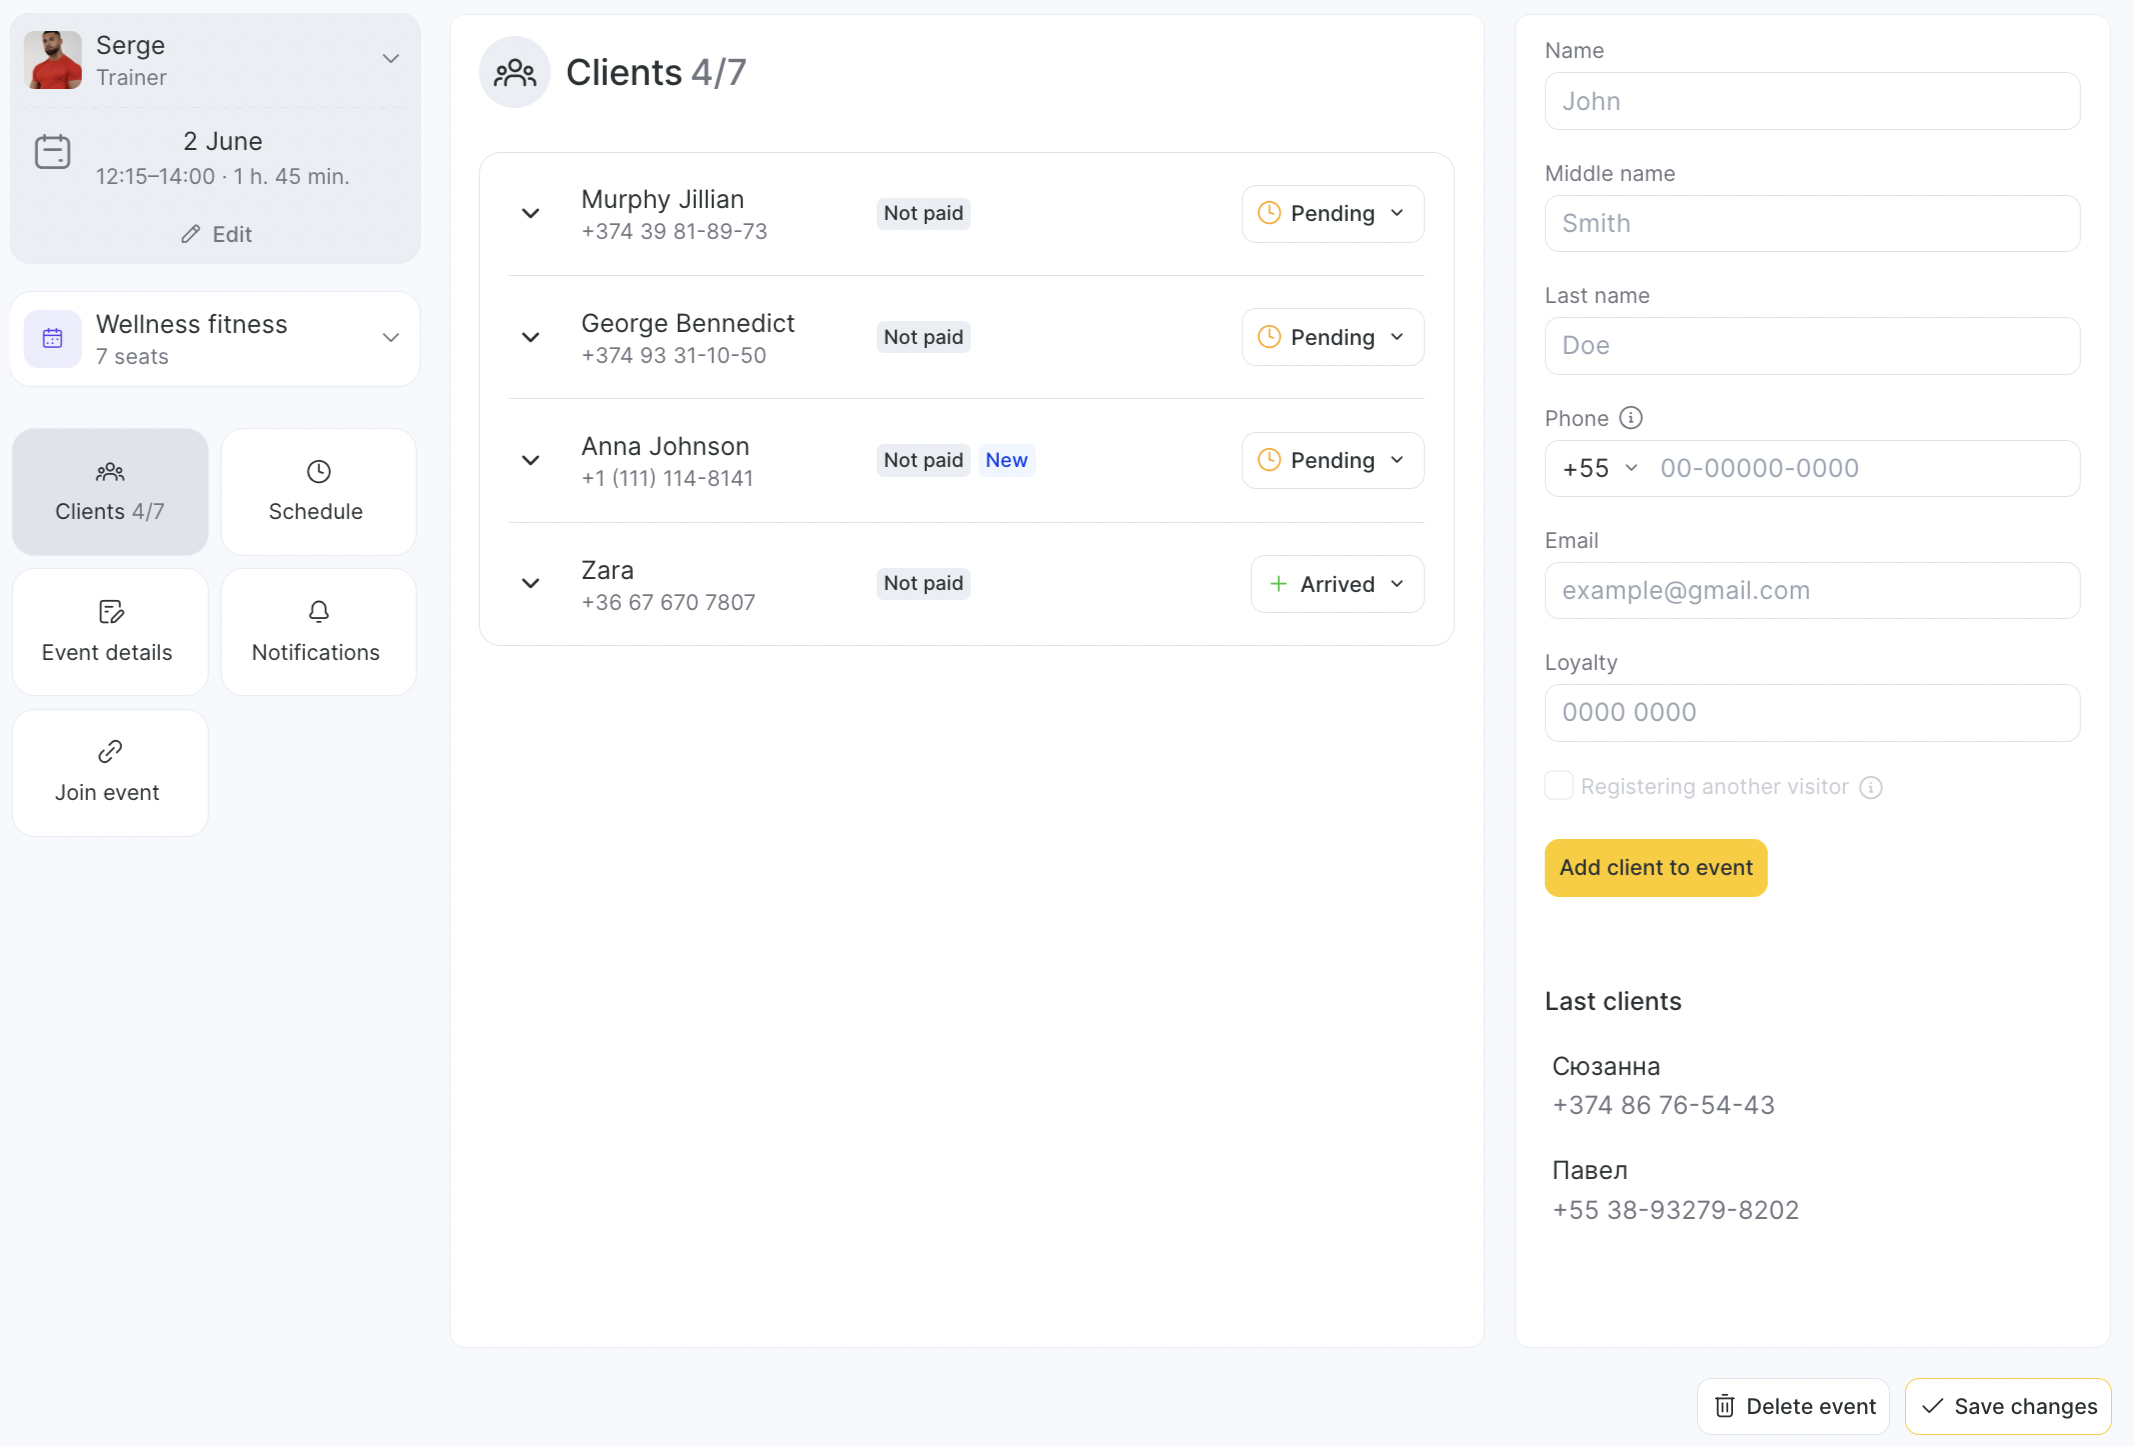
Booking Clients #
In the “Clients” section, you can begin creating bookings for the event. If no clients are added yet, the central area will be empty.
To add a client, enter their details in the right panel:
- First name
- Last name and/or middle name (if enabled in settings, see article)
- Phone
- Quantity (if booking multiple people under one number, including the main client)
The option “Add extra spots in event” in the appointment calendar settings allows multiple seats for one client (see details here).
To book a visitor (e.g., a child) and retain their details, see “Registering another visitor” below.
After entering the info, click “Add client to event” You can add other clients the same way.
Working with Client Bookings in an Event #
- All booked clients are shown in the central part of the event window under “Clients.” Each appointment is collapsed by default and can be expanded by clicking the arrow next to the name.
Without expanding, you can:
- View number of seats booked. If more than one, an icon shows the count.
- View a visitor booked under a client’s number. Their name and a special icon will appear.
- View and change visit status
- View payment status
- View client booking comment
- See event color (if changed)
- See if the booking was made online (icon appears)
- View and change booking category
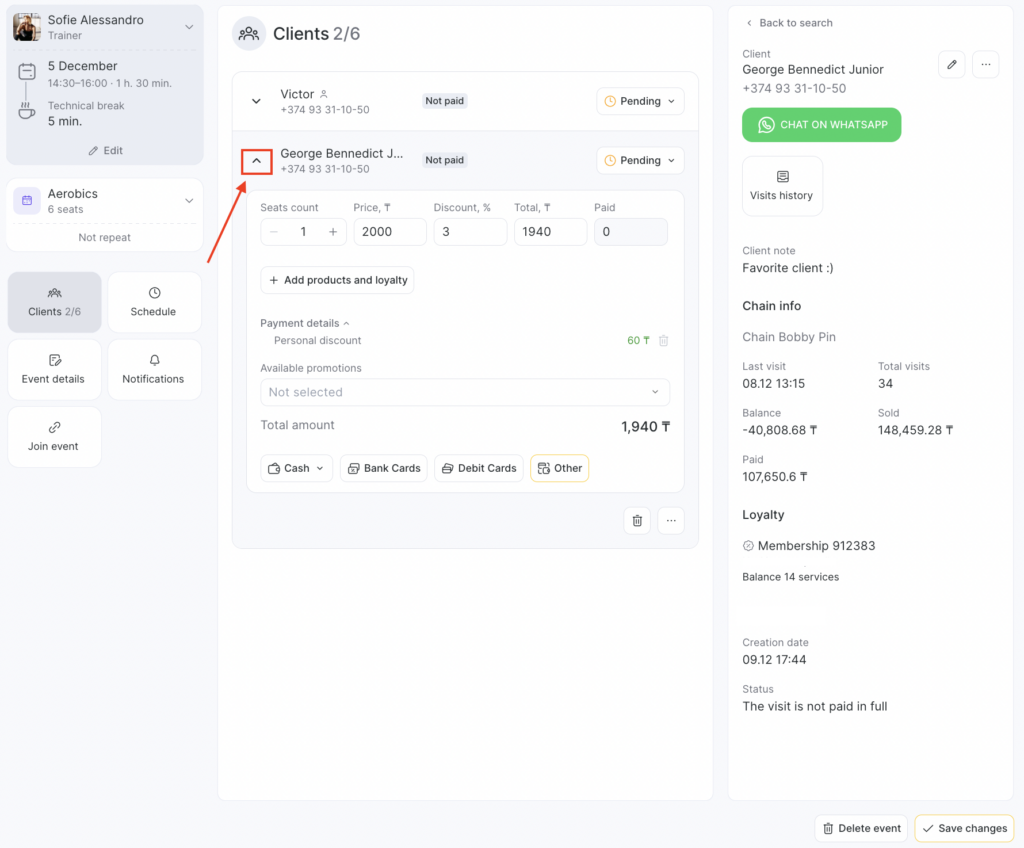
- To view booking details and payment, click the arrow next to the name.
Inside the booking card you can:
- Change number of seats
- Adjust service price
- Add a personal discount
- Update the final cost
- Sell a product, membership, or gift card (more on this below)
- Apply a promotion
- Proceed to quick payment (membership, gift card, card, cash, wallet, loyalty card, QR code, or link)
- Open detailed payment view
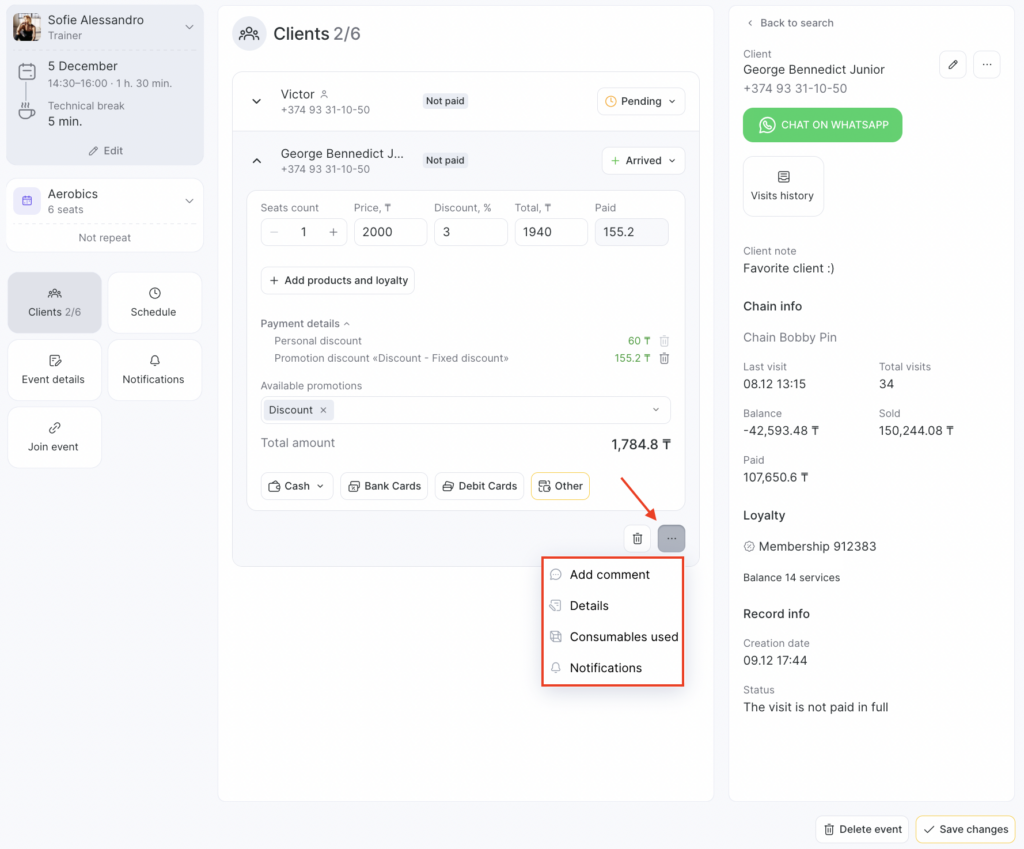
- Additional actions:
- Add a comment (shown in the booking card, max 200 characters)
- Move the booking to another event via three dots button.
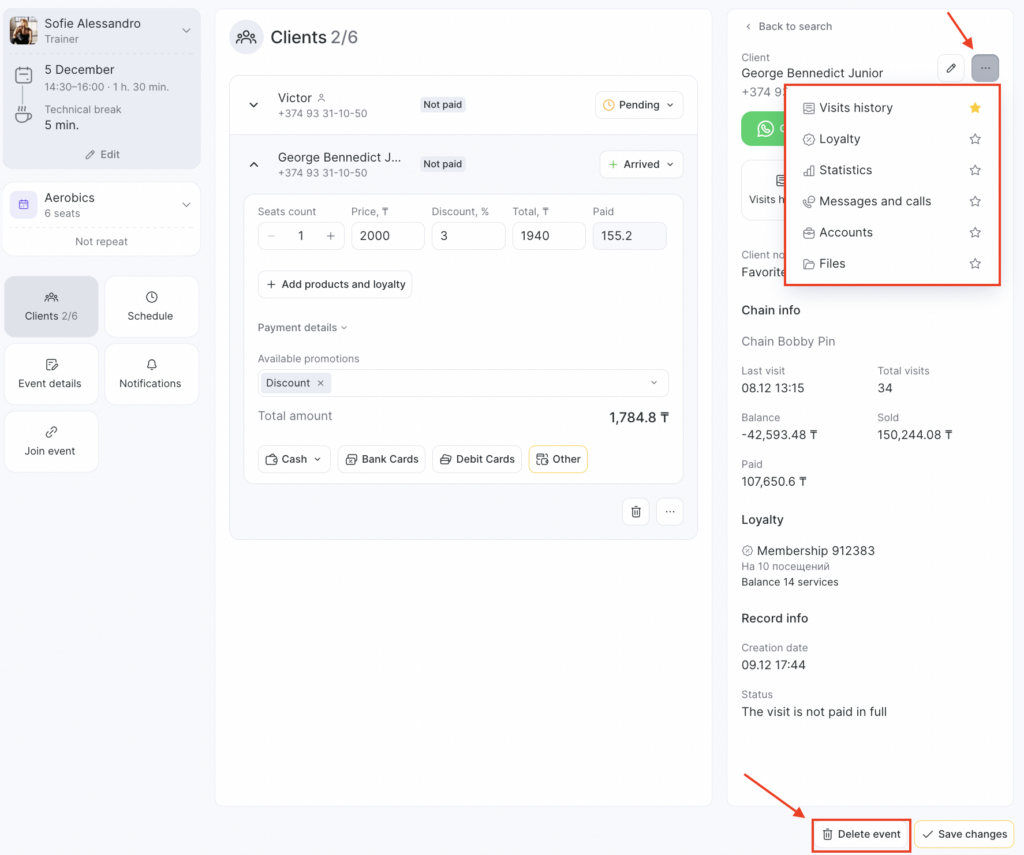
When expanded, the right panel shows detailed client info, like the client database and appointment window.
Top-right shows name, phone, and email (if added), with an edit (pencil) button.
A three-dot button reveals: Visit History, Loyalty, Statistics, Messages & Calls, Client Accounts, and Switch Client.
You can favorite these sections with the star icon, and they will appear below the client’s contact info for quick access.
- To delete a booking from the event, click “Delete event” at the bottom of the expanded card.
Selling Products in Events #
You can now sell products, memberships, or gift cards directly from the client card in the “Clients” section of the event window. No need to open separate entries or process warehouse transactions.
To sell an item:
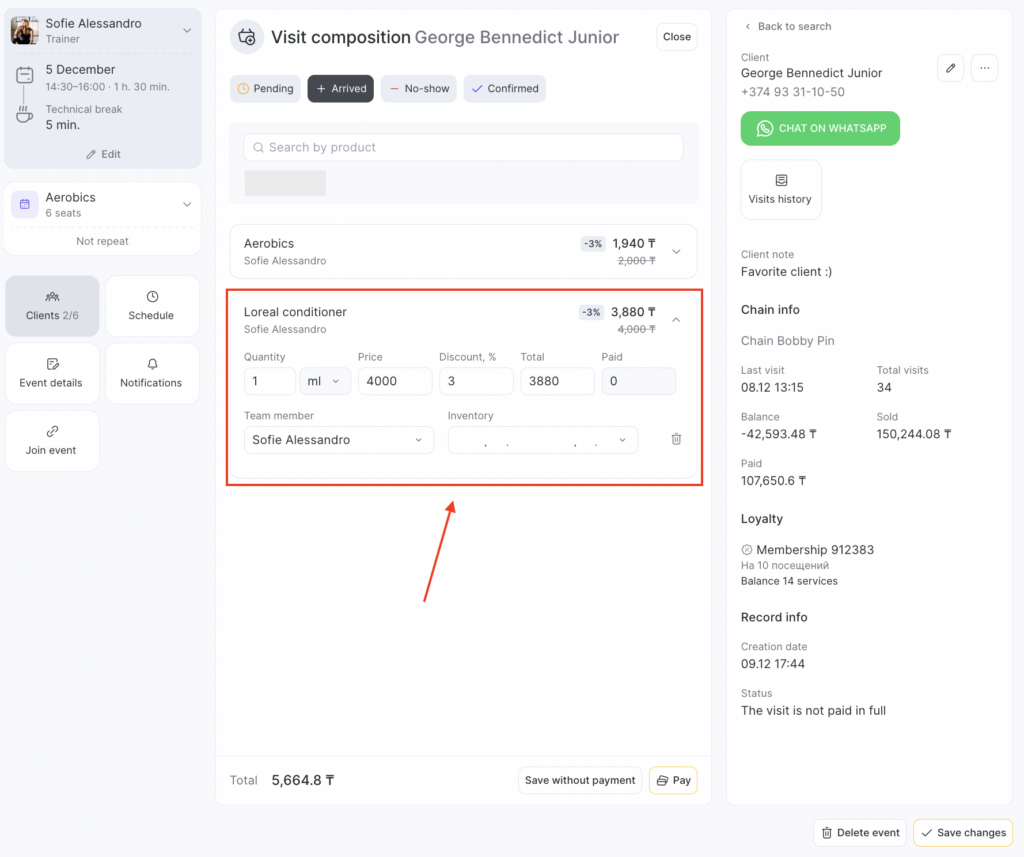
- Go to “Clients” and expand the booking card.
- Click “Add product or membership.”
- A new section will open, where you can also change statuses, costs, and proceed to payment.
- Use the search bar or expand the product tree to find an item.
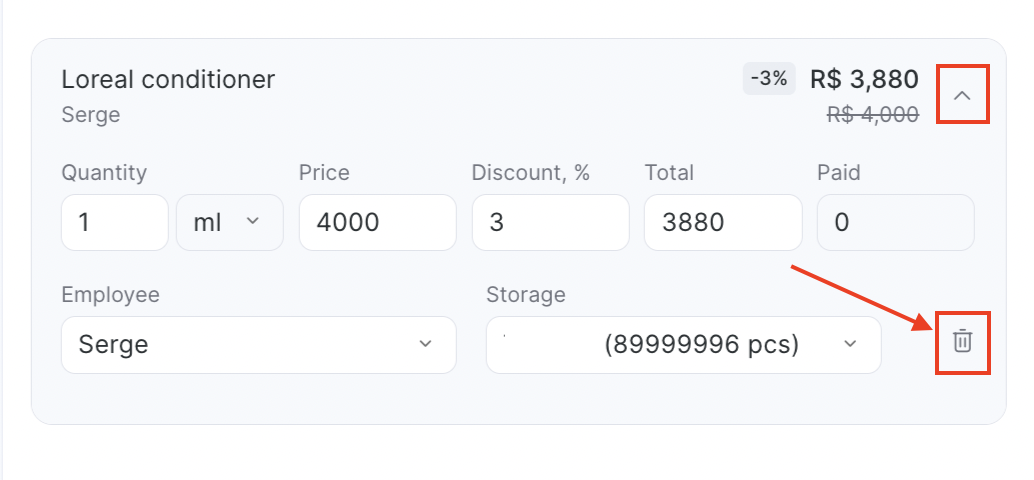
- Added products appear collapsed but can be expanded. You can change quantity (except memberships/gift cards), price, discount, final cost, responsible employee, inventory, and add a code (for memberships/gift card).
- To delete an item, use the trash icon in the visit composition or the three-dot menu in the client card.
Payments Within Events #
You can now complete any payment directly from the client card in the center of the group event window.
You can also apply loyalty, find a membership or gift card, and offer a discount right here—no need to enter a separate booking.
- For quick payment, expand the booking card in the “Clients” section. Add a personal discount or adjust the final price if needed.
If products or memberships were added, edit their cost via arrow next to the item > Edit.
- Click a quick payment button: membership, card, or cash.
Click “Other” to see all available options.
Payment options may include: membership, gift card, card, cash, wallet, loyalty card, QR code, or link—depending on location settings and what applies to the client.
You can also find a membership or gift card by code and apply it.
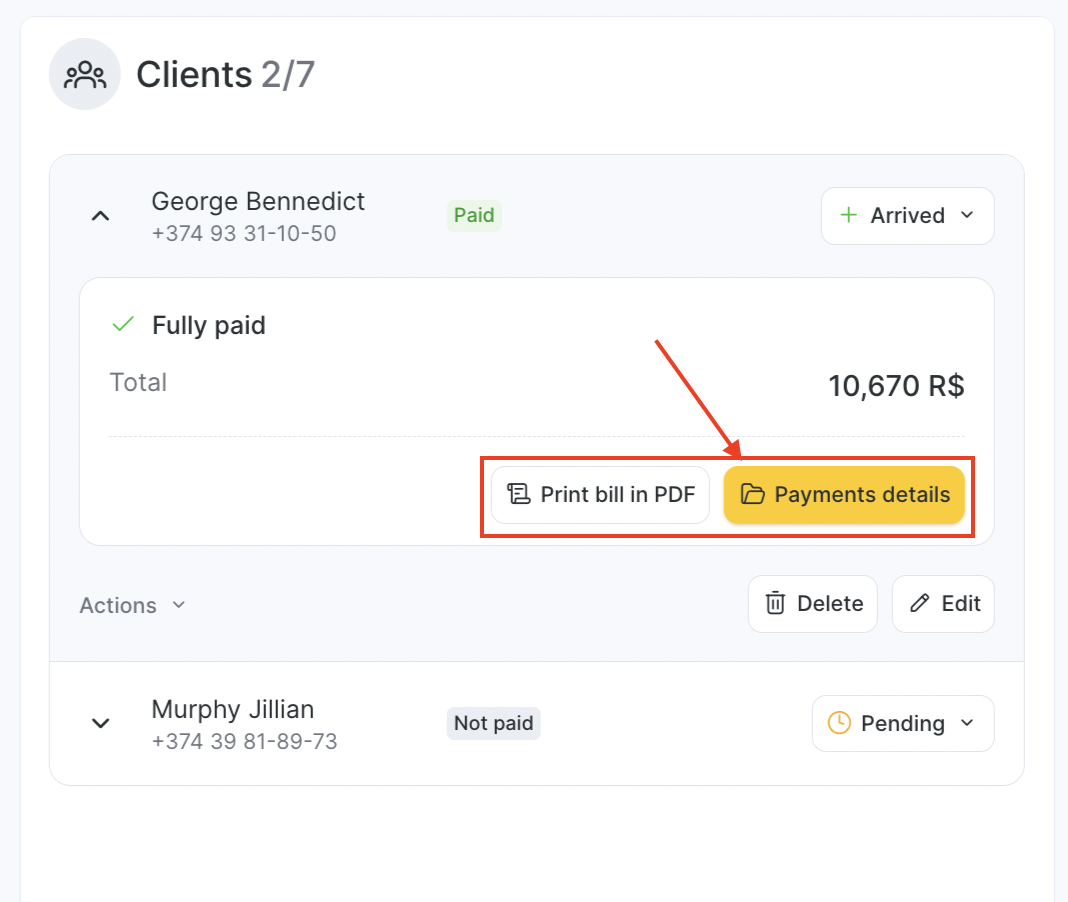
- After payment, the “Paid” tag appears in the booking, along with buttons: “Cancel payment,” “Print receipt,” and “Payment details.”
Clicking “Print receipt PDF” generates a non-fiscal receipt.
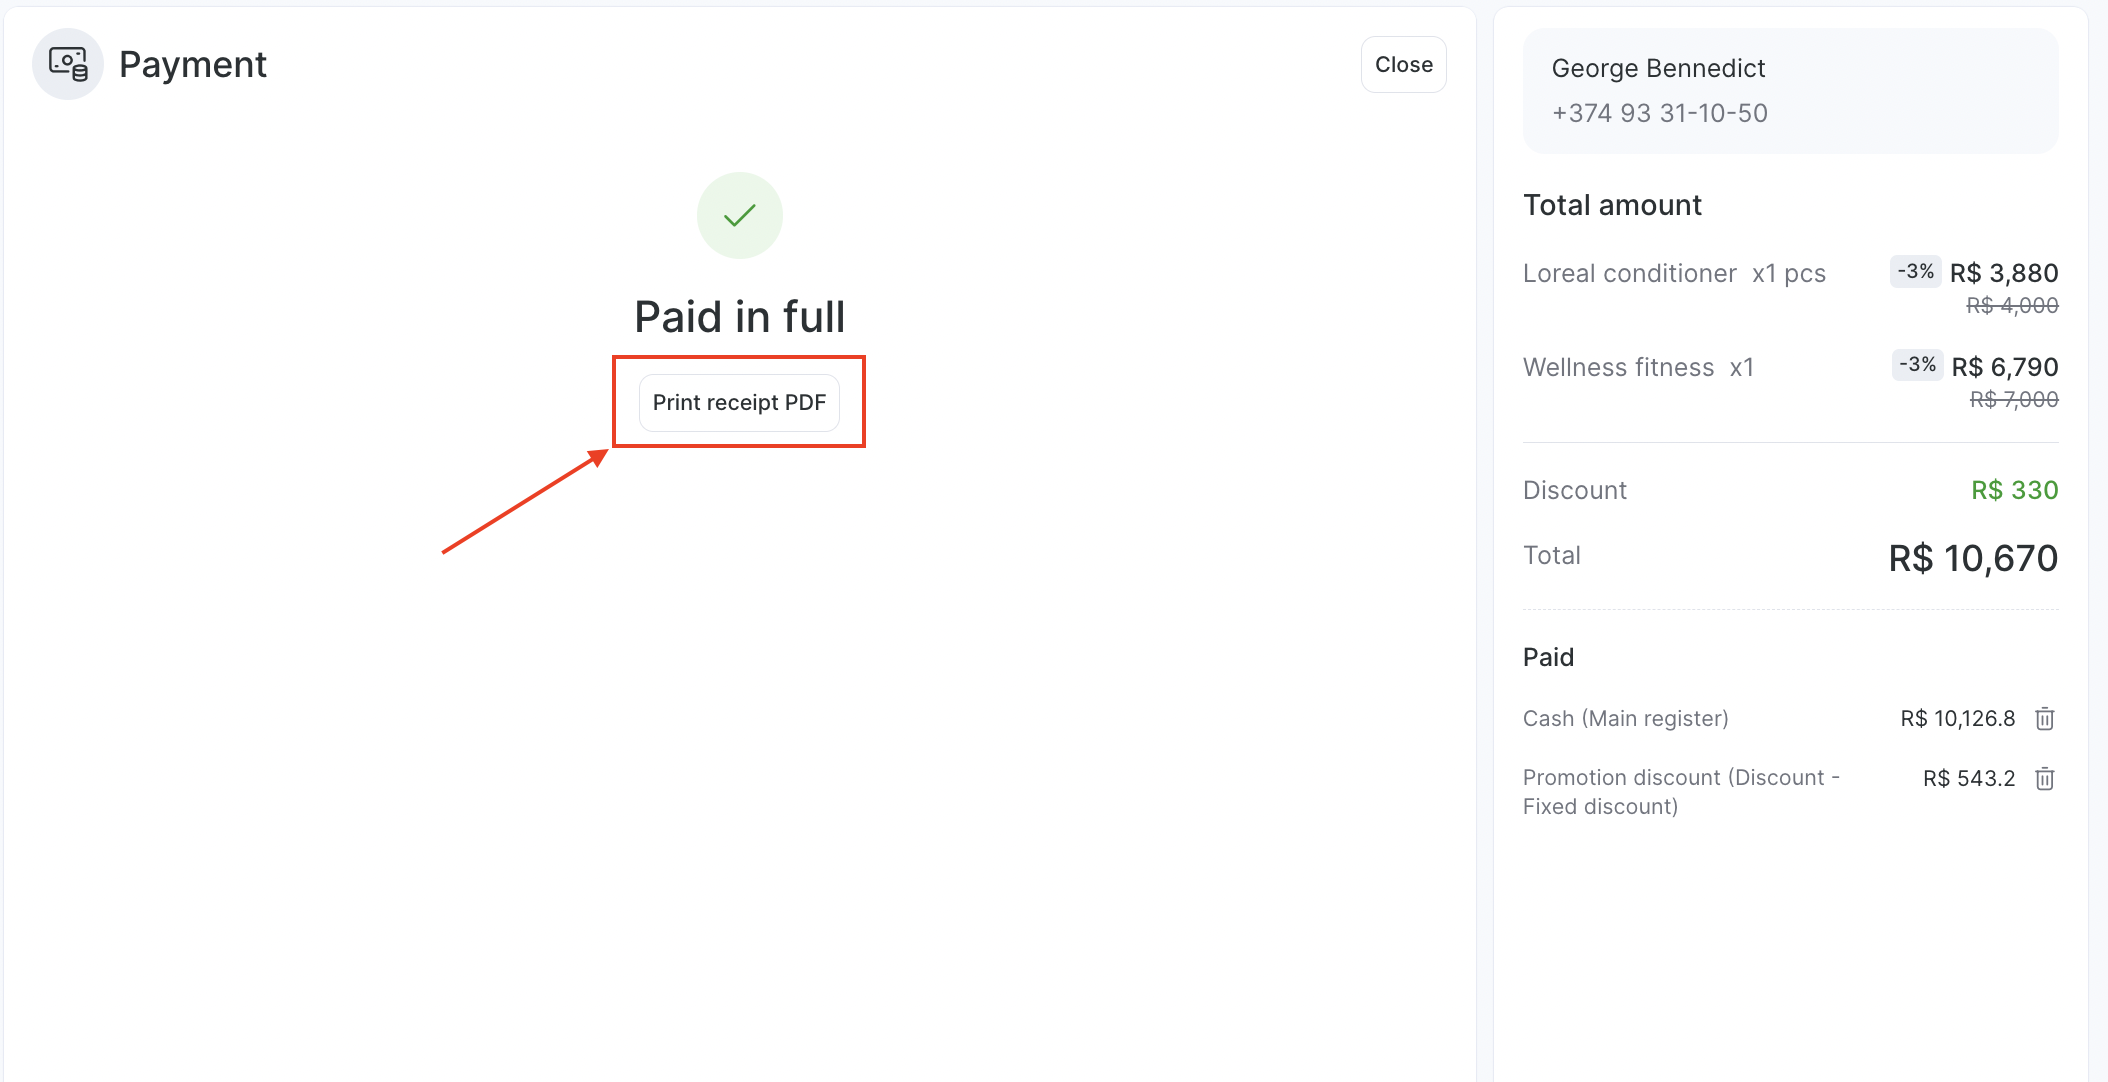
Clicking “Payment details” opens a page where you can print receipts, refund receipts, or delete the payment via trash icon.
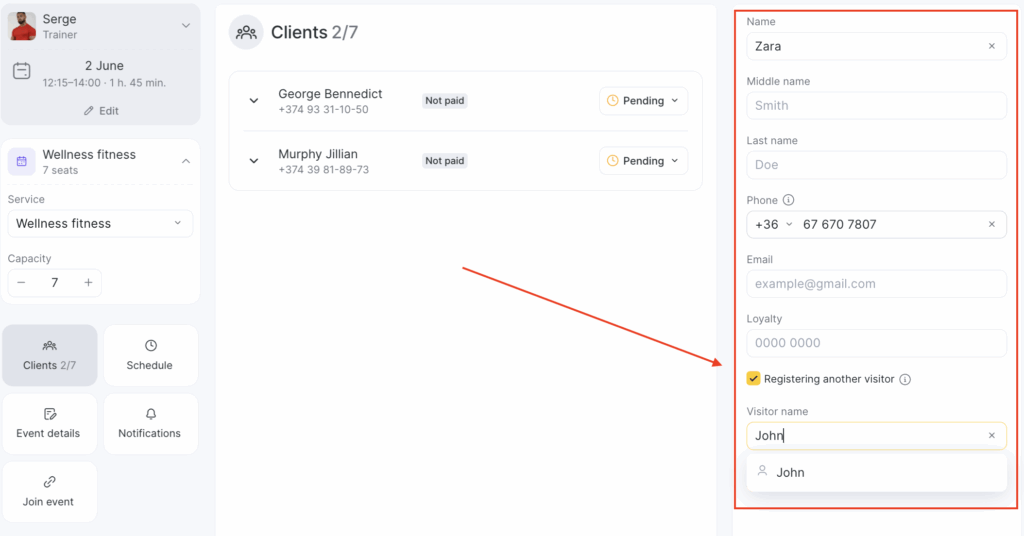
Booking a Visitor to a Group Event #
You can log visits for children or others without a personal phone number by booking them under the main client’s number and entering the visitor’s name.
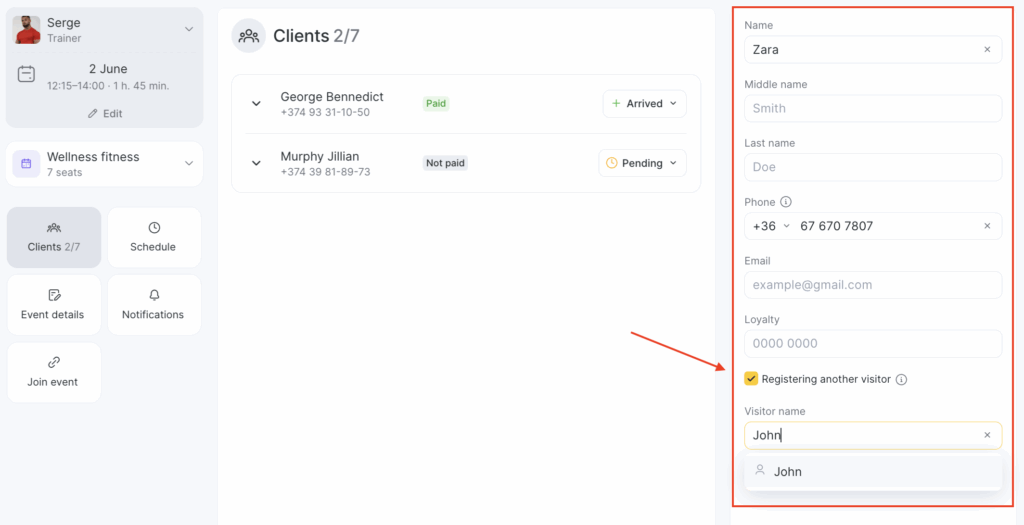
- To add a visitor, enter the client’s name and phone number, and check “Registering another visitor.”
- Enter the visitor’s name and click “Add client to event.” You can also add a visitor for an already booked client on the right panel.
- The client list will show the visitor’s name instead of the main client. All visitors will have an icon beside their name.
- To view the visitor’s visit history and data, expand their booking. The right panel will display both the main client and the visitor.
You can also sign up for online classes using the link. Detailed instructions are available in the article.