
Features of Paying with a Membership #
The client doesn’t have to be the one who purchased the membership in order to use it for payment. For example, if the membership was gifted to the client and they know the code, they can use it for payment. A membership can be found by its code during the payment process.
Before payment, the membership is located in the Loyalty section of the client card of the person who purchased it. After payment, the gifted membership will move to the Loyalty section of the client who used it—even if they weren’t the purchaser. Accordingly, the membership will be removed from the Loyalty section of the original buyer.
Important
If the “Named membership” option was selected in the membership type settings, the membership becomes tied to the client number of the purchaser. In this case, it can only be used by that specific client.
If the membership has already been sold, you won’t be able to change the setting that allows it to be used without a code. In this case, you need to create a new membership type.
Expired memberships cannot be used for payment.
Membership data can be viewed in the Loyalty tab in the client’s card within the Client Database or in the client’s appointment. To see the membership details, click Expand.
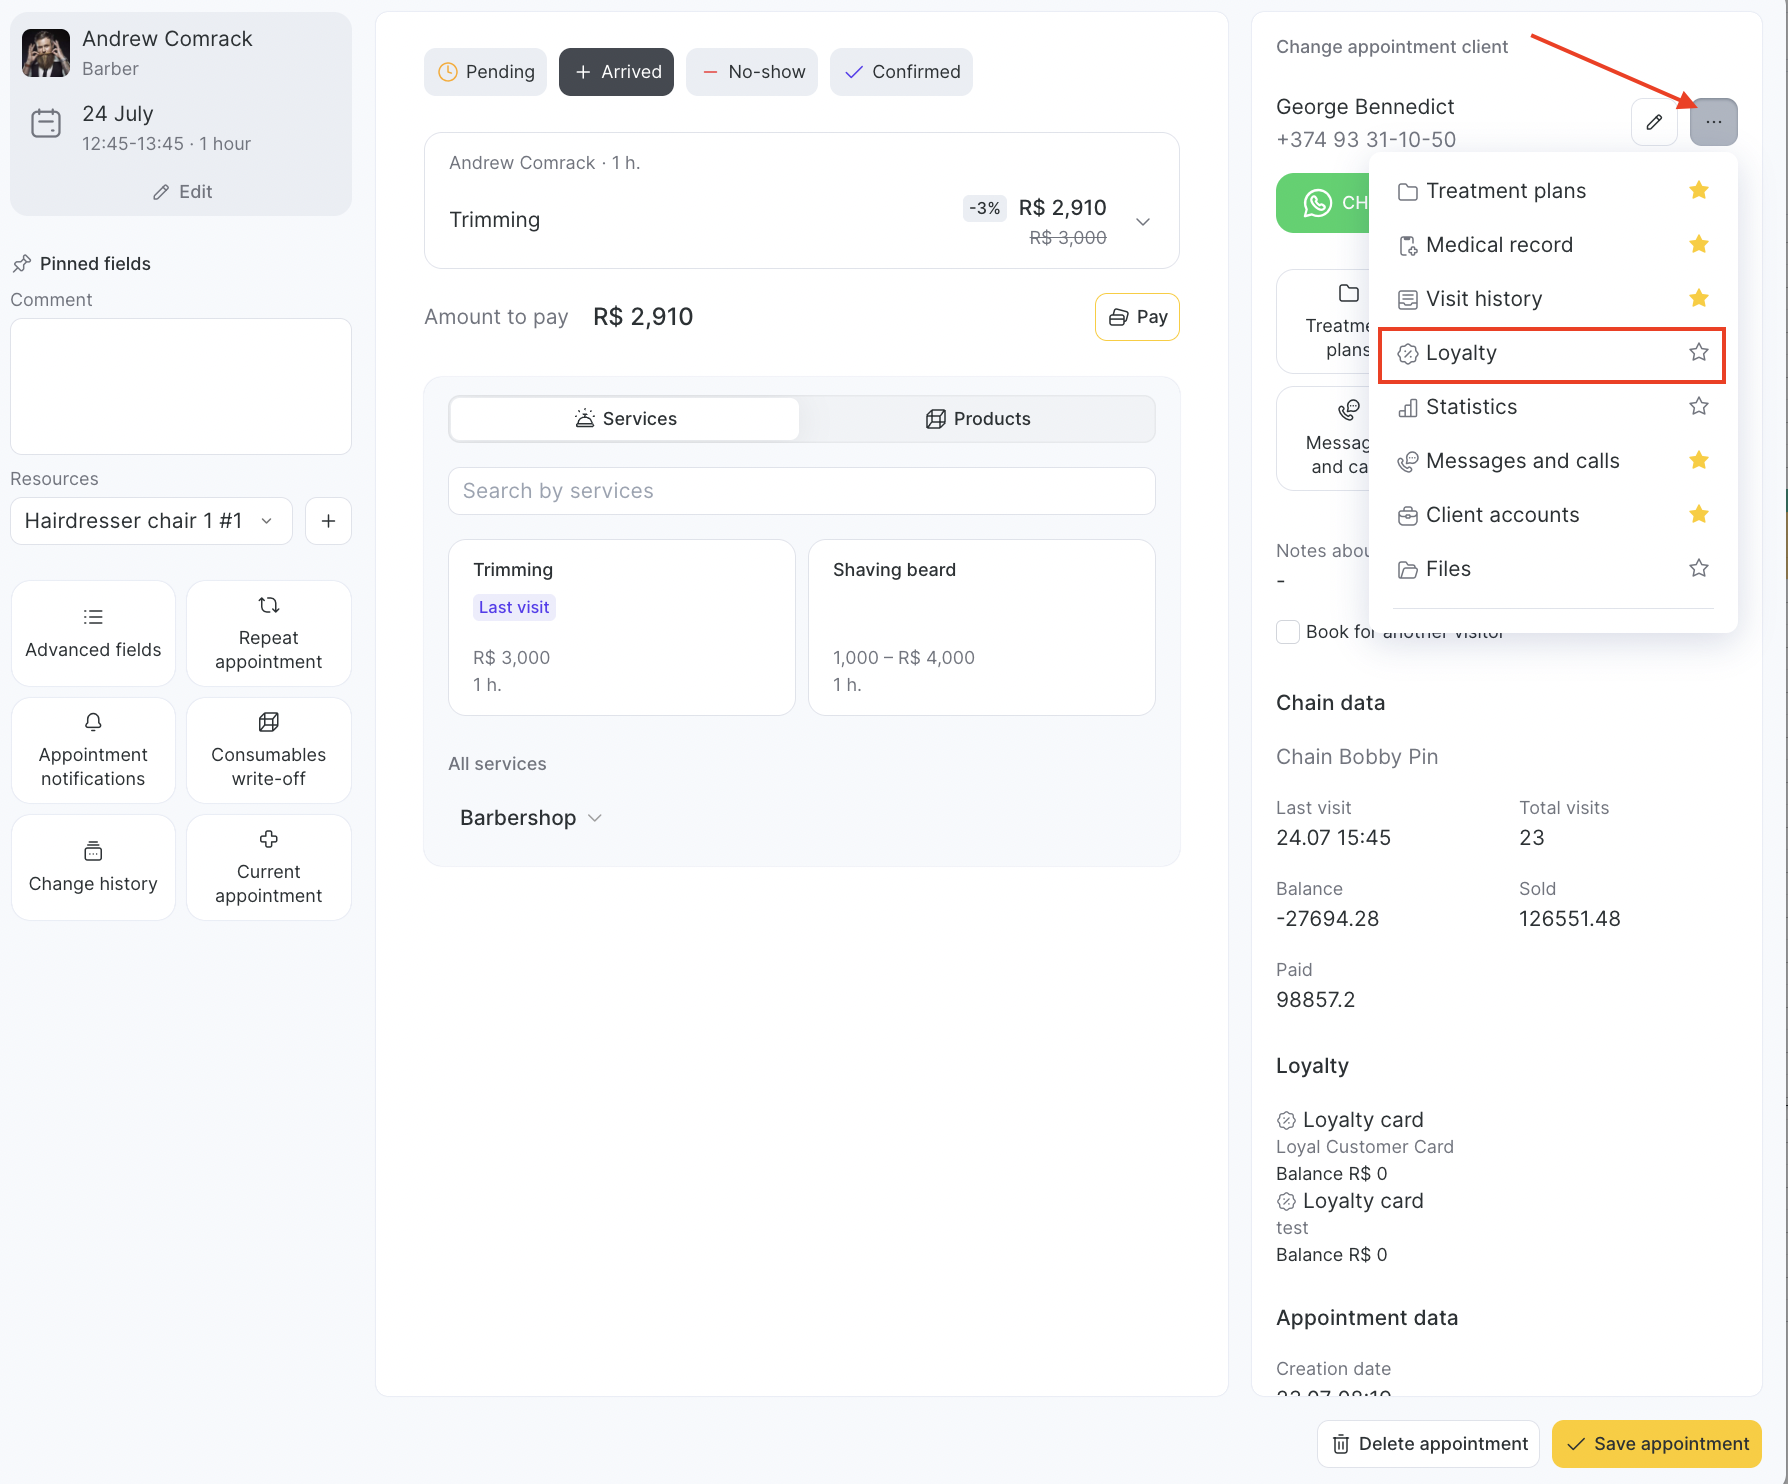

The balance and validity period of the membership can be edited if the membership type allows editing of balance and validity at the location level. This tab also allows you to freeze the membership if the membership type permits both balance/validity editing and freezing.
Paying with a Membership #
A membership can be applied in the appointment window or during a group event when paying for services that are linked to that specific membership type.
Quick Payment if the Client Has a Linked Membership #
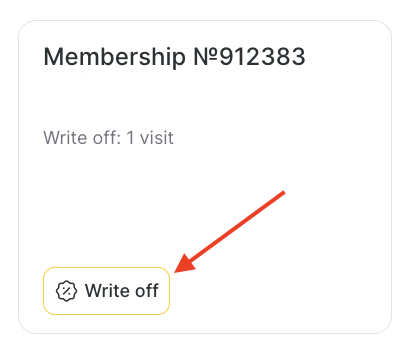
- If the membership appears in the client card under the Loyalty section, then after proceeding to payment in the appointment window, a Membership №… button will appear.

At the bottom of the appointment window, click Other. Then, select the desired membership for payment:
- One visit will be deducted from the membership.

The quick apply button for the membership also appears in group events.
To apply the membership in the event window, click the arrow next to the client’s name in the center of the window, then click Membership.
One visit will be deducted from the membership.
Detailed Payment if the Client Has No Linked Membership #
If the client does not have a linked membership (for example, if the “Unnamed membership” setting is selected in the membership type), it can be used by entering the membership code.
- In the appointment window, click All payment methods.
- Go to the Detailed Payment tab.
- In the Loyalty section, all applicable memberships available to the client will be shown.

- To find another membership linked to a different client, enter the membership code in the Gift card or membership field and click the search icon.

- Click Write off — the payment will be completed automatically, one visit will be deducted from the membership, and the membership will be linked to this client.
- In a group event, you can search for a membership the same way as for individual appointments. To open the client’s appointment, click the arrow next to their name and then the Other button.
Then go to the Split Payment tab and follow the same steps as described above for individual appointments.
Access Rights #
Access rights are managed in Administration mode Team > Team members list. Click the team member’s name and go to the Access tab.
- Loyalty > Purchase with gift card or membership without a code.
- To allow an employee to edit the balance, they need the permission:
- Loyalty > Membership balance editing.
To allow editing the validity period, they need the permission:
Loyalty > Membership validity editing.
To view membership purchase information in the “History” tab of a visit, the permission required is:
Loyalty > View membership history.


