
After adding categories and services, add team members.
Team member settings can be configured both in the Altegio web version and in the mobile app. All data is synchronized automatically.
Adding a team member #
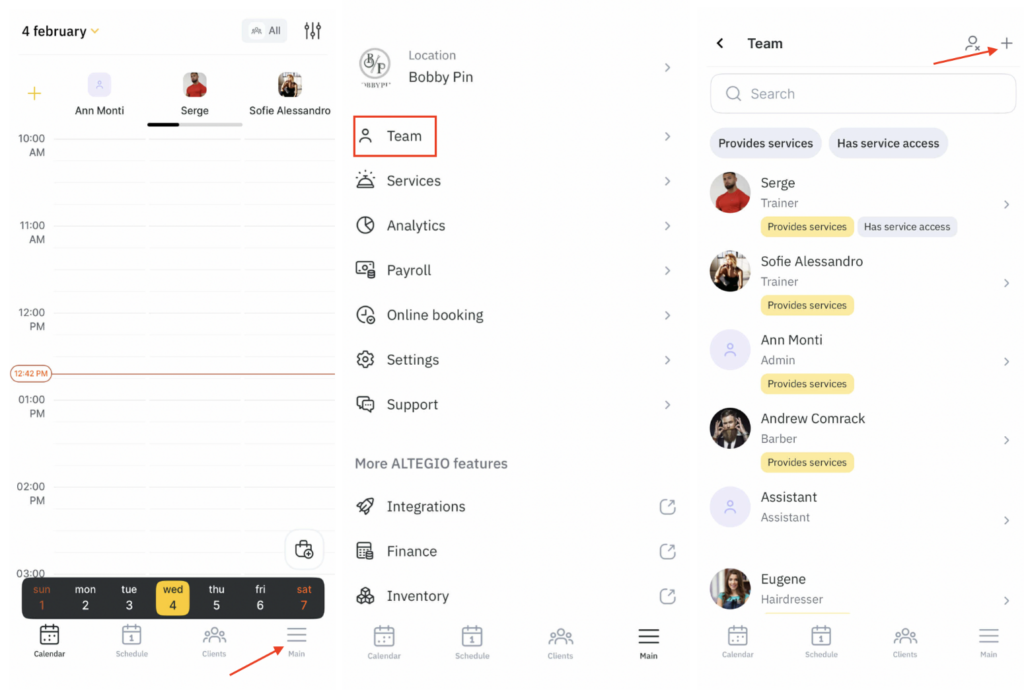
- Go to the main menu — tap More in the bottom-right corner.
- Go to Team.
- To add a new team member, tap the “+” button in the top-right corner.
Team member setup #
In the new window that opens, fill in the team member details:
- Team member name.
- Specialization. For example: esthetic cosmetologist, dermatologist cosmetologist, general hairdresser, colorist, etc. This is a narrow job title / specific area within one profession. It is shown in online booking. Required.
- If the team member provides services, enable Provides services and specify the team member’s Position. This is a group of team members who perform similar types of work or services. For example: stylist, makeup artist, cosmetologist, doctor, car washer, tutor. Optional.
- Enable Available for online booking so clients can book this team member online. Without this option, clients won’t be able to book on their own, but you can still create appointments manually in the calendar.
- Description. Add information about the team member: professional experience, education, services they provide. The description is shown in the online booking widget when the user taps i next to the team member photo. According to Altegio statistics, every fifth user opens this section, so it’s important to provide information that helps them make a choice. Text formatting tools can be used in this field.
- Upload a team member photo — tap Upload photo. It’s recommended to use high-quality professional photos, as they help build trust with clients.
- Recommended image size: 365 × 365 px
- Maximum file size: 12 MB
- Give the team member access to the service so they can use it according to assigned permissions (for example, view their schedule, reports, etc.). To do this, enter the phone number or email, select the role (Professional, Receptionist, Call center, Accountant, Manager, Owner) and configure access rights. Each role includes a default set of permissions, but you can edit it.
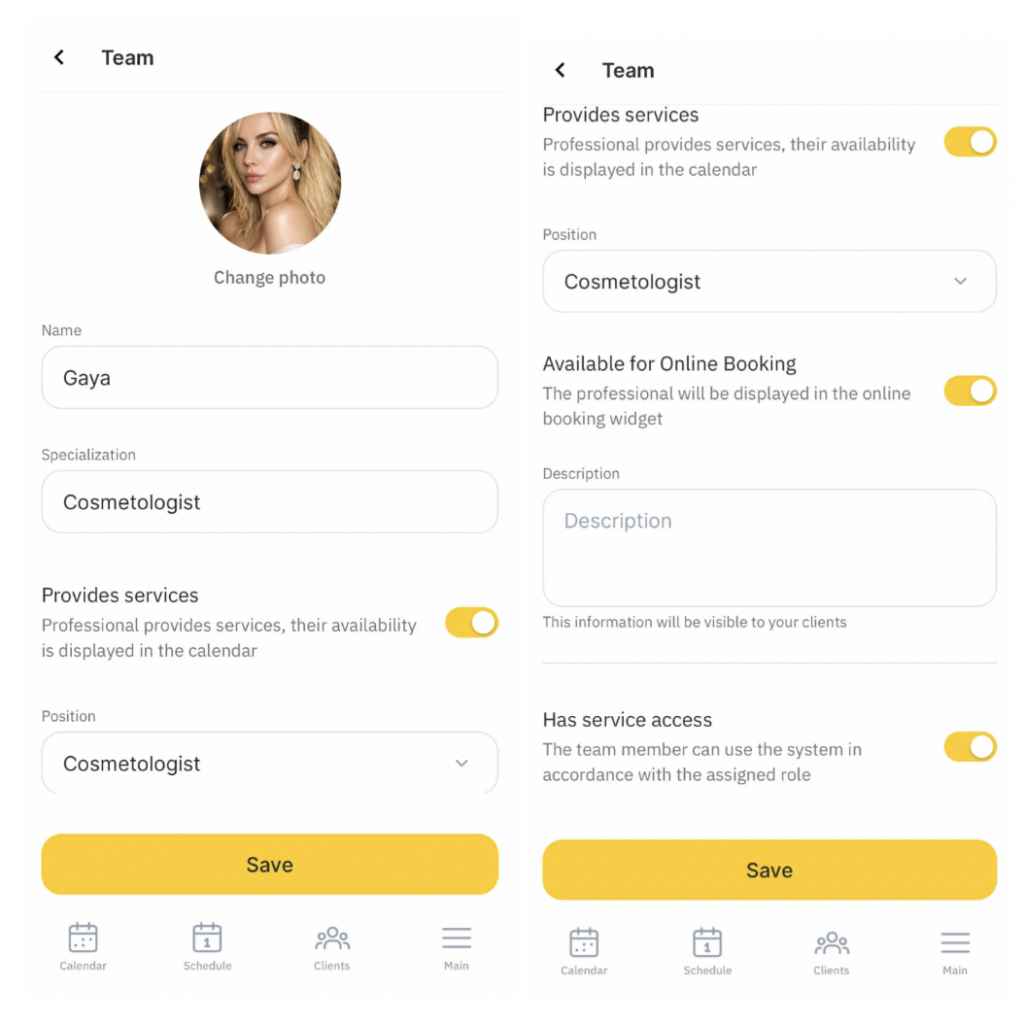
After filling in the data, tap Save.
Setting up the team member’s services #
After saving the team member details, a section will appear with the services they provide. New team members won’t have any services in this section yet — you need to configure them.
To add services to a team member:
- Go to the main menu using the top-left sidebar (three-line icon).
- Tap the team member name in the list.
- Tap Services > Provided services.
- Select the required category from the list, tap its name, then tick the services the team member provides. You can create a new category using the “+” button.
- You can change the service duration using the pencil icon. By default, the duration set in the service settings will be applied.
- After adding services, tap Save.
After that, in the team member service settings you will see categories and services marked as Linked and Not linked.
You can always edit, add, or remove services. To unlink services, untick them in the team member settings and tap Save.
Dismissal and deletion #
Team members can be dismissed or deleted. To do this, go to Team, select a team member, and tap their name.
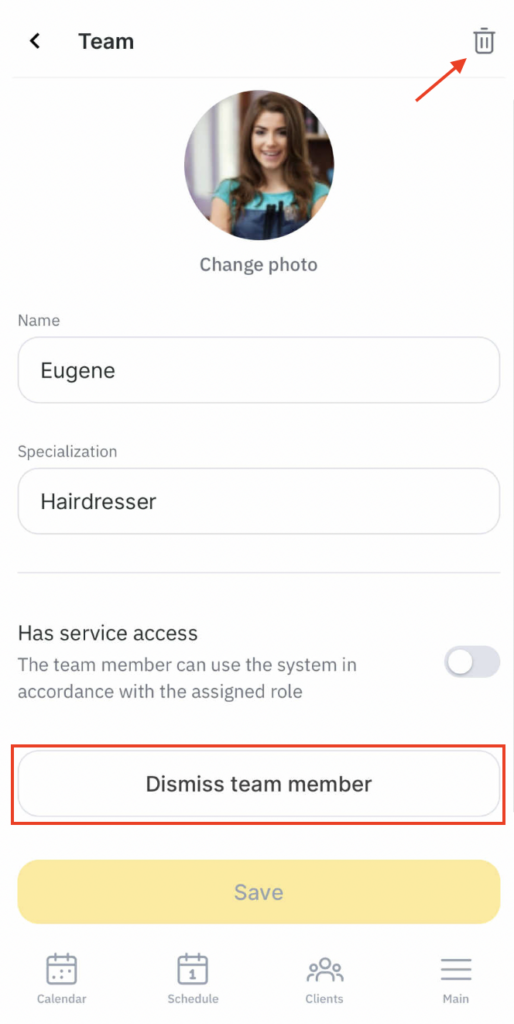
- To dismiss a team member, tap Dismiss team member. Choose dismissal if you need to remove the team member from the list but keep all their statistics.
- To delete a team member and all data about them, tap the trash icon in the top-right corner.
In the mobile app, all dismissed team members remain visible in the list. If needed, you can restore them: open Team and tap the person icon in the top-right corner. In the list, tap the required team member and then Restore team member.
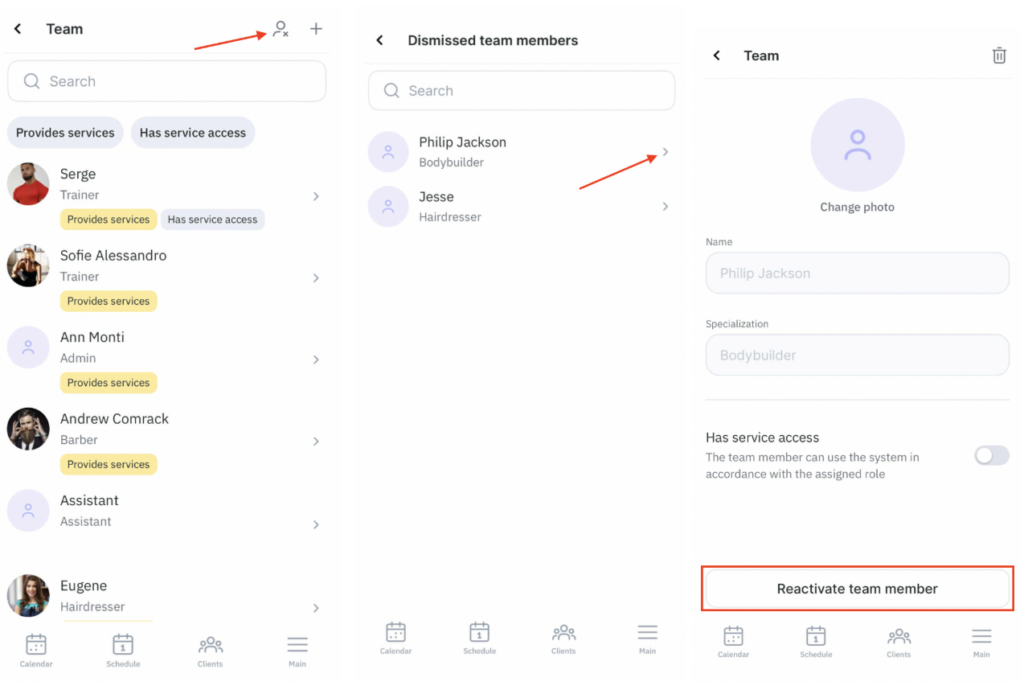
Deleted team members are not shown in the mobile app. They can only be restored in the web version. Read more about this in the article.
Important
A dismissed or deleted team member can be restored within 24 hours. After 24 hours, the team member can only be restored 30 days after dismissal.
Setting up the schedule and online booking #
After all services and team members are created and services are assigned to team members, you can start working with the appointment calendar. To do this, you need to set up the schedule and also configure online booking so clients can book appointments themselves.
A detailed description of these settings is available in the articles: Working with the appointment calendar in the mobile app and Setting up online booking in the mobile app.
See the detailed information in the articles: Using appointment calendar in the mobile app and Setting online booking in the mobile app.

