To process an appointment payment, click Pay in the center of the appointment window.
If the appointment status is Pending, after you click Pay it will automatically change to Arrived.
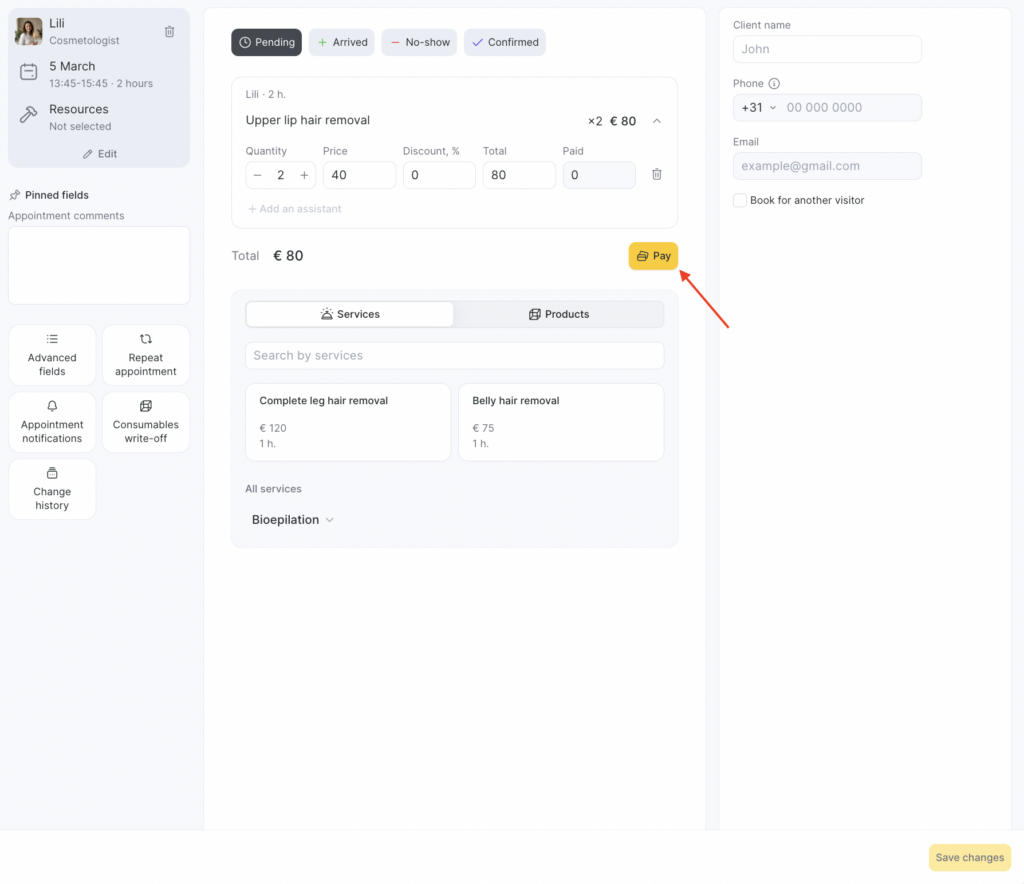
After switching to payment, the appointment payment section will open. In this section, you can take payment using any available method on the Fast payment and Split payment tabs.
Fast payment #
On the Quick payment tab, you can:
- Choose the cash register the payment will go to.
- Pay by cash and by credit/debit card.
- Pay with a certificate. Detailed instructions are in the article Paying for products and services with gift cards.
- Pay with a membership. Detailed instructions are in the article Paying for services with memberships.
- Pay from the client’s account balance. Detailed instructions are in the article Client accounts.
- Apply a discount for a client who participates in a loyalty program. You can apply multiple loyalty cards one by one — in this case, the discount is applied to the remaining balance. Detailed instructions are in the article Paying for an appointment using cards and promotions.
- Print the sales receipt after the appointment is paid.
- Copy online payment links for the client (available when online payment is connected).
- Enable QR-code payment.
Note #
Please note: the appointment shows only the loyalty types that can be used to pay for this appointment.
If the loyalty types linked to the client do not apply to the services/products in the appointment, they will not be displayed in this section.
You can find them by searching by code, but you won’t be able to use them to pay for the appointment.
Also, all loyalty program types are linked to a specific client. If no client is specified in the appointment, you won’t be able to use loyalty programs to pay for it.
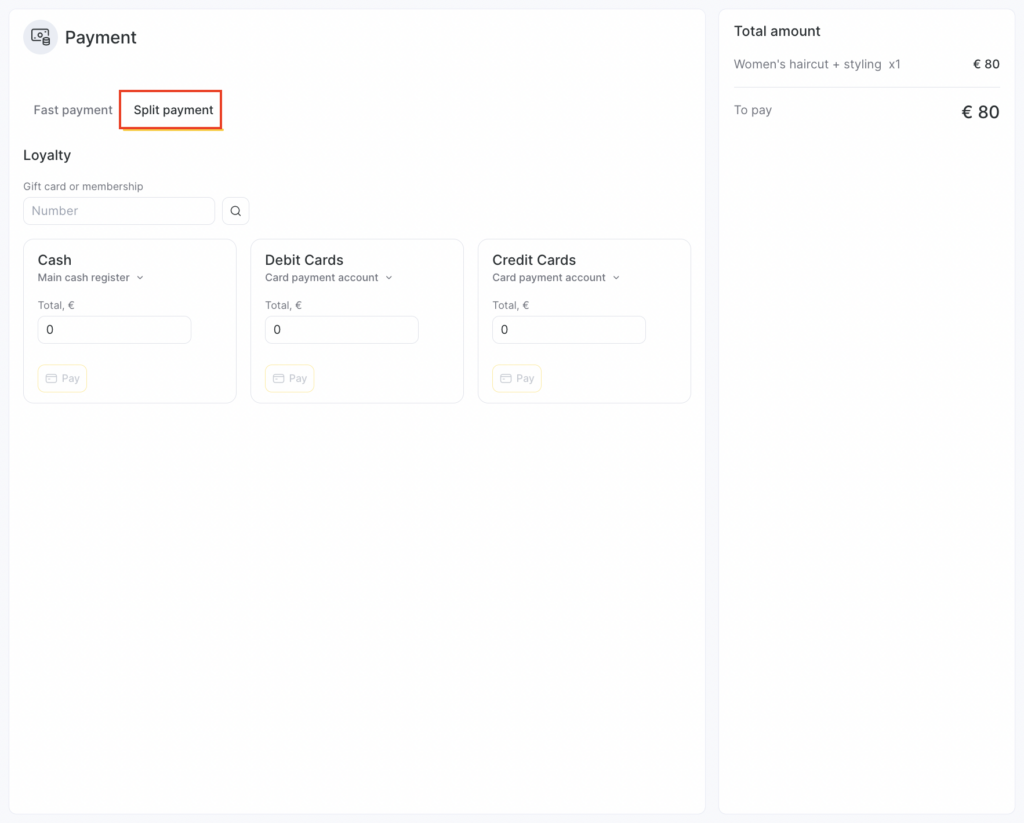
Split payment #
On this tab, you can split the payment and process it using different methods. For example, pay part of the amount in cash and the other part by credit card. You can also make a partial loyalty payment — for example, redeem part of the bonus balance or partially use a gift card.
Search by membership/gift card number is also available here. If you need to apply a non-personalized membership or gift card to an appointment, you can find it on this tab as well.
After payment, the left side of the screen will show the amount due and the payments made using all methods. To delete a payment, click the trash icon.
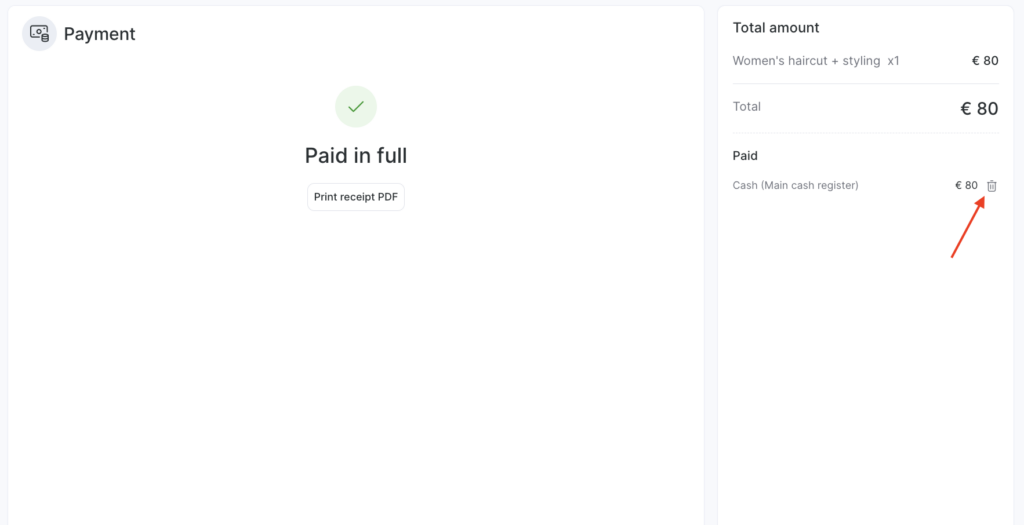
After processing the payment, you can print the sales receipt as a PDF.
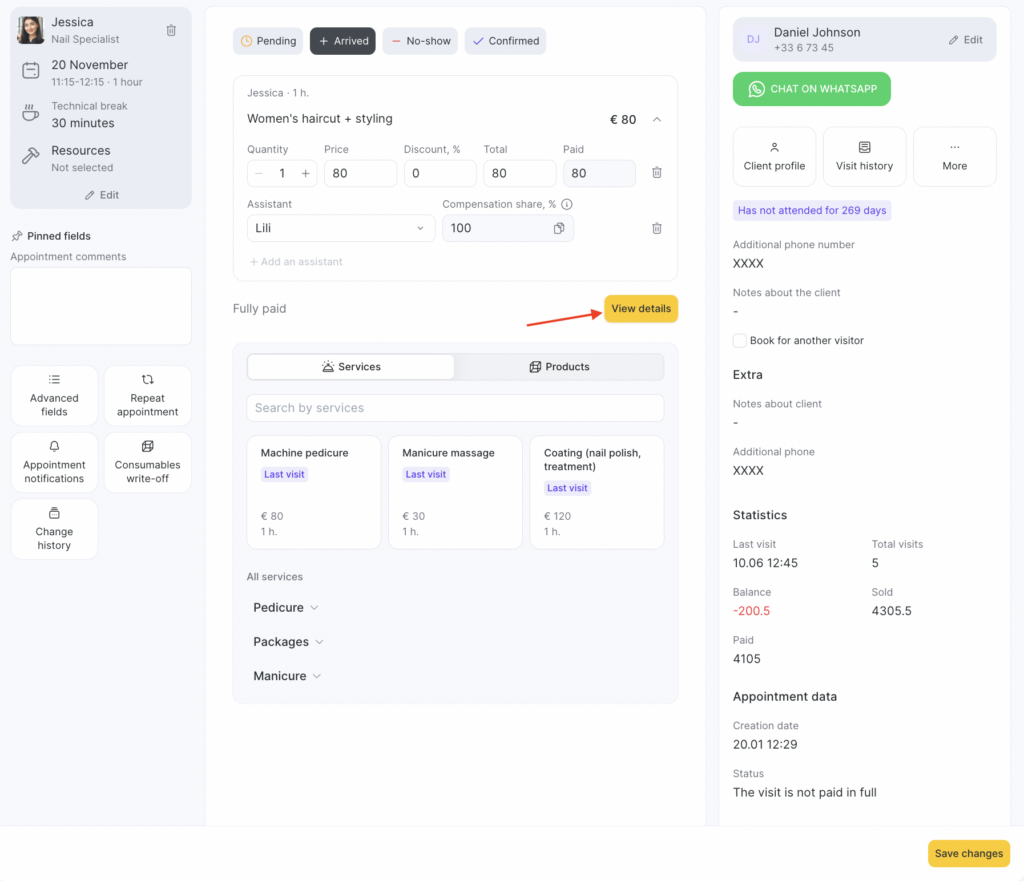
Payment details #
After payment, you can view its details. To do this, open the appointment window and click View details in the center of the appointment.
Canceling a payment #
If the payment was processed incorrectly and you want to cancel it:
- Open the appointment.
- Go to the payment section by clicking View details.
- Delete the payment by clicking the trash icon on the right side of the window.

After canceling the payment, the appointment status will change to Appointment not fully paid.
Note
To cancel a payment, the employee must have this access right enabled: Booking window > Edit appointments > Edit appointments with status “Client arrived” > Access to edit a paid appointment in status “Client arrived”. More details about access rights for the appointment window are provided in the article.