In Settings > Main settings > Team, you can enter and configure all information about team members, the services they provide, their work schedules, and payroll calculation schemes.
A team member is any company employee who provides services or performs any actions and has access to the system.
Adding and editing #
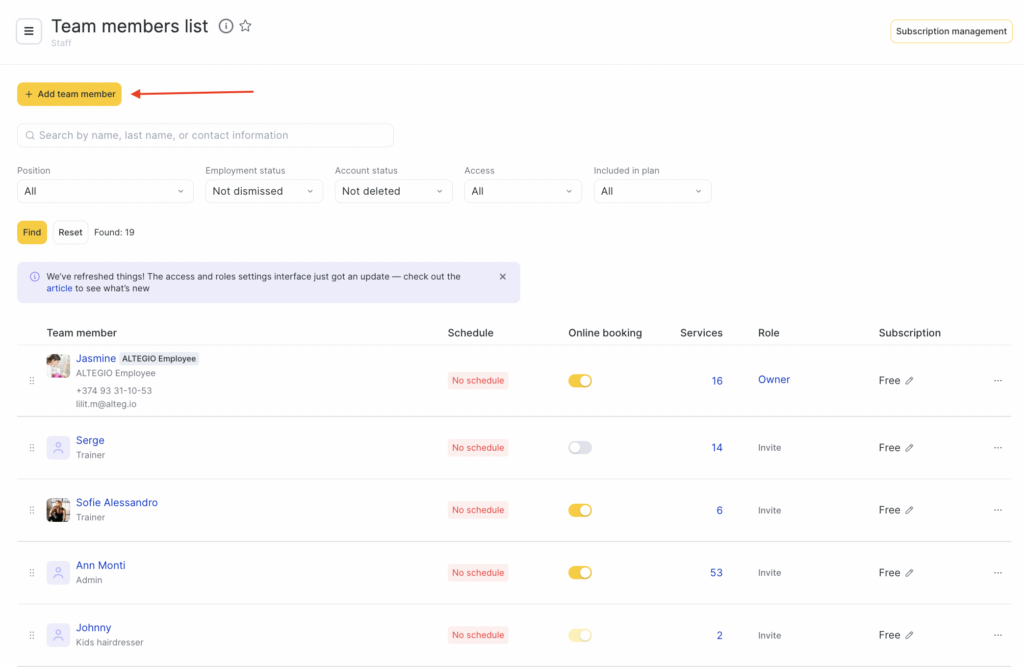
- Go to the main menu in the Settings > Main settings > Team section.
- To add a new team member, click Add team member. In the pop-up window, enter the team member’s name, their specialization (for example, Makeup artist-stylist), add them to the schedule, and grant access to the service if needed.
Read more about adding new team members in the article Adding team members.
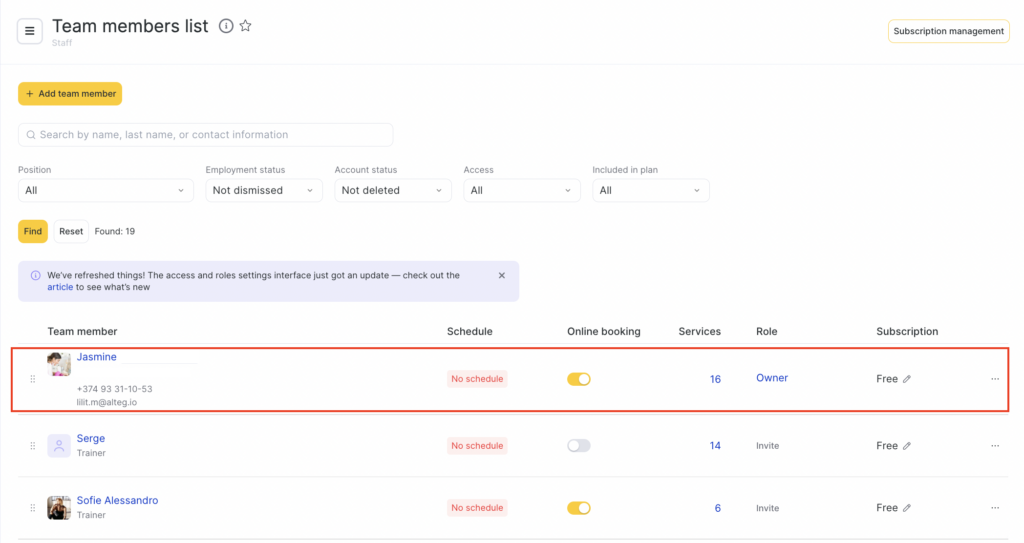
- You can also edit team member details after they are created. To do this, use the quick action buttons in the columns:
- Team member. This column shows the created team members. Click a team member’s name to open editing. For more on setting up and editing team member data, see Adding team members, Additional team member information, Team member settings.
- Work schedule. Here you can see whether a schedule has been set for the team member. If the schedule is configured, the end date is shown in green; if no schedule is set or the end date has expired, the date is shown in red. If no schedule is set, you’ll see the Add to schedule button. Click it to configure the schedule. For details, see Team members’ schedule.
- Online booking. In this column, you can quickly enable or disable online booking for a team member. If online booking is disabled, the team member won’t appear in the online booking form, but you can still create appointments for them in the appointment calendar.
- Services. This column shows the total number of services linked to the team member. To configure the team member’s services, click the number in the column. For details, see Team member service setup.
- Access. This section shows the team member’s role, which determines their access rights in the system. The set of rights depends on the selected role and configured permissions.
To assign a role, click Grant access. To change already configured access rights, click the role name in the Access column. For details, see Team member roles and access rights.
Deleting and dismissing #
Team members can be dismissed or deleted. To do this:
- Click the team member’s name.
- In the new window that opens, click the relevant button in the bottom-left corner.
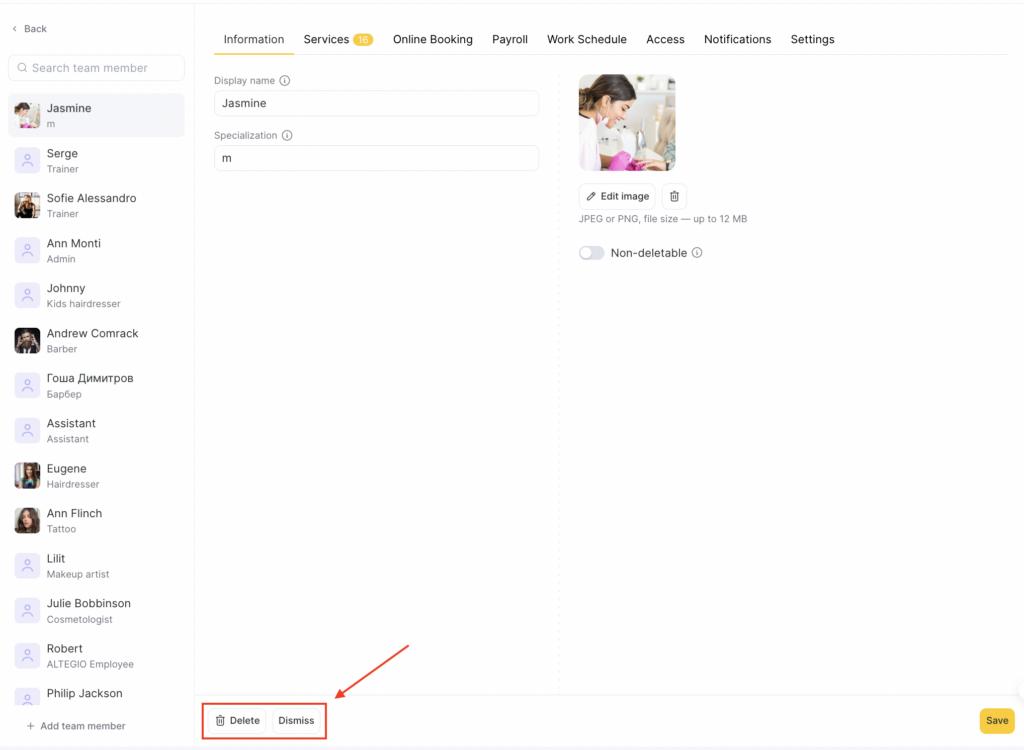
Select Dismiss if you want to remove the team member from the list while keeping all their statistics. Enter the dismissal date and reason, type DISMISS to confirm, and click Dismiss.
When dismissing a team member, if they have appointments scheduled for future dates, a notification will appear in the modal window stating that the team member may have appointments after the dismissal date, and that you can reschedule them in Reports > Appointments.
If you want to delete the team member and all data about them, select Delete. Type DELETE to confirm, then click Delete.
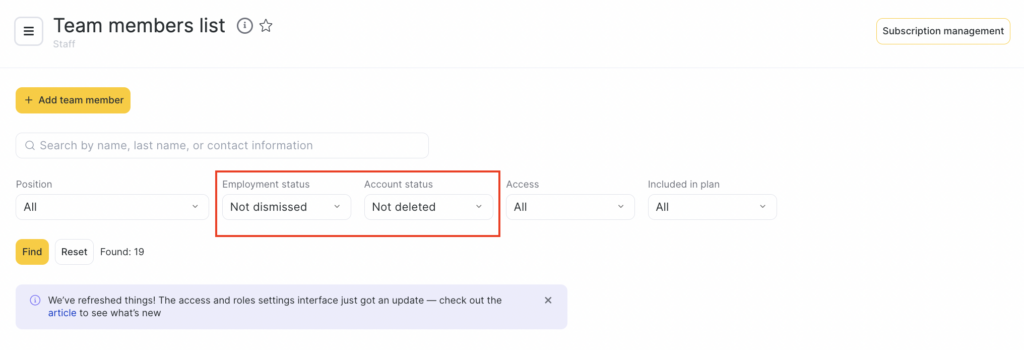
- After dismissal/deletion, you can filter team members using the Dismissed/Deleted filter and view them. If you deleted a team member, you’ll only be able to view their profile card after restoring them.
Important notes #
- When a team member is dismissed or deleted, their system access is removed automatically. They will no longer be able to log in to Altegio.
- A dismissed or deleted team member can be restored within 24 hours. After 24 hours, the team member can only be restored 30 days after dismissal.
- The schedules of dismissed team members are still shown in the appointment calendar. To hide a dismissed team member from the calendar, you need to clear their schedule. It’s most convenient to do this in Settings > Main settings > Team.
- After a team member is dismissed or deleted, all appointments created for them are not deleted and remain available in Reports > Appointments.
How to dismiss/delete a team member correctly #
To avoid unpleasant situations that may occur after dismissing or deleting a team member from a branch (for example, the team member has already been dismissed but their appointments were not rescheduled, or the team member was not paid), please review the information below.
Before dismissing/deleting a team member:
- Go to Reports > Appointments and filter future appointments by this team member.
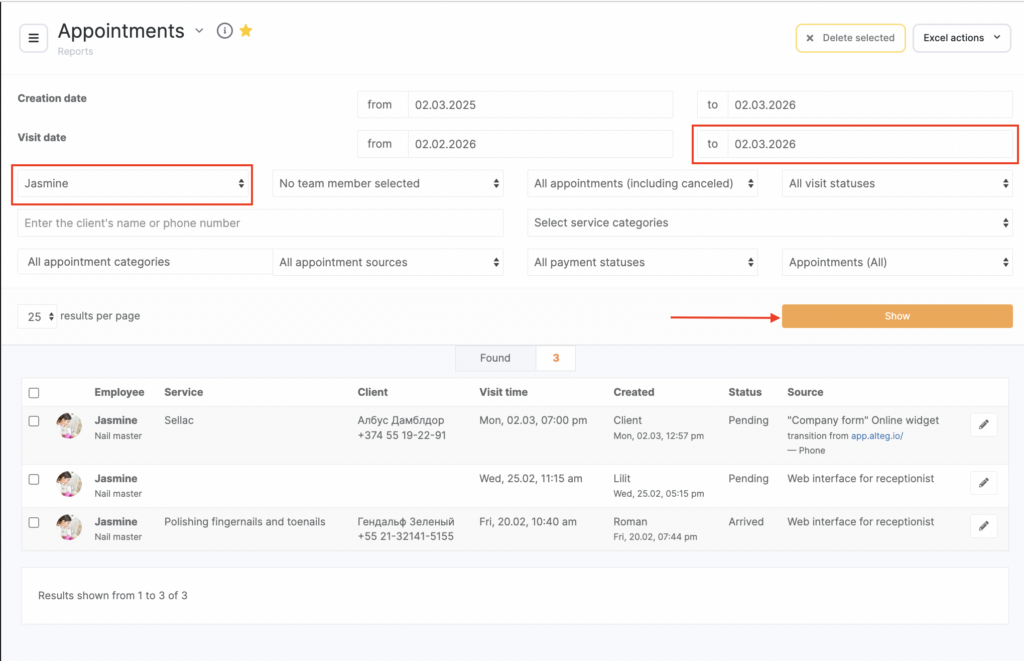
- If there are future appointments, you can reschedule or delete them if needed. To do this, click the pencil icon and, in the visit window that opens, change the specialist.
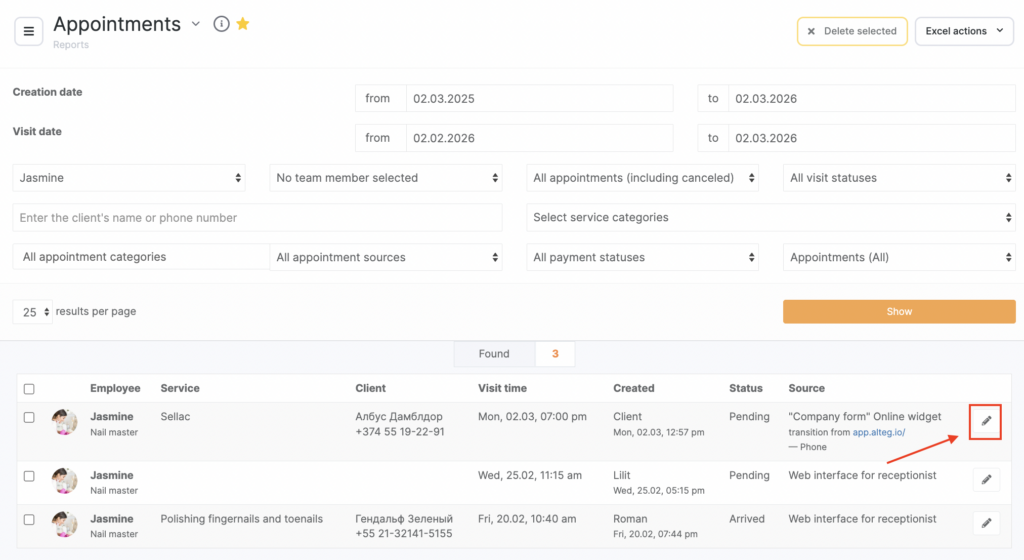
You can also reschedule an appointment directly in the appointment calendar by dragging it to the required team member.
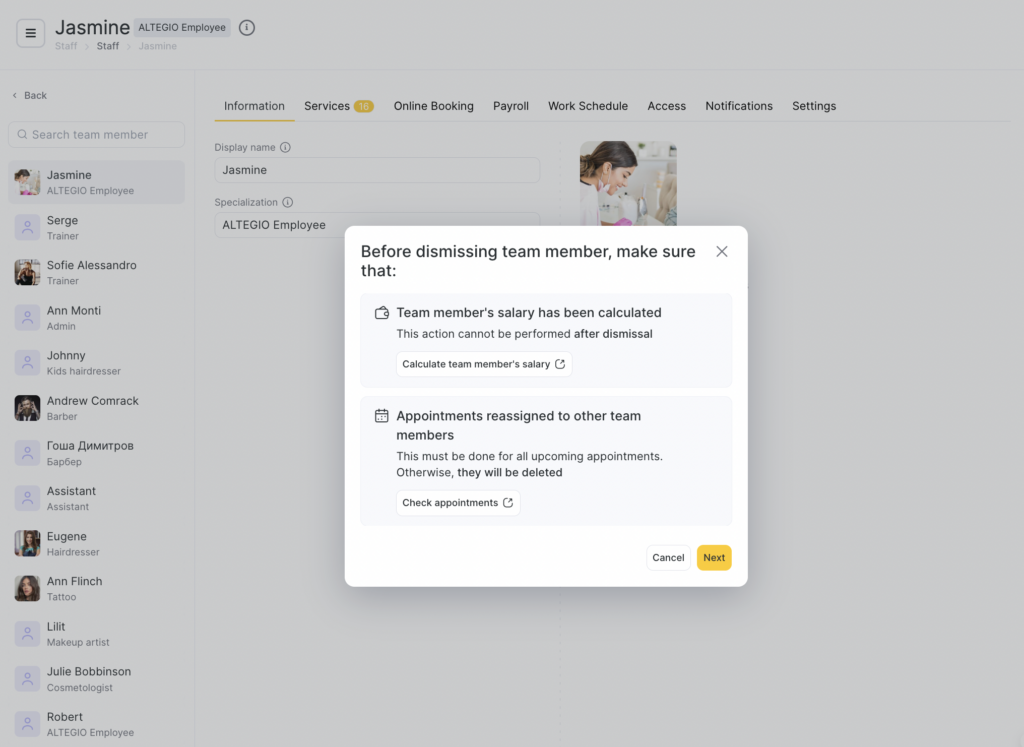
- Check whether this team member’s salary has been paid. You can do this in Payroll > Calculation for the period or Payroll > Settlements.
If the salary hasn’t been paid, you must do it before deletion, because you can’t create a payroll statement for a deleted team member (you can create one for a dismissed team member). If the salary hasn’t been paid, a corresponding window will appear before dismissal/deletion.
- Go to Settings > Main settings > Work schedule or Settings > Main settings > Team members and delete the team member’s working days.
- Now you can go to Settings > Main settings > Team members and dismiss or delete the team member.
Restoring #
Dismissed and deleted team members can be restored.
To restore dismissed team members:
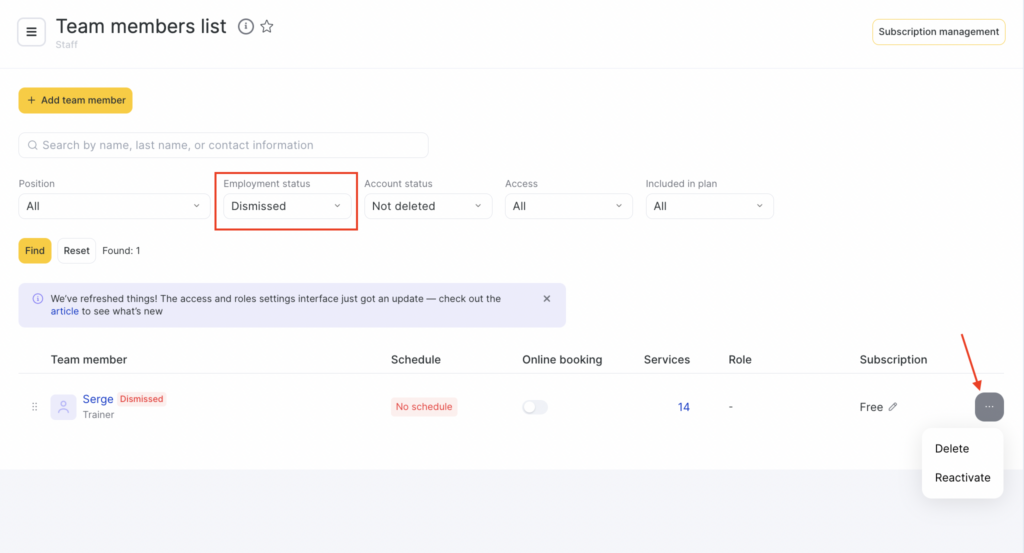
- Filter the list by the Dismissed status.
- In the list that appears, click the three dots next to the team member’s name and select Reactivate.
To restore deleted team members:
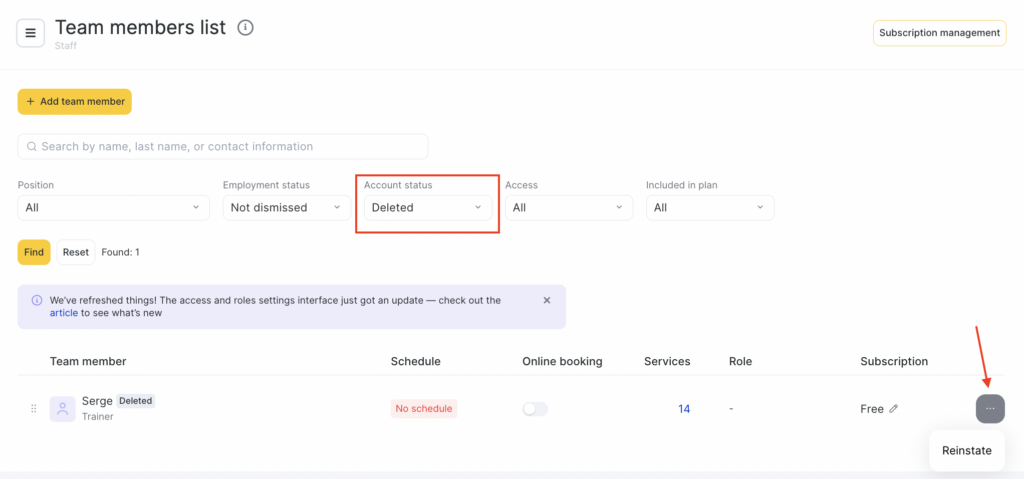
- Filter the list by the Deleted status.
- In the list that appears, click the three dots next to the team member’s name and select Reinstate.
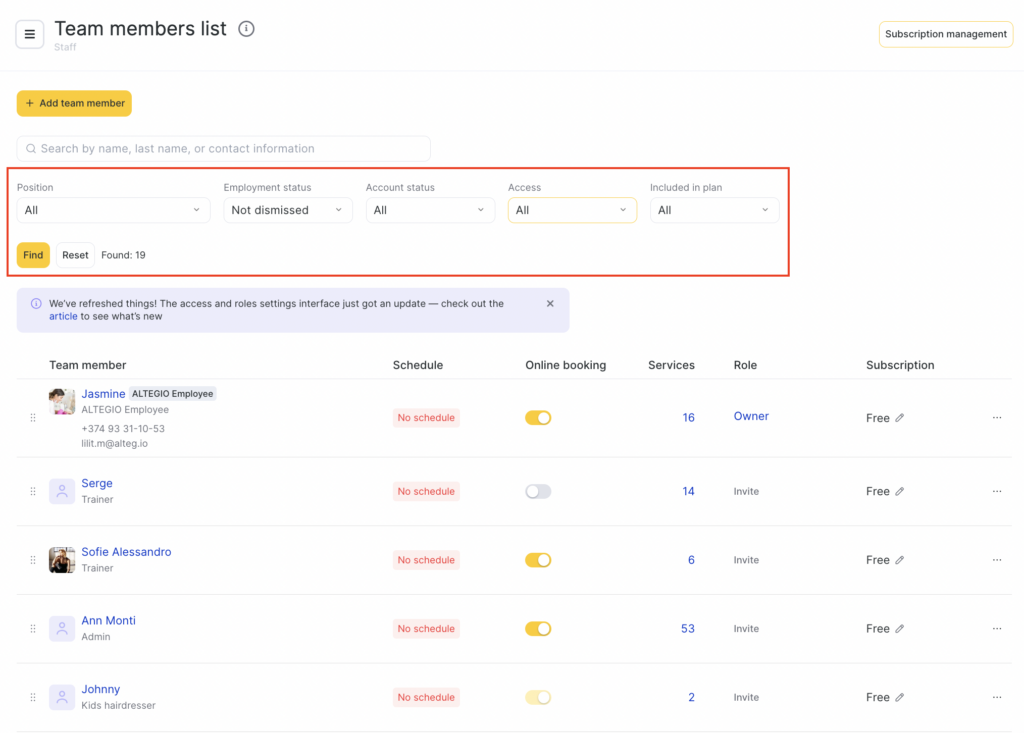
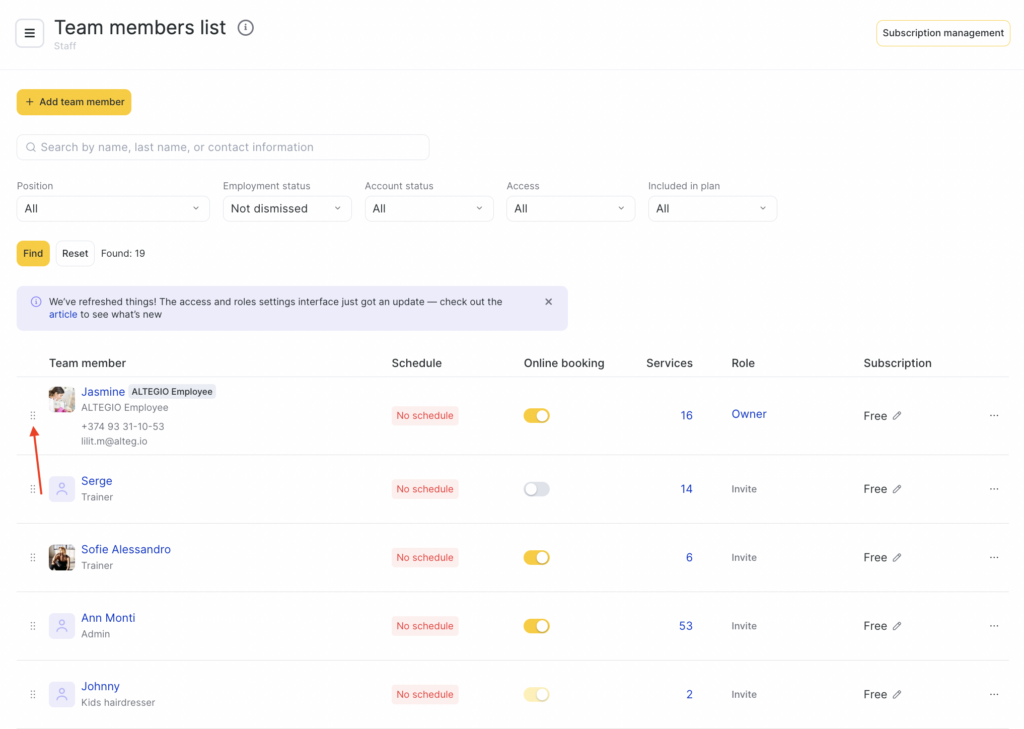
Sorting #
You can move team members within the list: click the sorting handle to the left of the team member and drag the row to the desired position. This order is reflected in the appointment calendar and the online booking widget.
For convenience, you can also view team members selectively by filtering the list by Positions, Access, subscription management, or by statuses Deleted/Not deleted and Dismissed/Not dismissed.