
Altegio’s capabilities allow for accepting online prepayments for services through the online booking widget. You can configure online prepayment for the services and/or team members you select.
Important
Altegio does not charge a fee for payments; the bank’s commission depends on the chosen partner.
Online Payment Statuses #
Online prepayment can be:
- Required — the client will not be able to book online without paying for the services.
- Optional — payment is not required for online booking.
General prepayment settings #
Payment can be either Enabled (required) for a specific service/team member or Disabled, and the active setting will take priority.
- If online prepayment is enabled for a service but disabled for a team member, then online prepayment for that service will still be required in the online booking widget, regardless of the team member’s payment settings. The client will not be able to book without paying for the service.
- If mandatory online prepayment is set for a team member, then online prepayment will be required in the widget for all services provided by that team member. In this case, the service payment setting must be either Disabled or Enabled (required).
How the payable amount is calculated #
- If online prepayment is disabled for a service but enabled in the team member settings, the full cost will be charged (based on the minimum price if a price range is specified).
- If online prepayment is enabled for a service, the amount charged will follow the service setting (partial or full payment).
- For individual services, you can set up partial prepayment. For team members, only full prepayment — 100% — can be configured.
Setup #
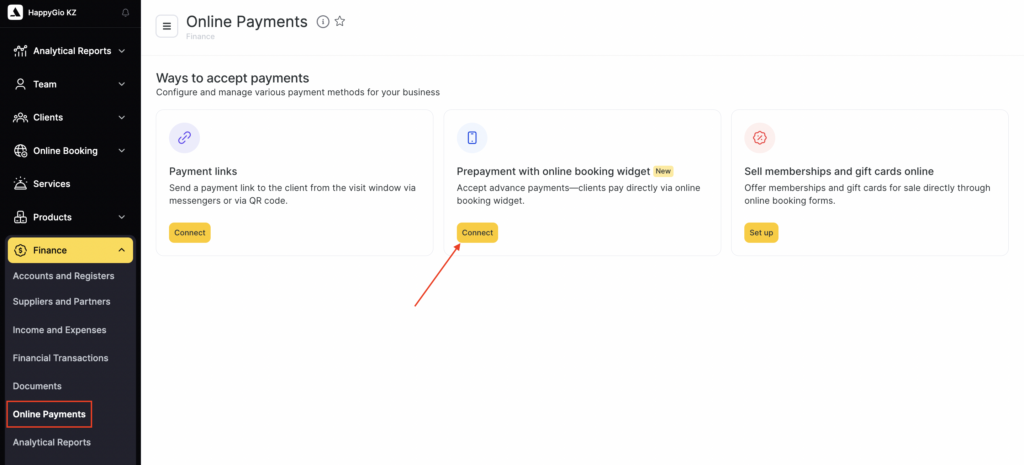
- In Administration mode, go to Finance > Online Payments and click Connect in the Prepayment in the online booking widget section.
- Select a payment system.
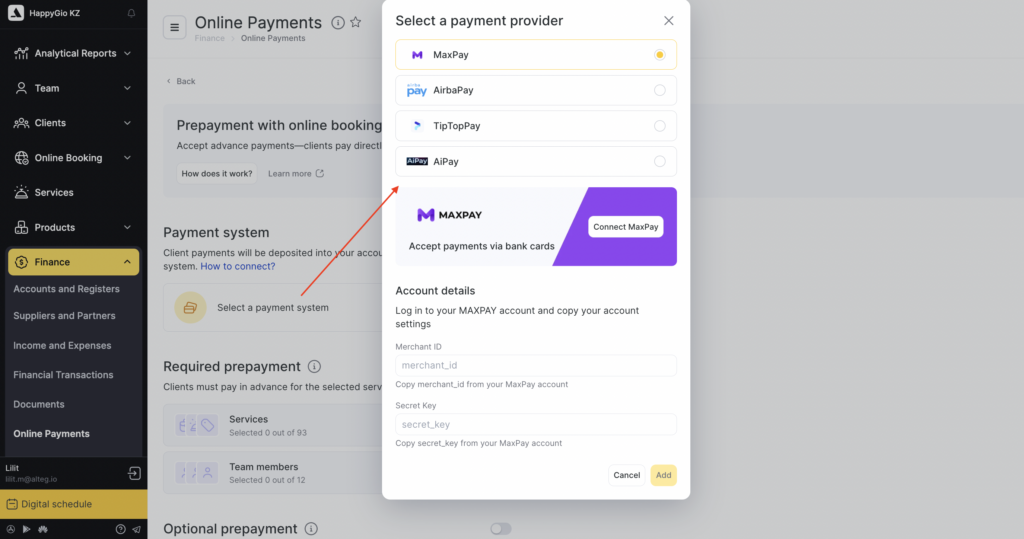
In the window that opens, enter your payment system account details. If you have not connected a payment system yet, you can do it directly from this window by clicking Connect. You can find more details about connecting the integration in the related articles. Then set up required and optional prepayment.
Setting up required prepayment #
You can set up online prepayment for selected services and/or team members
For services
#
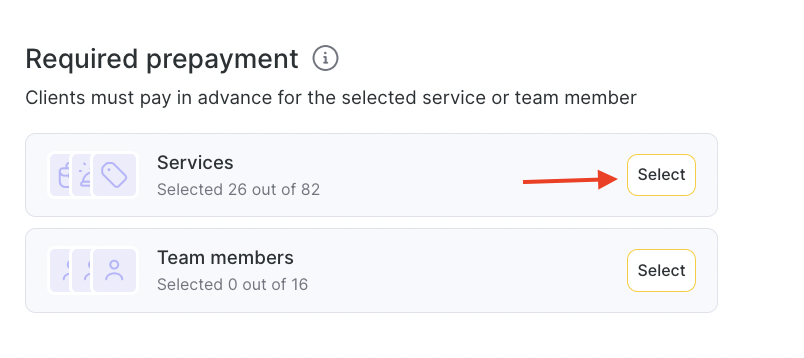
- In the Required prepayment section, click Select next to the services section.
- Expand the needed category and tick the services for which online prepayment should be enabled. If there are many services, you can use the search bar.
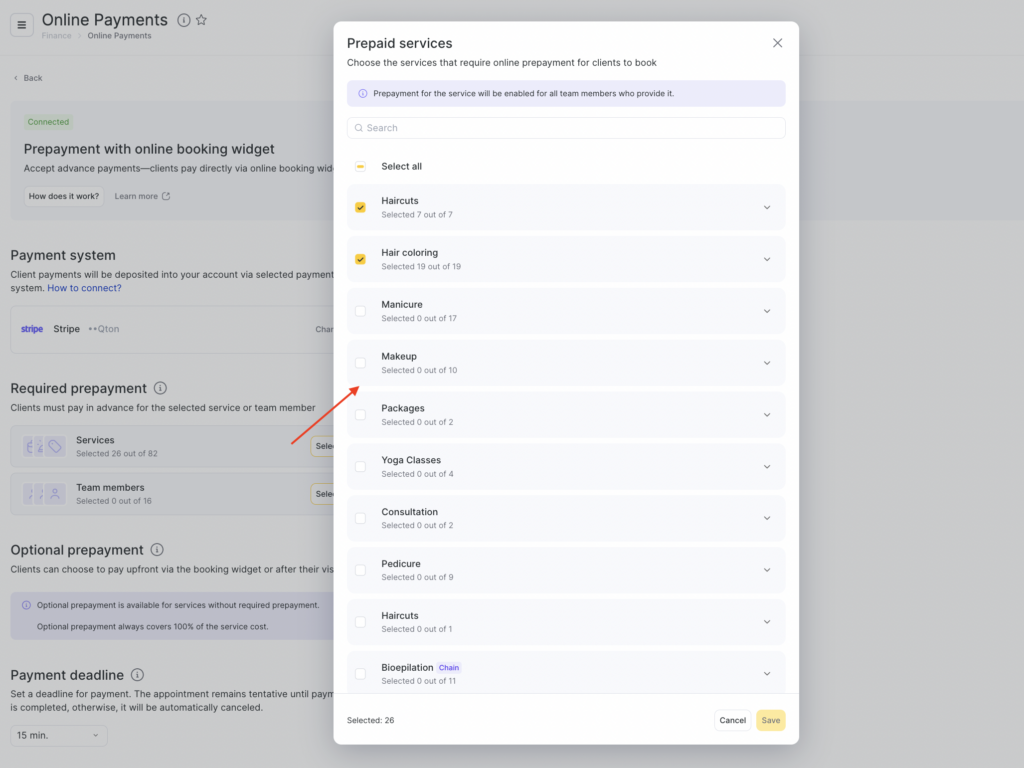
Next to the service name, specify the payment parameters. The prepayment can be set as a percentage or a fixed amount in currency. The prepayment amount is calculated based on the minimum service price. You can set up either full or partial prepayment. Then click Save.
Important
Partial prepayment can only be set up for individual services. For group events, prepayment can only be 100%.
For team members #
- In the Required prepayment section, click Select in the Team section.

- Expand the needed position and tick the team members for whom full online prepayment should be enabled. If there are many team members, you can use the search bar.
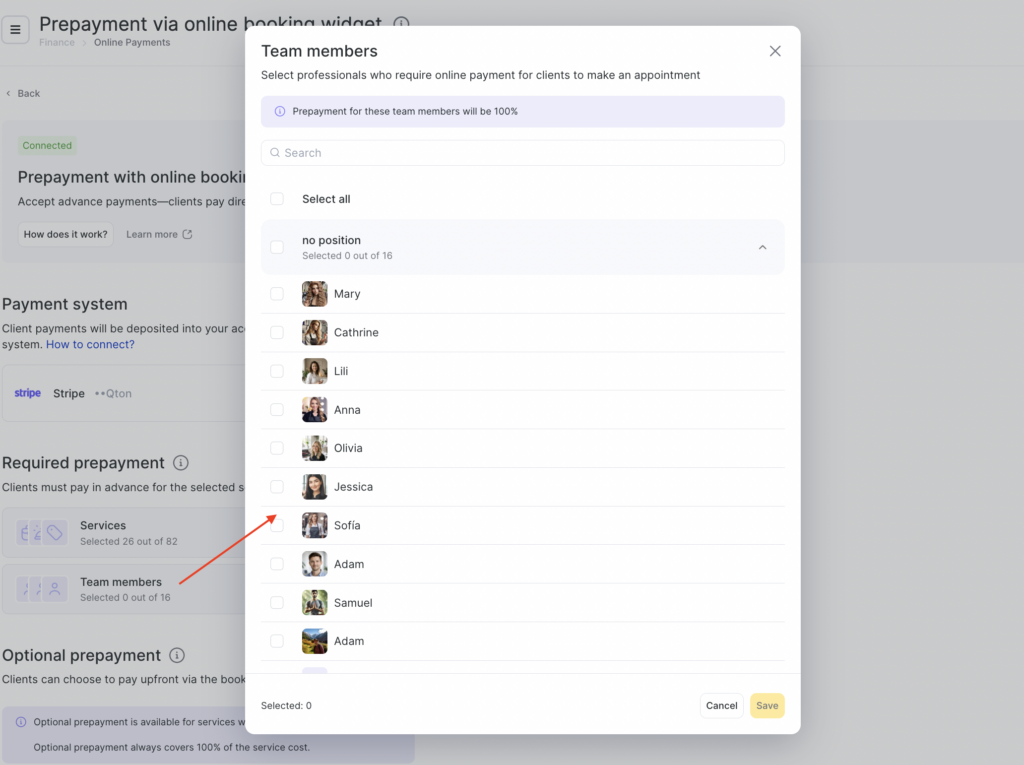
- Click Save.
Setting up optional prepayment
#
- Optional prepayment is enabled immediately for all location services, while required payment is configured for specific services or team members.
- Optional prepayment is always full (100%); partial setup is available only for required prepayment.
- It can work on its own or in combination with required payment. You can set required payment for the most popular services or specialists, while optional prepayment will apply to the rest of the services. To enable it, switch the toggle in the Optional payment section to the active state.
After optional payment is enabled, clients will be able to switch on the Pay online toggle in the online booking form if they want to make a payment.
Notes
— If required payment is not set up for services or team members in the location, but optional payment is enabled, then all services in the online booking form will have optional payment.
Choose the payment waiting time — from 5 to 60 minutes in 5-minute intervals. By default, the payment waiting time is set to 15 minutes. During this time, the booking is reserved, and if the client does not manage to pay, it will be canceled automatically.
— If the online booking form includes a team member for whom required payment is enabled, then all of their services will have required payment. A team member with required payment takes priority over all other settings, and there will be no optional payment for such a booking.
— If the online booking form includes some services with required payment set up and some without payment set up, while optional payment is enabled for the location, then some services will have required payment and others will have optional payment.
Payment waiting time
#
Choose the time within which the client must pay for the service. During this time, the booking is reserved, and if the client does not manage to pay, it will be canceled automatically.
If your schedule is busy, we recommend giving no more than 15 minutes for payment so that more clients can book. If you choose more than 15 minutes, your clients will have more time available to pay online.
After creating an online booking, the client will see that their booking is awaiting payment, as well as how much time is left to complete the payment.
Click Save or Connect if you have not activated a payment method yet.
Online prepayment in service or team member settings
#
Online payment can also be activated for a specific service or team member in their settings.
“Services” section
- Go to the Services section, expand the needed category, and click the service name.

- Open the Online Booking tab in the service settings and enable online prepayment.
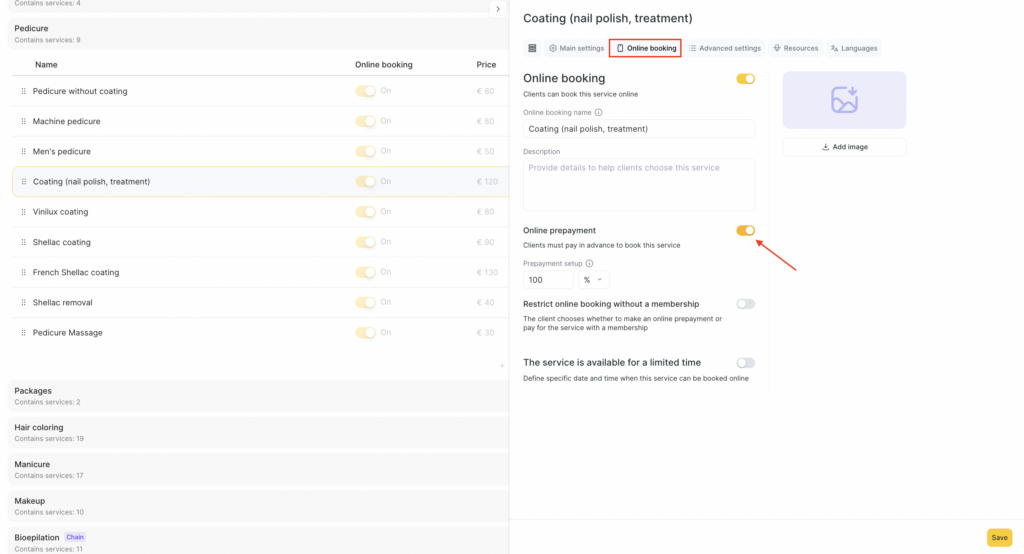
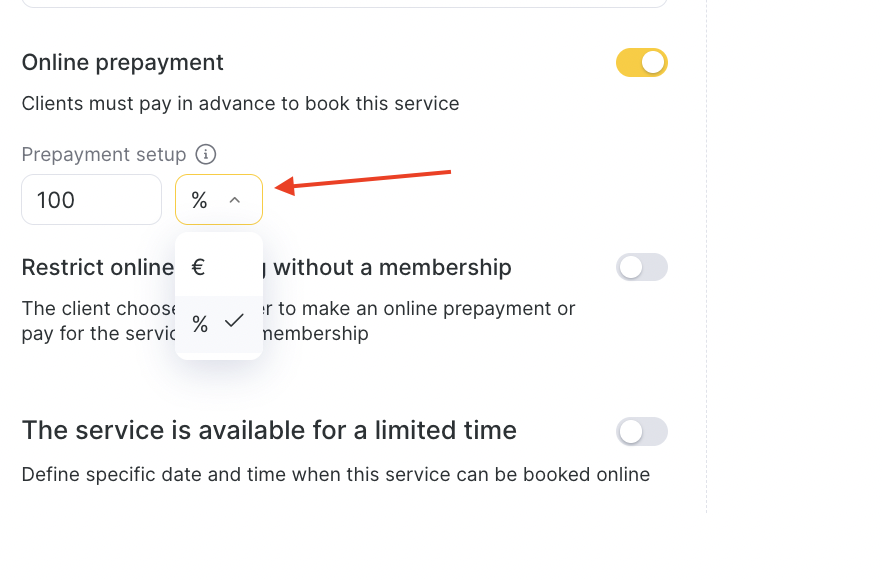
After enabling online prepayment, a field for its setup will appear below. The prepayment can be set as a percentage or a fixed amount in currency. The prepayment amount is calculated based on the minimum service price. You can set up full or partial prepayment.
Important
Partial prepayment can only be set up for individual services. For group events, prepayment can only be 100%.
- After changing the settings, click Save.
Team member section #
- Go to Team > Team members list and click the team member’s name.
- Open the Online Booking tab. On the page that opens, tick the checkbox in the Online prepayment field to enable it.
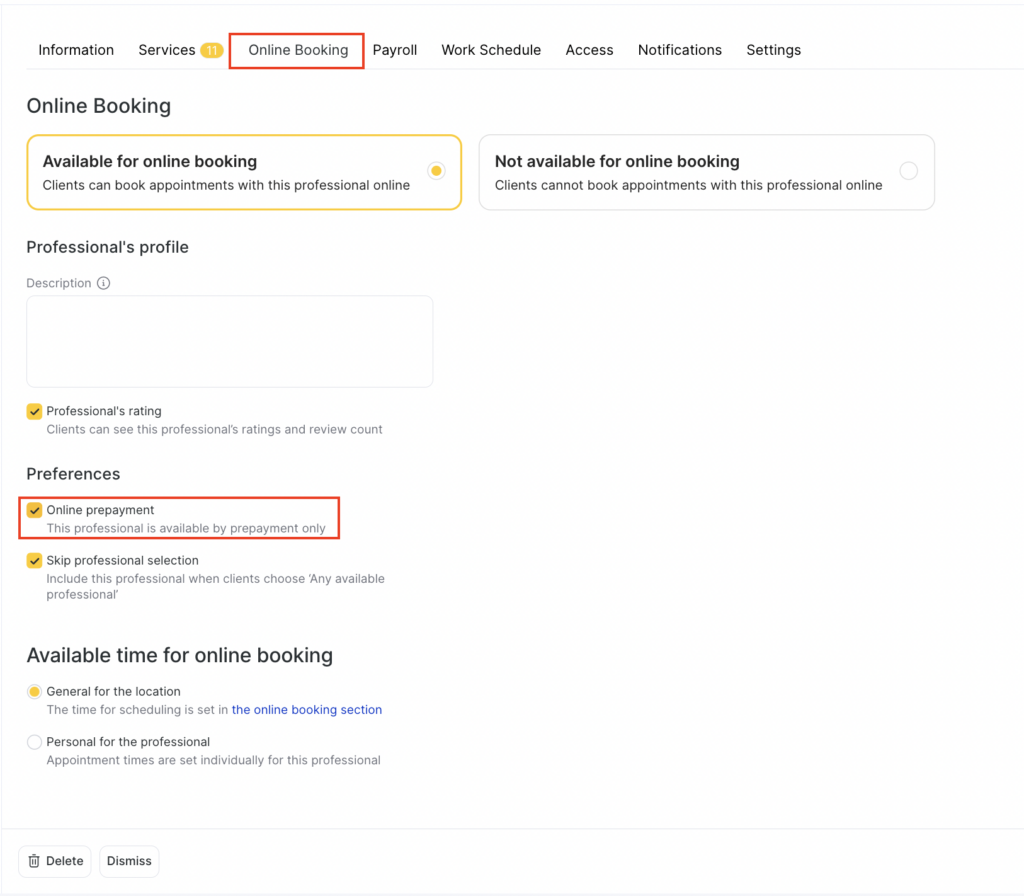
- Click Save at the bottom.
How the online booking widget will change after setting up online prepayment
#
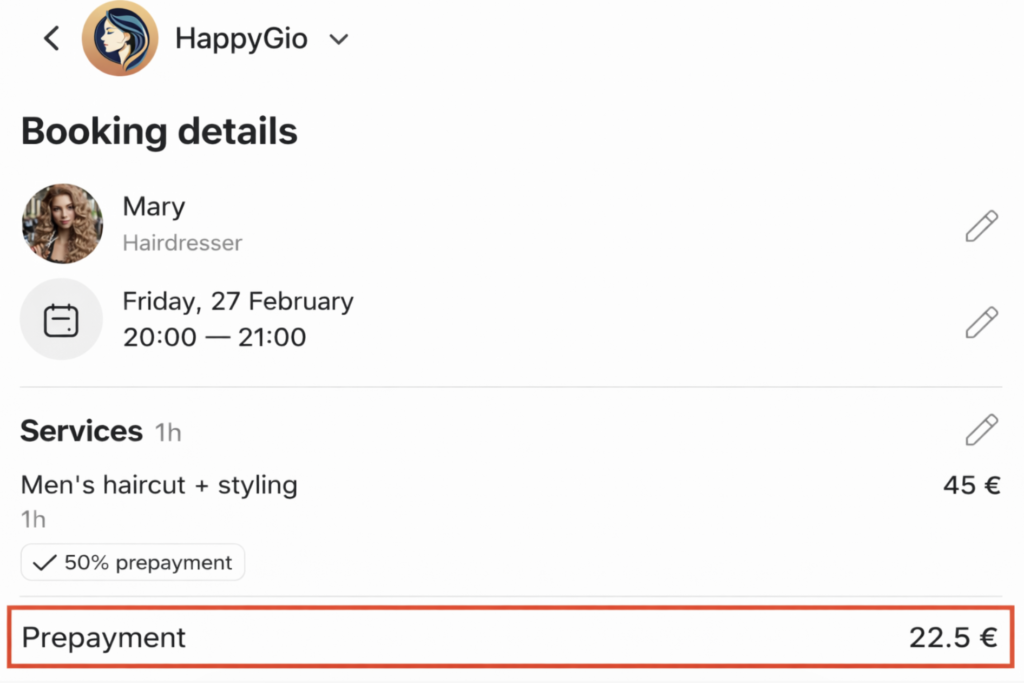
Services or team members with online prepayment are marked in the online booking widget with corresponding tags.

When completing the booking, your clients will see the booking details and the amount to be paid.
After clicking Pay, the client will be redirected to the payment system, where they can pay for the services.
After payment, the client can return to the online booking widget and see the payment status and booking details.
If payment is not received within 15 minutes (this is the default time if no other time was selected in the online prepayment settings), the booking created in the appointment journal will be deleted automatically.

