
To sell memberships and gift cards online, you need to connect a payment system integration, create membership and gift card types, and set up online payment and the online sales widget.
Setting up memberships and gift cards #
To configure memberships and gift cards, go to the Loyalty section in the chain interface of the program.
For more details on the setup, see the Memberships and Gift cards articles.
It is important to enable online sales for the memberships and gift cards you create.
To do this:
- Go to Loyalty > Membership types / Gift card types in the chain section.
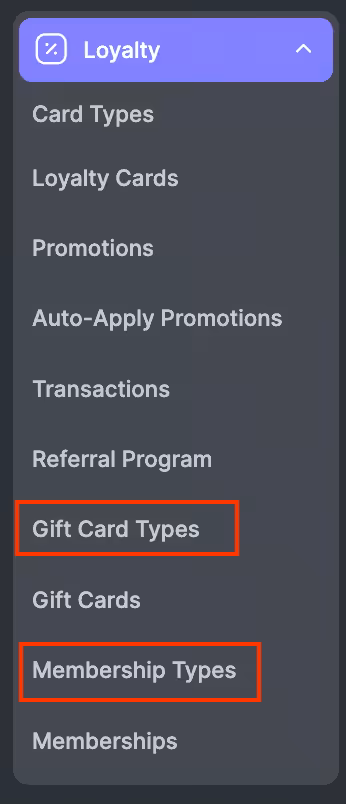
- Select the membership/gift card type you plan to add to the widget, or create a new one.
- On the General settings tab > Settings, enable the Available for online sale option.
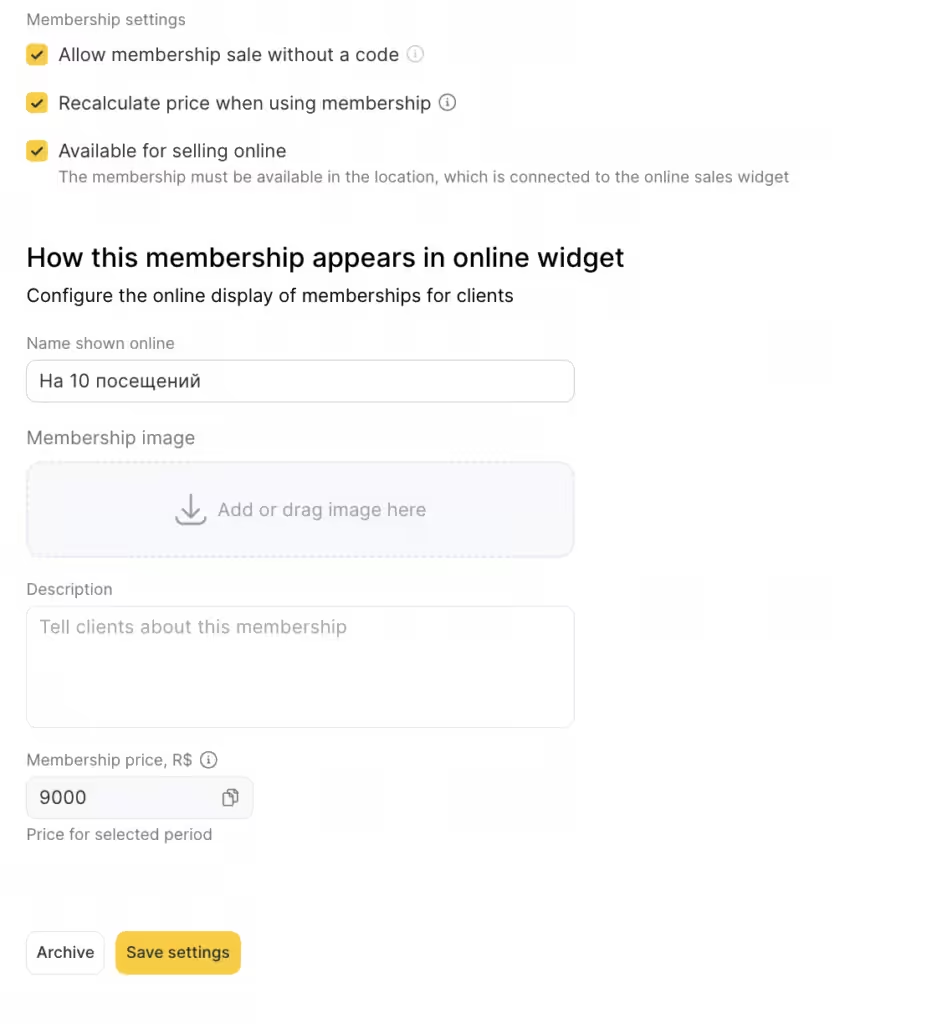
- In the menu that appears, add the online sales name, image, description, and price that the client will see in the booking form.
The price may differ from the actual value specified in the membership or gift card type settings: if the sale price in the gift card type differs from the face value, the online sales widget will display a discount field.
For a membership, this field will not appear. If you need to indicate that the membership is sold at a discount, you can add this to the Online sales name field.
Image upload recommendations:
The recommended minimum image size is 288 × 184 px, and the file size must not exceed 12 MB.
Use a horizontal image. If you upload a vertical one, it will be cropped to a horizontal format.
After adding the image, wait 5–10 seconds for it to upload to the server before saving the membership/gift card type settings.
Save the settings at the bottom of the page.
Notes
After an online sale, a code will be assigned to the membership/gift card automatically, and it cannot be changed.
The membership/gift card must be available in the location you selected in the Select branch field when setting up online sales.
On the Stripe checkout page, the name displayed for the gift card or membership will be the one specified in the Receipt name field in the product card settings under Inventory > Products of your chain, not the Online sales name specified in the membership/gift card type settings.
Connecting a payment system integration #
Different payment services may be available in different regions.
Choose the one that applies to you — the full list of supported payment systems is available via the link.
Setting up online payment #
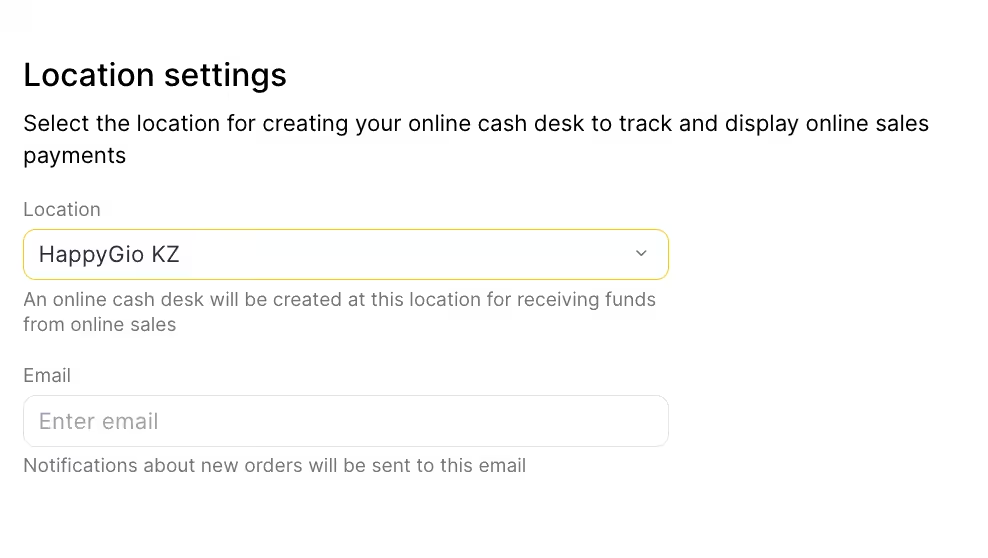
- After you create and configure memberships and gift card, go to the location in Administration mode and open Finance > Online payments.
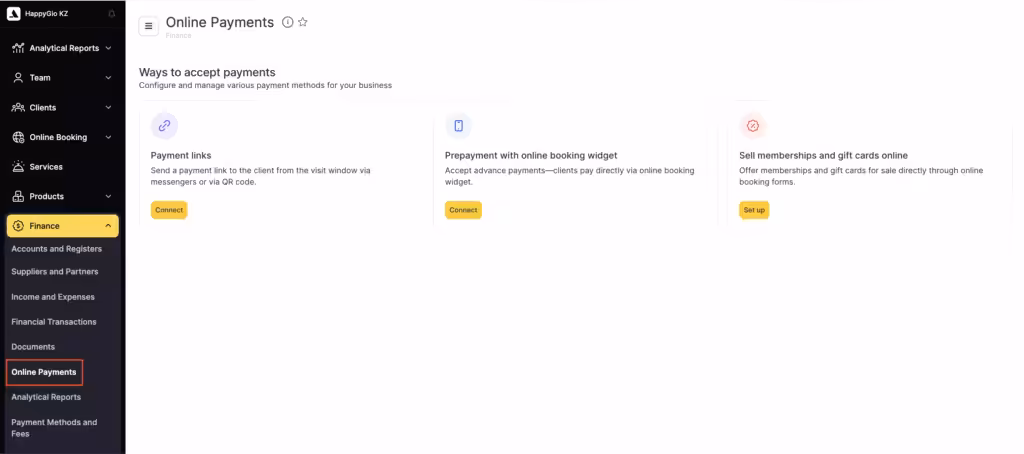
- Click Set up in the Online sale of memberships and gift cards window.
- Select the payment method: Cashless payment.
Connect the payment system by entering the required integration parameters. - Specify the location where a separate cash register will be created for proceeds from online sales, and the email address where notifications about new orders will be sent.
All membership and gift cards types you plan to sell online must be valid in the selected location.
Setup for multiple locations #
Create a separate chain for each location. For more details on creating a chain and linking it to a location, see the Creating a chain article.
Create and configure gift card and membership types in these chains. All loyalty items created in a given chain will apply and be displayed only in the linked branch. Detailed setup instructions for all loyalty types are described in the Loyalty section.
If you plan to separate revenue only by location within one legal entity, you do not need to create a separate payment system account — use the same details as in the main chain.
If you need to separate cash flows across multiple legal entities, sign a contract with the payment system for each location.
Setting up the online sales widget #
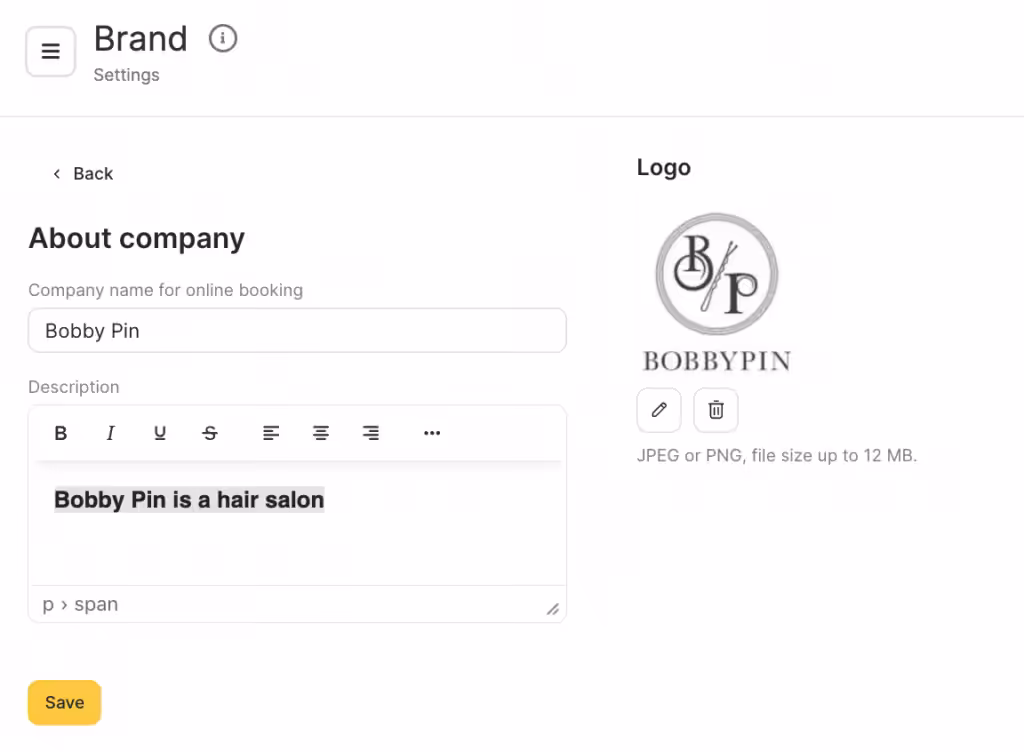
- On the Widget tab, check that the company information is correct (name, contact details, logo). If needed, you can change it in the branch interface under Online booking > Settings > Company information > Brand.
- Below, you can add a message that clients will see in the widget: a heading and message text.
- Add a personal data processing agreement. If you leave the fields empty, they simply will not be shown in the form. Review the offer and fill in the missing information: company name, contacts, address, company details, and license number (if you provide medical services).
Enable the Send an automatic email to the client after purchase option. After purchase, the client will receive an email with the purchased membership or gift card.
By following the link in the settings, you can see what a sample email looks like. The sample email does not display all branch details, but the real email the client receives will contain the correct information.
After finishing the setup, do not forget to save the settings and activate the widget. If you enabled the widget after saving the settings, click Save once again.
To see how clients view the form, click Open widget (the sales form becomes active only when the Enable widget option is turned on).
The link to the online sales form is generated automatically, just like the online booking form link.
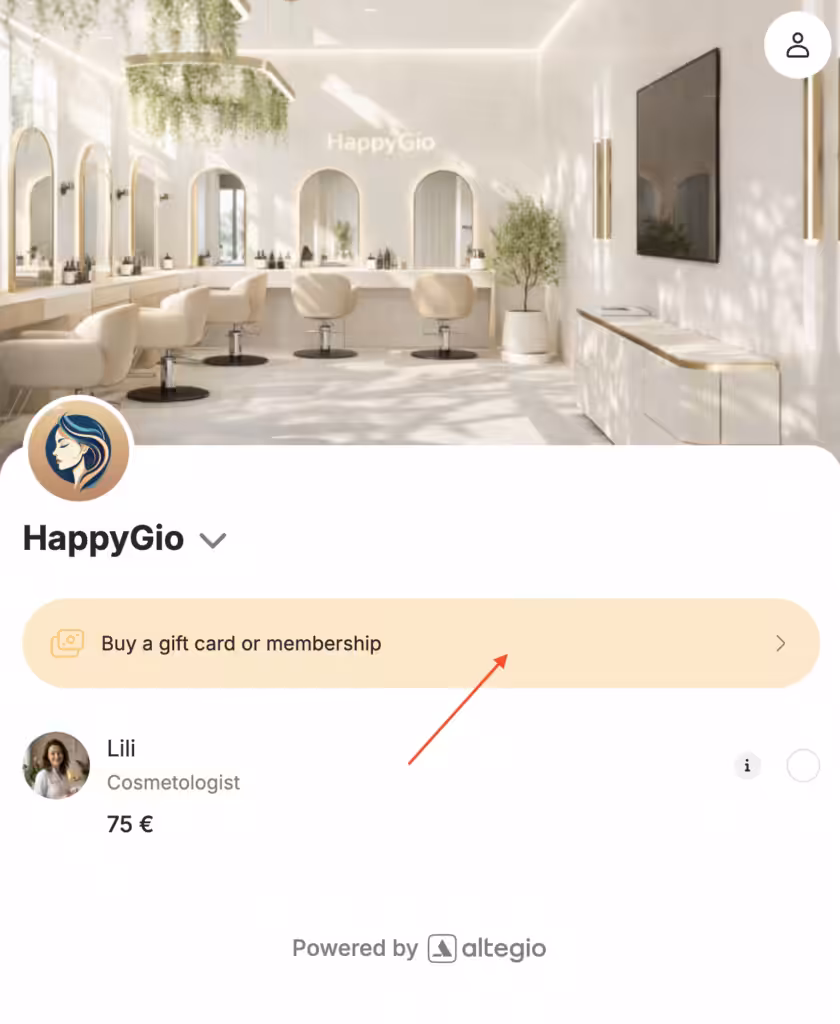
Adding an online sales button to the online booking form #
After activating the widget, you can also add an online sales button to your online booking widget.
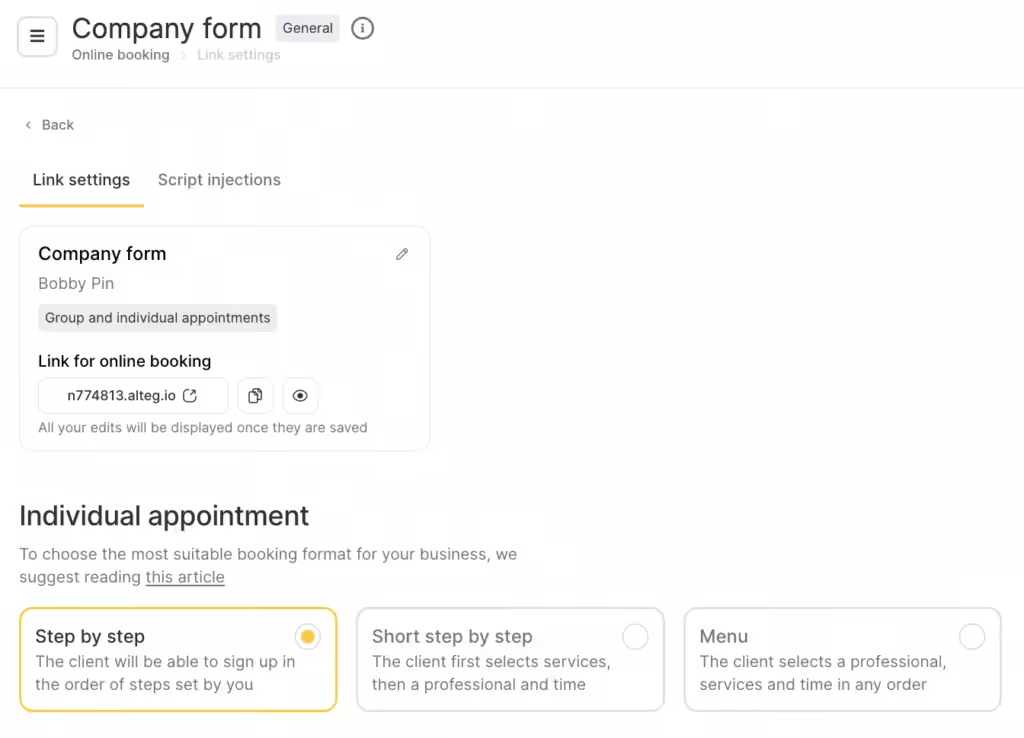
- Go to Online booking > Online booking links in the branch interface.
- Click the form name or the Configure button.
- On the Link settings tab, in the Sale of memberships and gift cards field, specify the chain whose settings will be used for online sales.
- After making changes, click Save.
The button color depends on the primary color in the widget design settings.
If the widget is a chain widget, you will not be able to configure the online sales button in it.
For the button to appear in a chain widget, you need to specify the required chain in the Use online sales settings from chain field in the main form (not an additional or chain form). However, in this case the button will be displayed only in the widget of the branch where this setting was made.
For the button to be shown when selecting each branch in the chain widget, you need to configure the online sales button in the main widget of each location in the chain.
If you are not planning to sell online but want sales to be displayed in the online booking system, make sure Stripe or our other payment systems are supported in your country.
For more information on creating and configuring online booking widgets, see here.
After saving, the sales form is available via a direct link, which you can send to clients or promote on social media.

