There are two types of spaces in Altegio: locations and chains. Locations — with yellow highlight on the left, chains — with purple highlight on the left. Locations and chains have different sections.
To open the chain you need to do the following:
Click the name of the location in the top left corner.
In the drop-down list select the desired chain.
Creating membership type
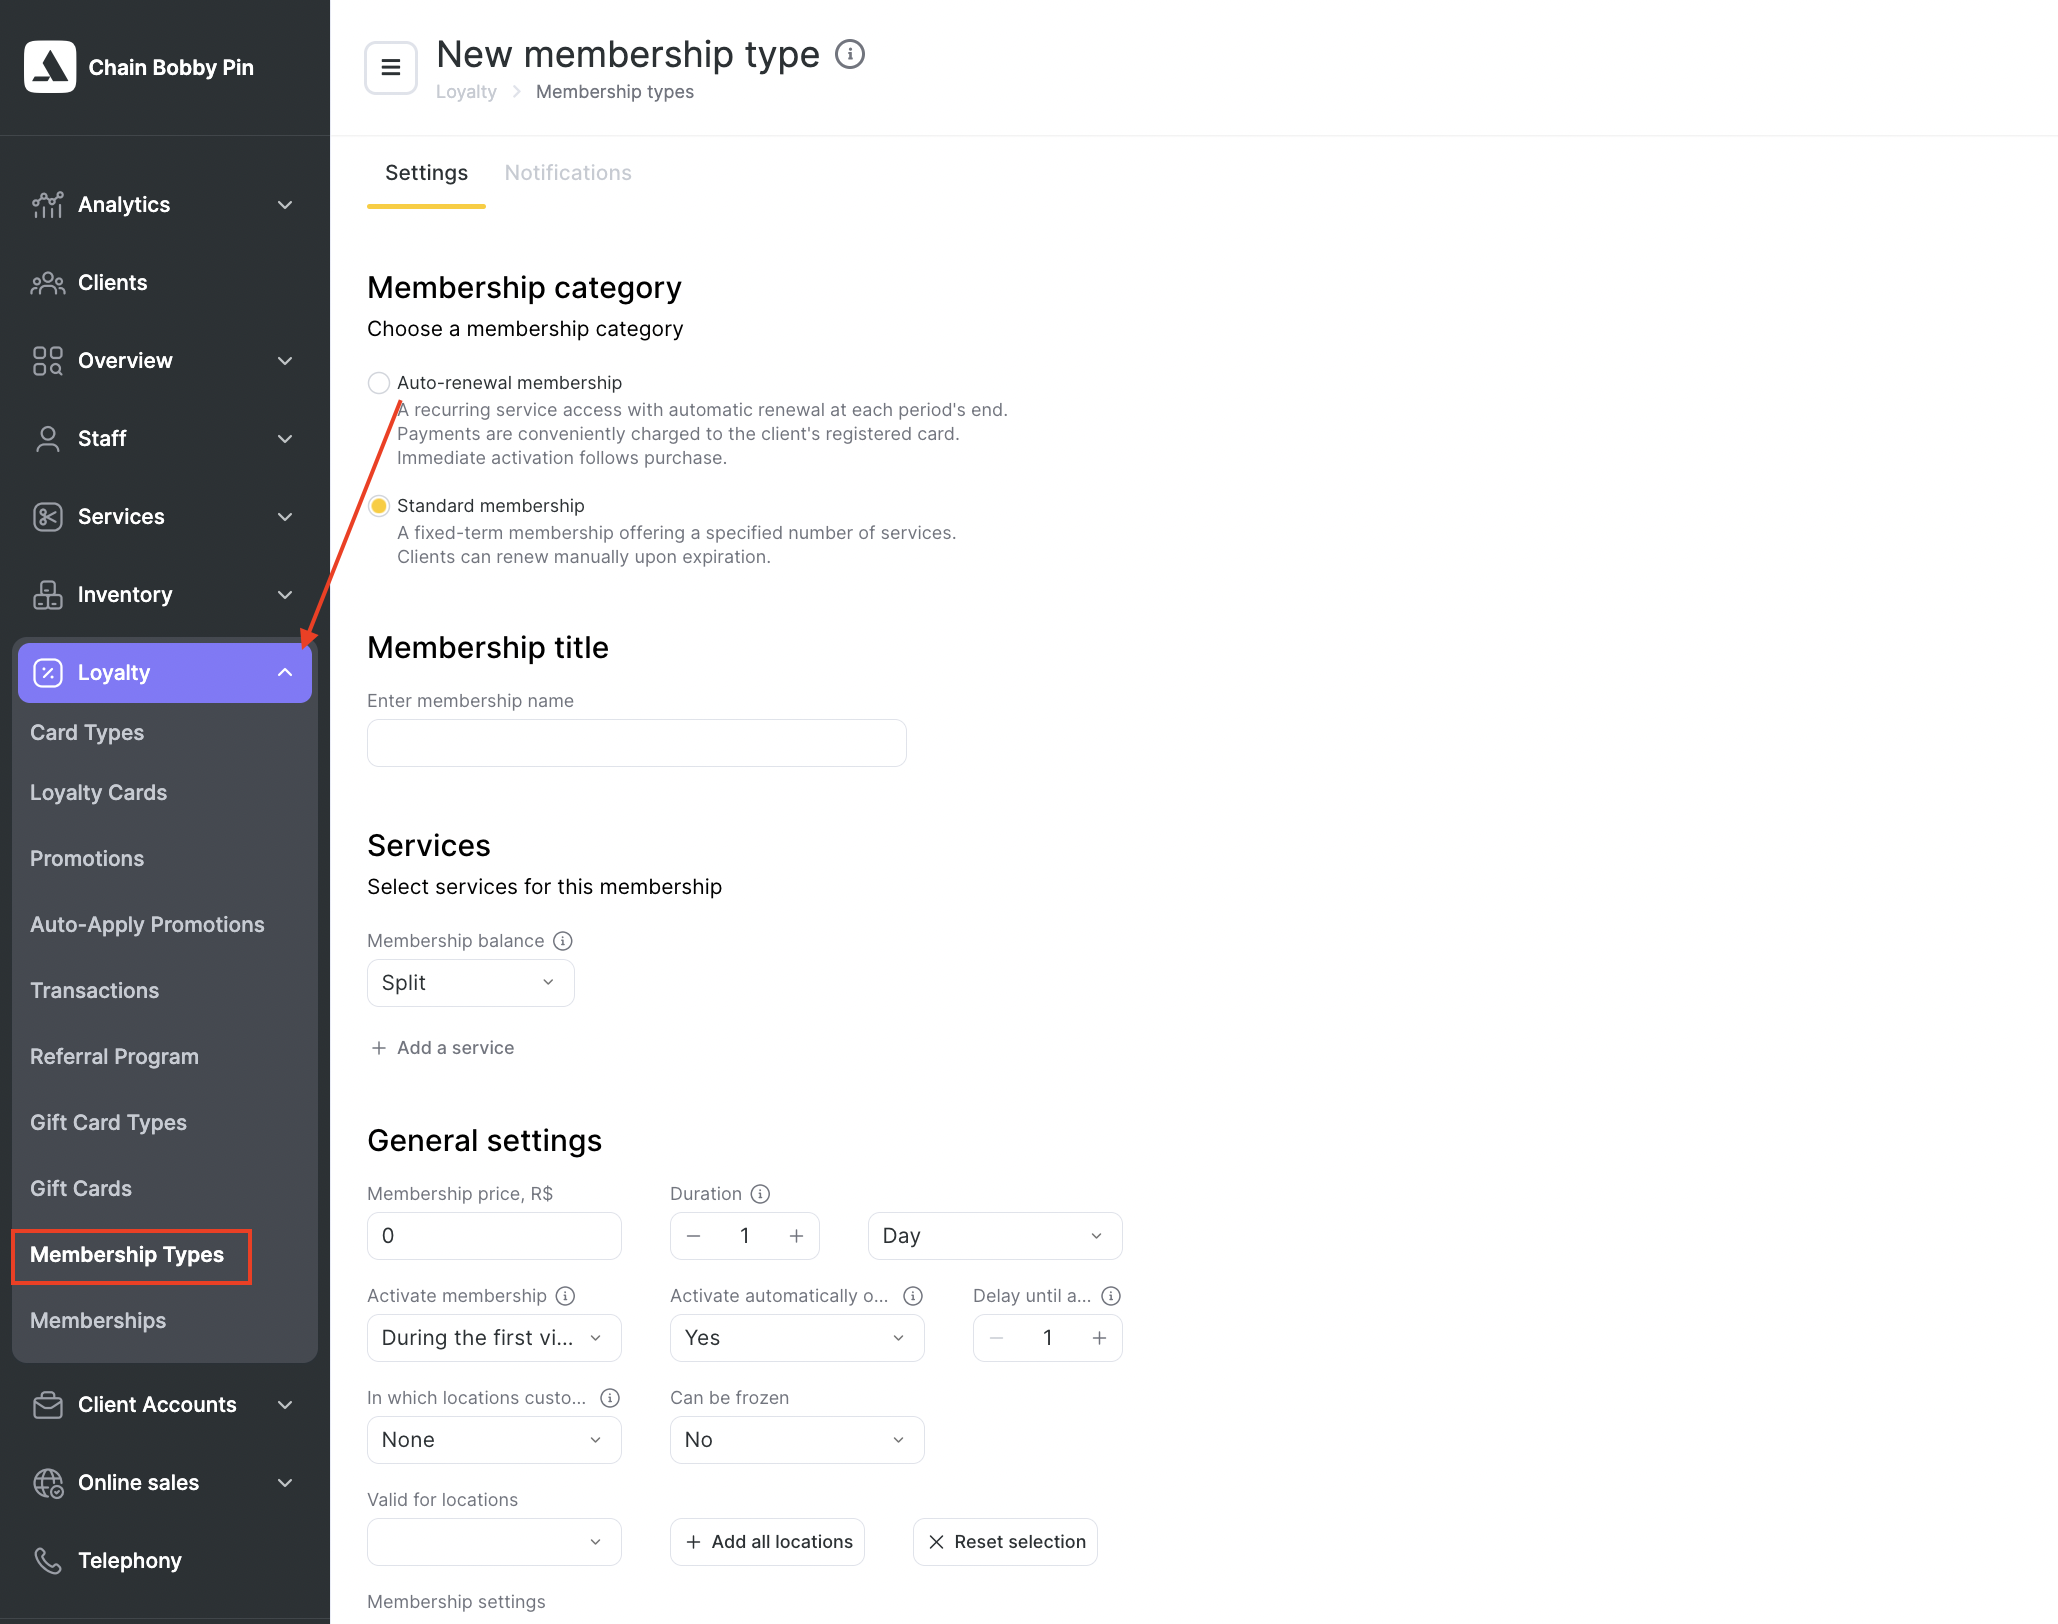
In the chain interface go to the Loyalty > MembershipTypes section and click the Add a membership type button. On the new page that opens indicate all information needed and click the Save button.
Settings tab
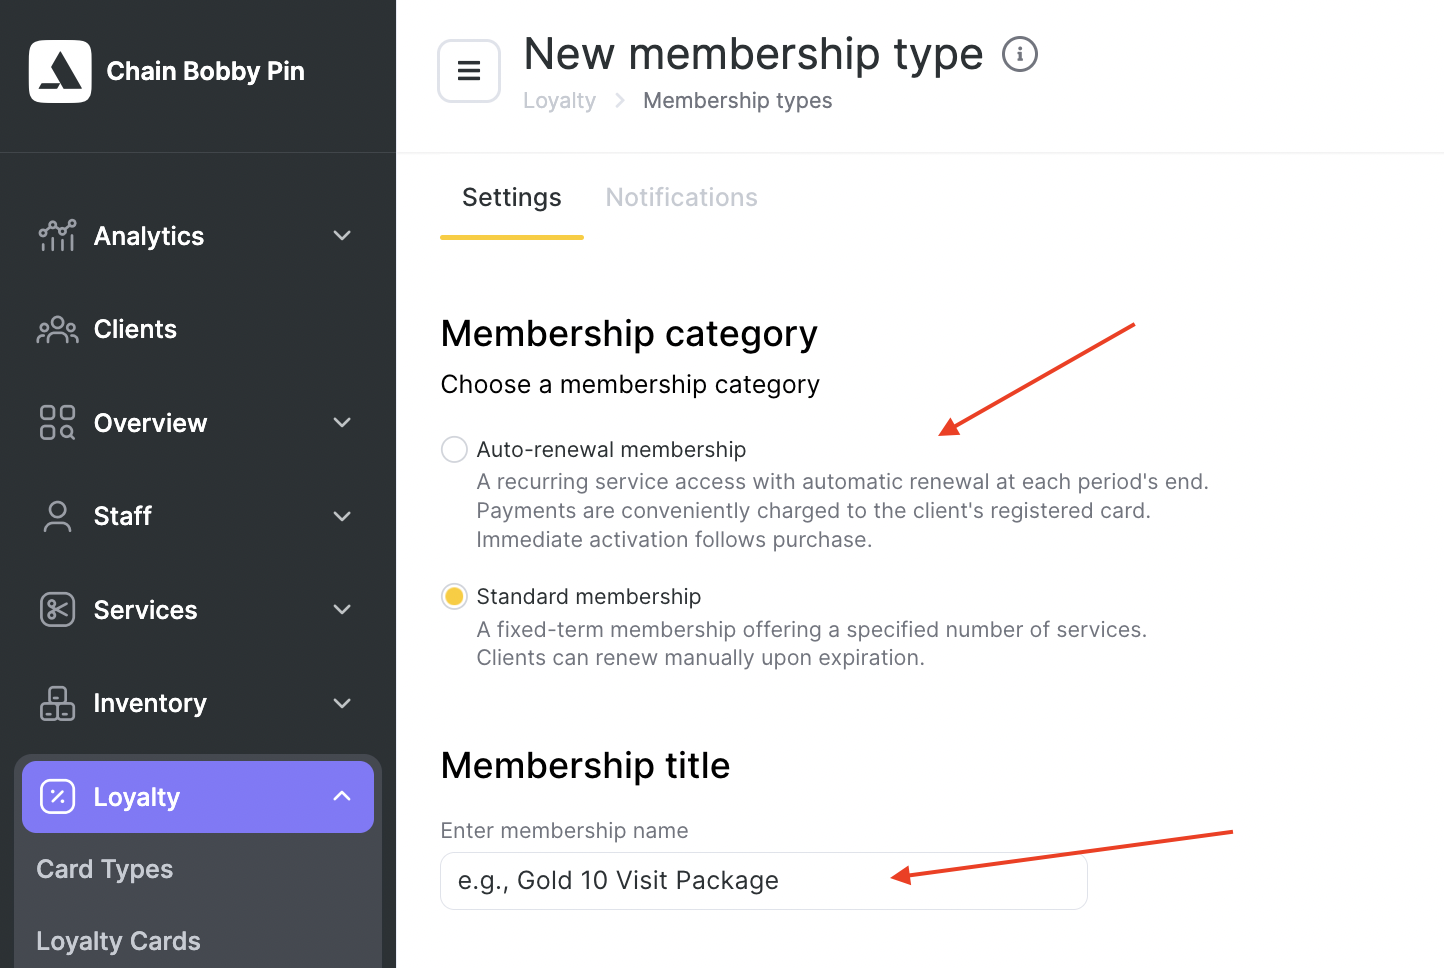
Step 1: Choose a Membership Category
Select the Standard membership option to create a fixed-term membership that includes a specified number of services. This type of membership allows manual renewal after expiration.
Auto-renewal membership is available for recurring memberships.
Step 2: Enter the Membership Title
In the Membership title field, input a clear and recognizable name for your membership (e.g., “Gold 10 Visit Package”).
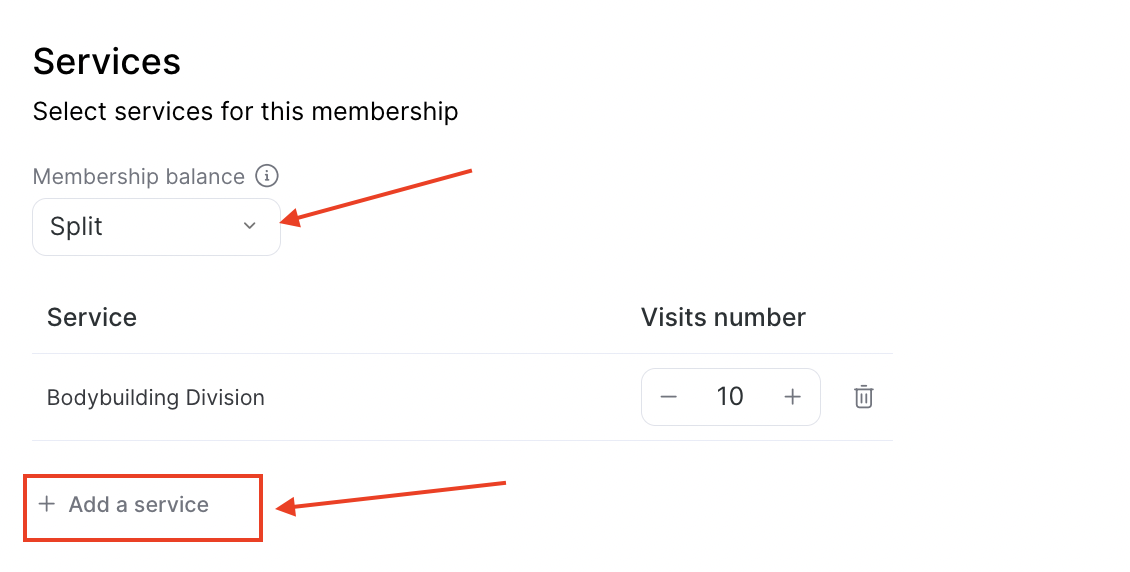
Step 3: Configure Services
Under the Services section:
Membership balance: Choose how the included services are distributed. Options include:
Split: Services are counted individually and tracked per type.
Total: All services draw from a single pool of visits.
Click + Add a service to specify which services are included in the membership.
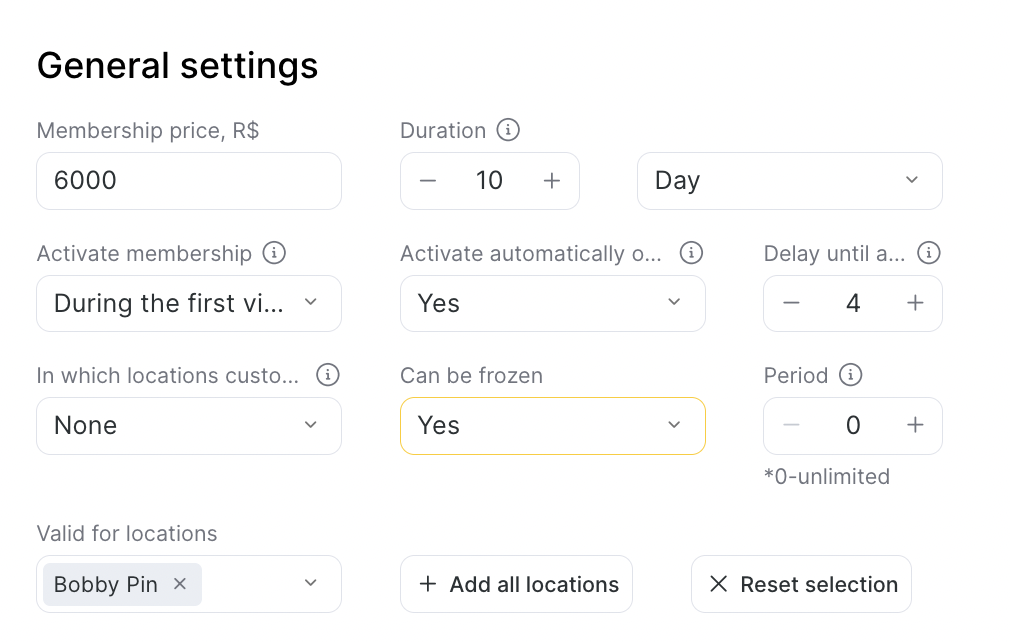
Step 4: General Settings
Set the pricing and usage rules for the membership:
Set the pricing and usage rules for the membership:
Membership price, R$: Enter the cost of the membership.
Duration: Define how long the membership remains valid (e.g., 1 day, 1 month).
Activate membership: Choose when the membership becomes active:
During the first visit
Upon purchase
If in the Activate automatically on long non-attendance field you’ve indicated Yes then in the Activate from the moment of sale through (in) field you’ll be able to indicate when a membership should be activated after sale. Learn about this in more detail in thearticle.
Activate automatically on purchase: Select “Yes” to automatically activate when bought.
Delay until activation: Set a delay period (if needed) before activation begins.
In which locations customers can use membership: Restrict usage to specific locations or choose “None” to allow all.
Can be frozen: Choose whether clients can pause (freeze) their membership. Learn about this in more detail in thearticle.
Valid for locations: Select the physical locations where the membership is valid. Use + Add all locations or Reset selection to modify.
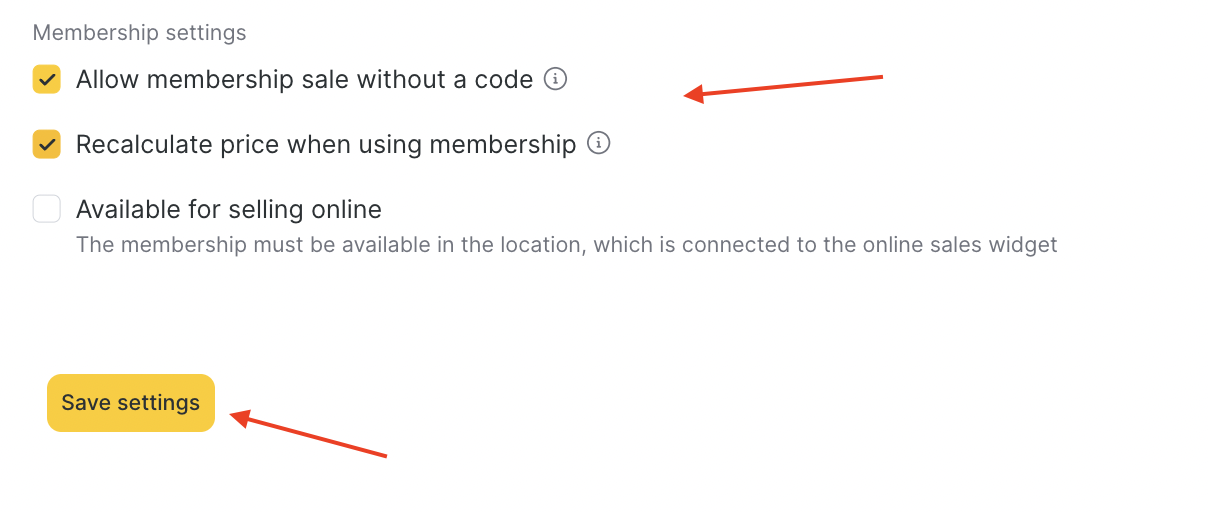
Step 5: Membership Settings (Optional)
Additional settings for advanced control:
Allow membership sale without a code. These memberships are valid only if client is specified during the sale.
Recalculate price when using membership: Adjusts the service price dynamically when redeemed under membership. For example, a single visit costs $100. With an 8-session membership priced at $600, the recalculated service cost per session is $75. Selecting this option will include the $75 session cost in both the daily financial report and employee salary calculations, as outlined in the ‘Payroll Rules’
Available for selling online: Makes the membership purchasable through the online widget. (Requires the membership to be available in the selected locations.)
Detailed information on online sales can be found in thearticle.