The Appointment Calendar is the main tool for the administrator. In the Calendar, you can view all visits, resources, the client card, their full visit history, preferences and statistics, as well as sell products. You can configure the interface of the Calendar in Settings > Main settings > Appointment Calendar — select the required options and click Save.
Basic settings #
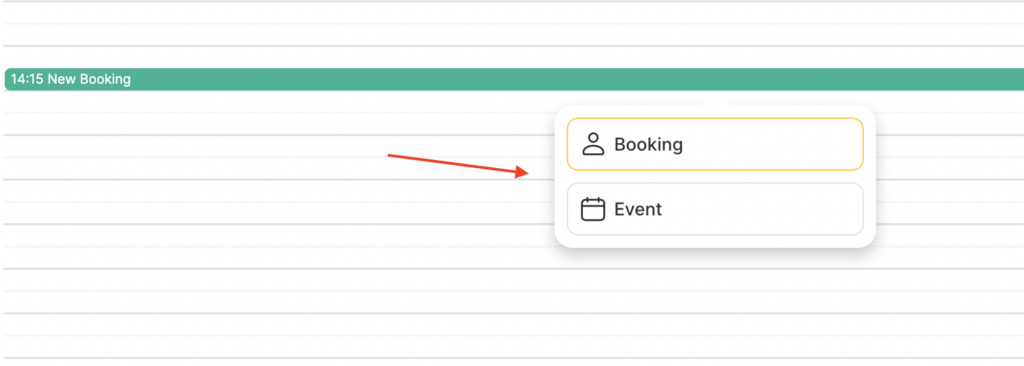
- Appointment type – select which type of appointment will be created by default:
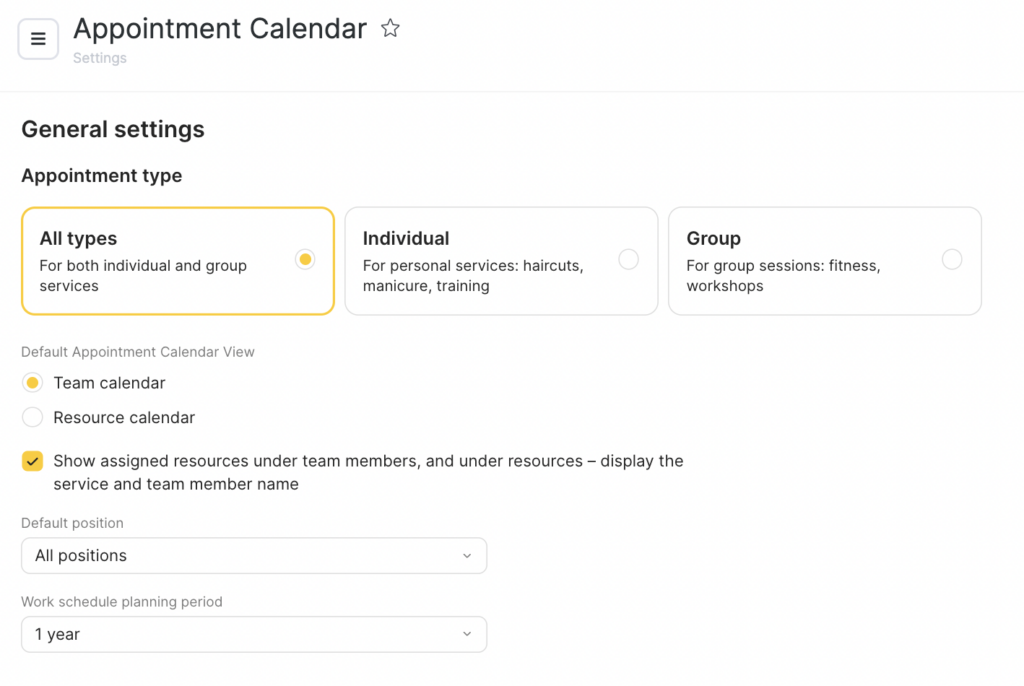
- All types. When creating an appointment, two buttons will appear: Appointment (for individual appointments) and Event (for group appointments).
- Individual. When creating, the visit window for personal services will open.
- Group. When creating, the visit window for group classes will open.
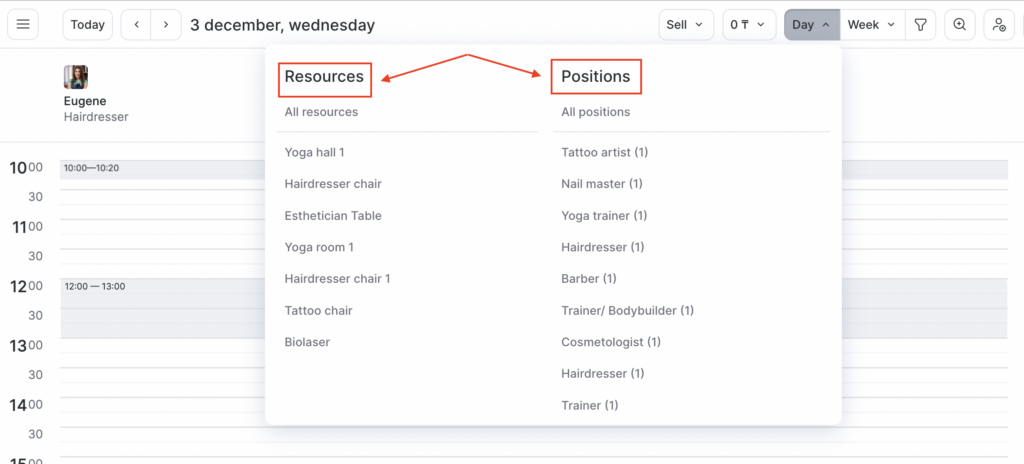
- Default Appointment Calendar view – select which schedule will be displayed by default: Team schedule or Resource schedule. If you selected Team schedule, specify which position’s team members will be shown by default. For more details on configuring positions, see the Team member positions article. If you selected Resource schedule, specify the default resource. For more details on resources, see the Resources article.
- If needed, tick Show assigned resources under team members, and under resources – display the service and team member name.
This option helps reduce switching between calendar modes, speeds up the receptionist’s work when creating appointments, and helps clients quickly navigate to the correct resource. With this option enabled, the following data will be displayed in the appointment thumbnail in the Appointment Calendar and in the tooltip when hovering over the status icon:- In Team schedule – the resource booked by the team member.
- In Resource schedule – the service name and team member’s name.
- Work schedule planning period – you can configure the schedule planning period for staff that will be visible in the Appointment Calendar. Available options: 1 year, 1 year 6 months, 2, 3, 4, and 5 years.
Appointments and visits #
This block contains settings related to appointments.
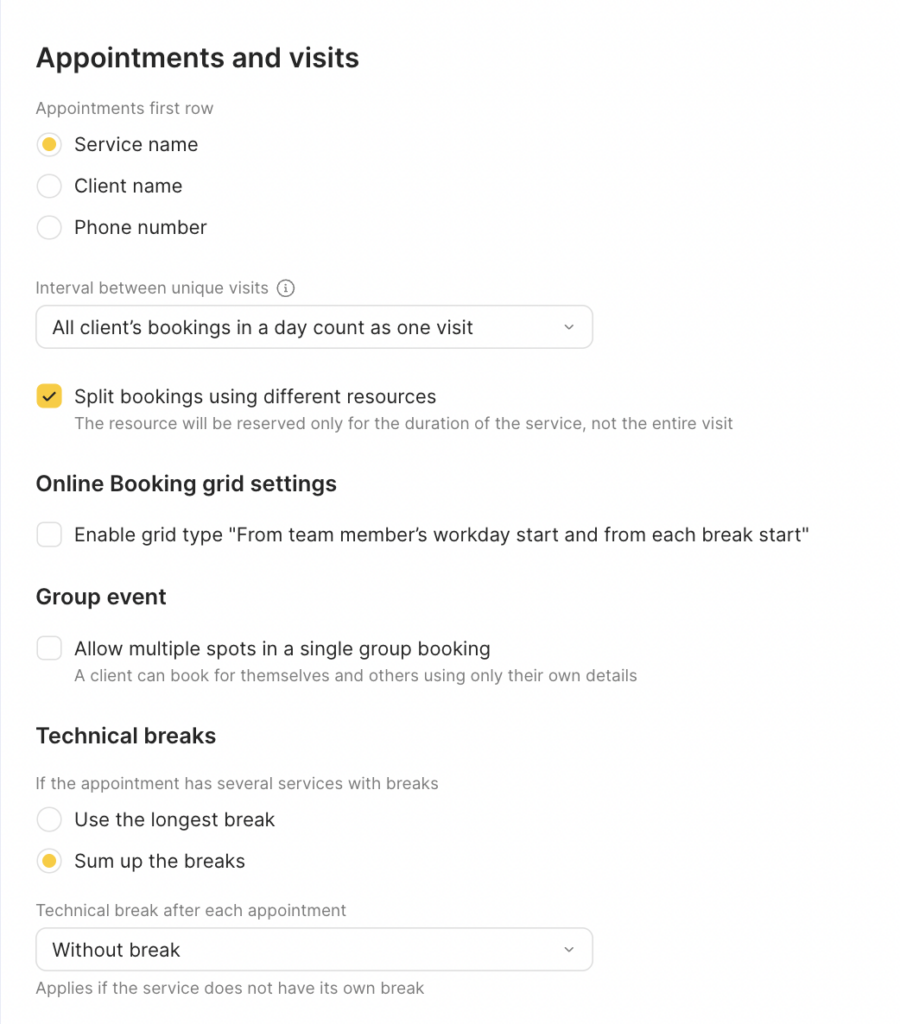
- Appointment first row – specify what will be shown as the first line in the appointment: service name, client name, or phone number.
- Interval between unique visits – specify which interval is used when creating separate visits. This setting allows you to group or split a client’s appointments during the day. When a client receives multiple services in one day (for example, manicure and pedicure), you can combine them into a single visit and see information about all appointments in one window. The interval allows you to define the time range within which appointments will be combined into one visit. This also lets you set the status and process payment for all services at once.
- Split bookings using different resources – when creating an appointment for multiple services, resources for each service are booked for the entire appointment time. Tick this option so that the system creates separate appointments for each service, booking resources only for the duration of that specific service.
This feature does not apply to online booking, since the client cannot know in which order the services will be performed. - Group event – allow booking multiple spots within a single appointment – enable this so that when booking a group event it is possible to reserve several spots for one client, then set a limit on the number of spots.
This option allows clients to book a group event for themselves and their friends or family members without having to create multiple separate appointments for each attendee.
In the Technical breaks block, choose how the break duration will be distributed if the appointment includes several services with breaks:
- Use the longest break – the maximum break from the calendar settings or from specific services will be applied.
For example: the appointment includes “Haircut” with a 30-minute technical break and “Styling” with a general technical break of 15 minutes for all services. In this case, the appointment will automatically get a 30-minute technical break. - Sum breaks – the technical break will be the sum of the values set for the branch or specific services.
For example: the general break for all services is 15 minutes. If the appointment includes 2 services, the technical break will be 30 minutes; if 3 services – 45 minutes, and so on.
Or: one service has a 10-minute technical break in its settings, and the general branch break is 15 minutes. In this case, for two services the break will be 25 minutes.
Important
The total duration of all technical breaks in one appointment cannot exceed 1 hour.
In the Technical break after each appointment field, choose the break duration for all services – from 0 (no break) to 1 hour, in 5-minute increments. This setting will be applied to all appointments; if needed, the technical break can be adjusted in the calendar or in the appointment window (for example, you can change the duration manually or remove it).
Click the Save button at the bottom.
You can also configure technical breaks separately for each service. For more details, see the corresponding article.
Client management #
In this block, you can configure how you work with clients in the Appointment Calendar.
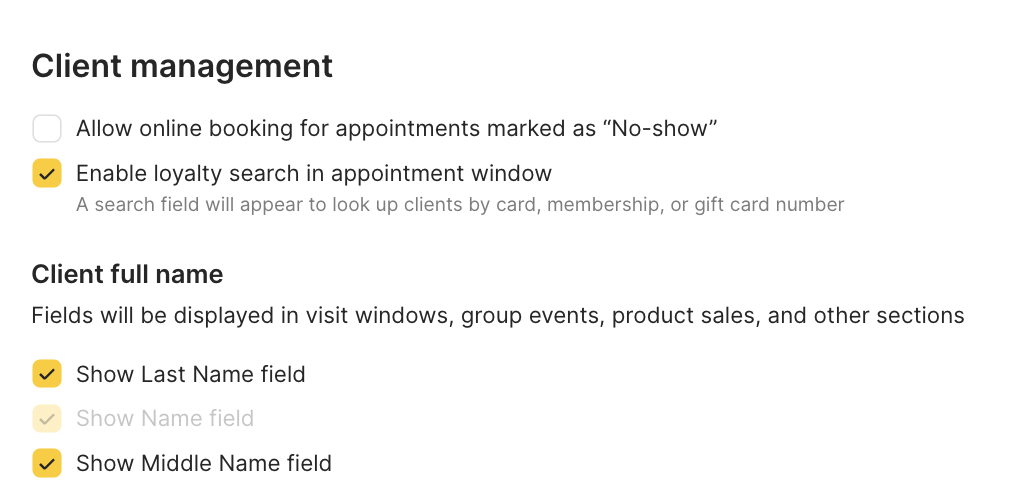
- Allow online booking over appointments with the No-show status – allow clients to book over appointments with the No-show status.
This setting applies to appointments created via the calendar and the online booking widget. If a visit in the calendar has been changed to the “No-show” status, this time slot will be freed for booking, without having to delete the visit that was cancelled. - Show loyalty search in the appointment window – enable the field for searching a client by card number, membership, or certificate.
- Client full name – enable additional fields for the client’s last name and/or patronymic. More details on this setting can be found here.
- Chat with client. If you have an SMS aggregator/chatbot connected, a Chat with client in WhatsApp button will appear in the appointment window, allowing you to start a conversation with the client directly from the appointment window.
You can find more information on how to set up chat with clients in the corresponding article.
Workload #
The circle fill in the calendar reflects team members workload level.
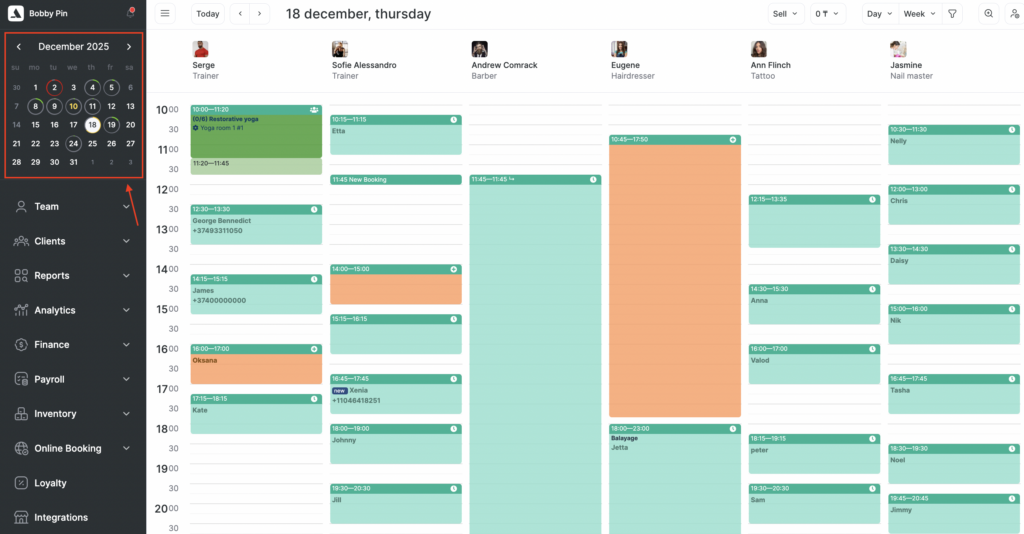
Color meanings (a working day including breaks = 100%):
- Gray — no appointments;
- Green — a small number of appointments, less than 50% of the time is booked;
- Yellow — a moderate number of appointments, more than 50% but less than 80% of the time is booked;
- Red — a high number of appointments, more than 80% of the time is booked;
- A gray number without an outline — a non-working day.