
Automatic messages that are sent to the client after a visit.
A review request notification will be sent after the selected time once the client completes their visit and the visit status changes to Arrived. It is important to change the visit status to Arrived before the moment when the client is supposed to receive the notification.
You can request a review both from clients who booked via the online booking widget and from clients who booked with a receptionist via the Appointment Calendar.
The review request message contains a link. By following it, the client can leave a review about the staff member’s work. The submitted review will then be displayed in the online booking widget at the professional selection step.
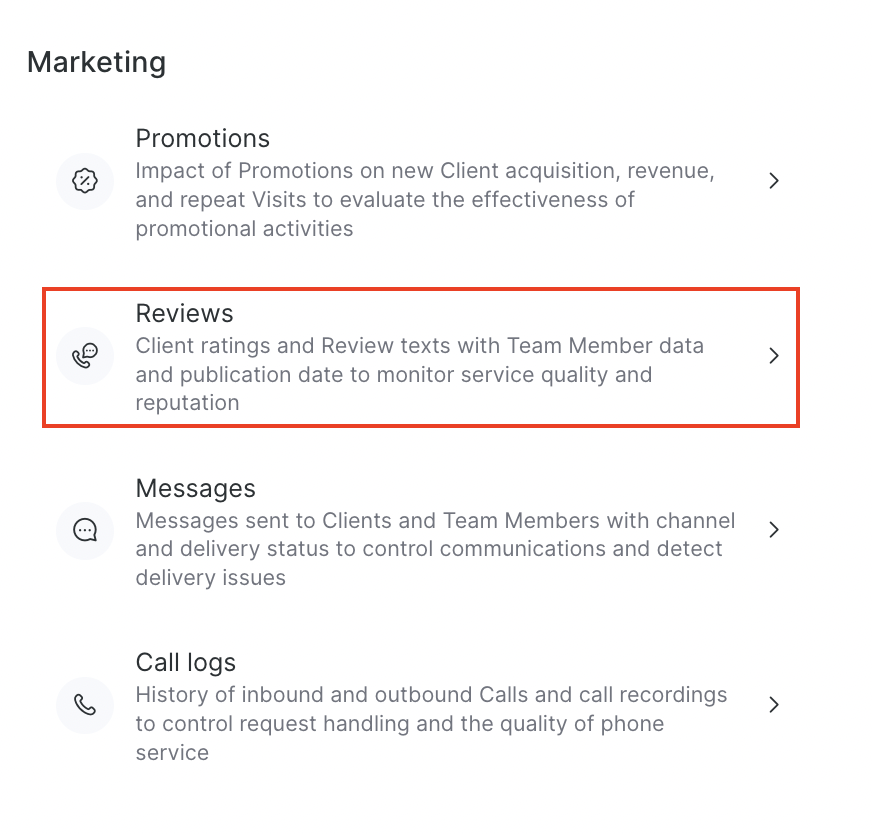
All received reviews can be viewed and deleted in Analytical Reports > All Reports> Marketing > Reviews (Administration mode).
Setup and editing #
- In the Administration mode go to Notifications, and open the Notification types tab.

- In the Client > Quality control section, click the notification name or the pencil icon and select the notification type:

- Review request after a visit booked via the online booking widget
- Review request after a visit booked via the booking journal
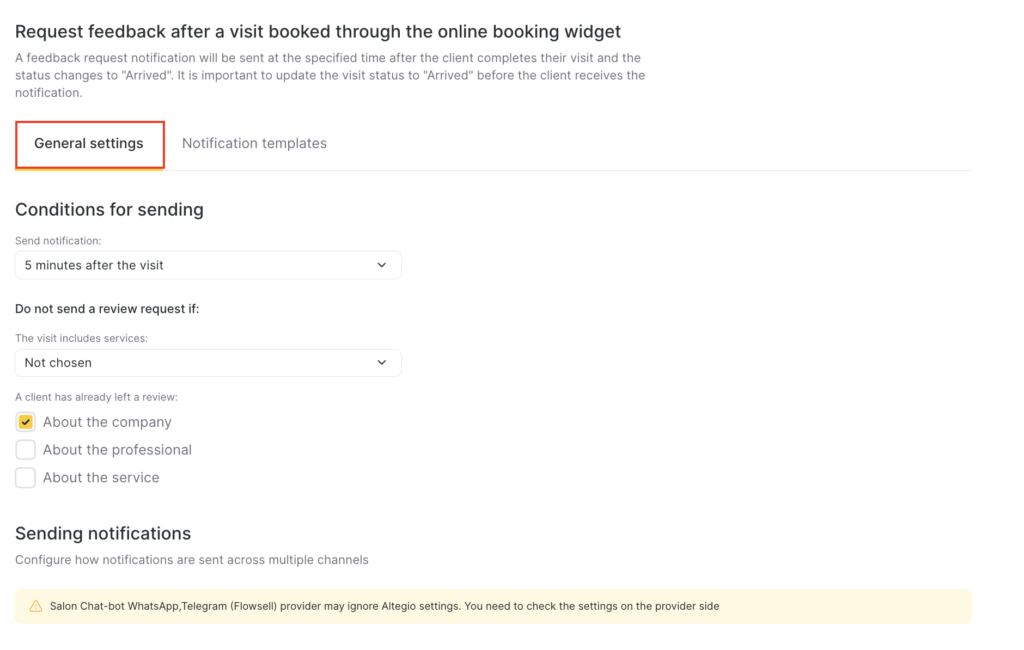
- On the General settings tab, select the sending conditions.
Send notification #
Choose when the notification will be sent — after N minutes after the visit (1, 5, 15, 30) or after N hours after the visit (from 1 to 24).
Do not send a review request if #
Select the conditions under which the notification will not be sent. If the notification must be sent in any case, skip this setting.
- The visit contains services — select one service or several services from the list. If the visit includes any of the specified services, the review will not be requested.
- The client has already left a review — select a branch, staff member, or service. This option is needed to avoid requesting a review from the client again.
- If the client has already left a review in this branch (any review: submitted on their own via the widget or via a review request message), the request will not be sent.
- If the client left a review for a visit that included the same staff member as the current one, the notification will not be sent.
- If the client has already left a review for a visit with the same service as the current one, the review request will not be sent.
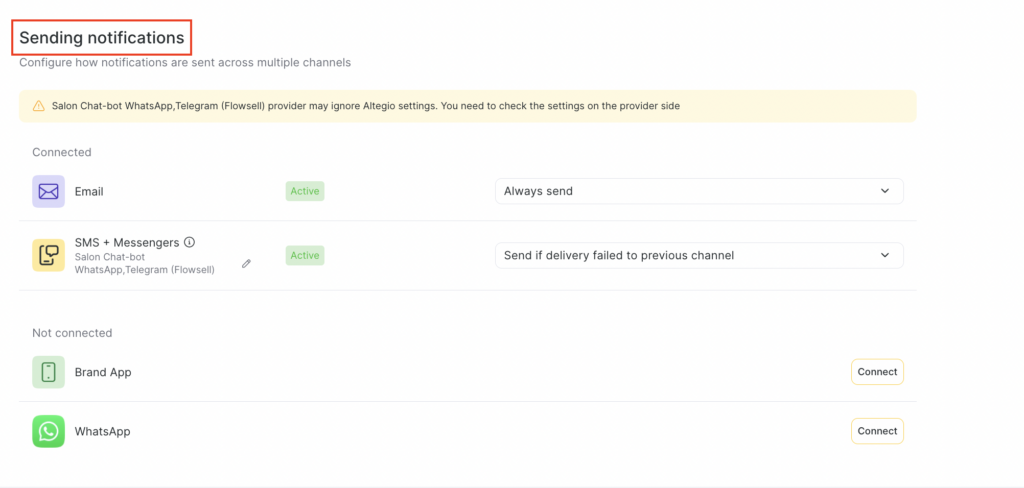
- Next, configure how notifications will be sent via multiple channels. More details about multi-channel notification scenarios are available in the article. Available sending channels:
- SMS / chat-bots
- Branded app
Templates #
After configuring the sending scenarios, set up templates for different channels. More details on notification template setup are available here.
- When editing the notification on the Notification templates tab, you can specify different text for each available sending channel.
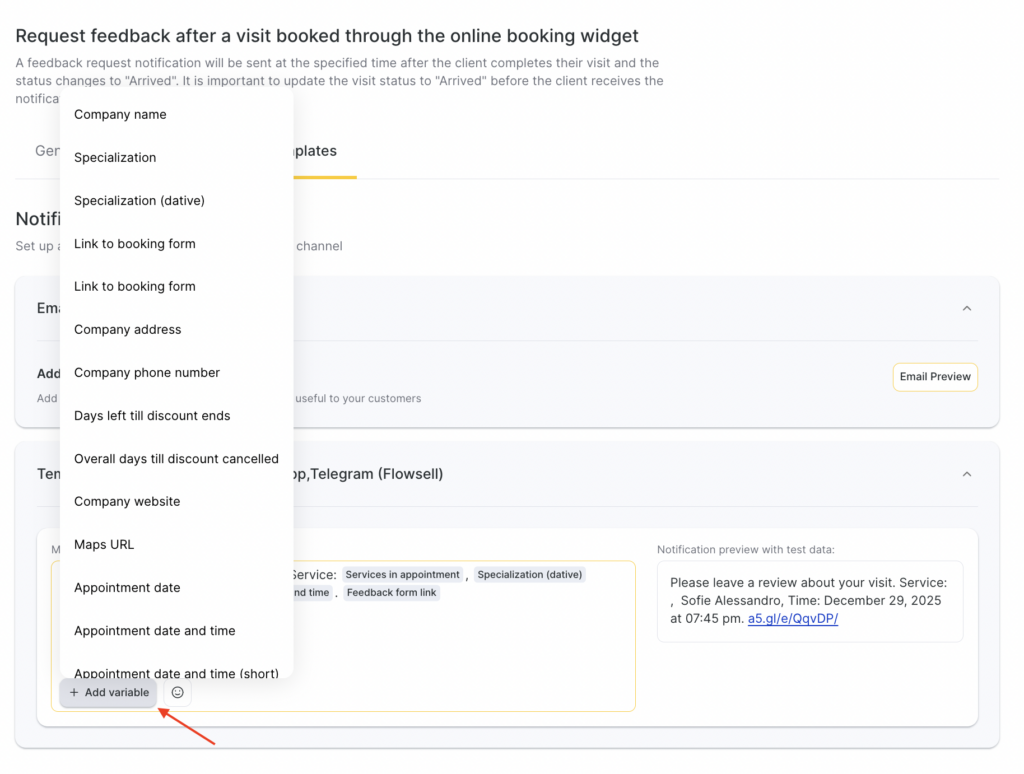
- For the SMS template, variables are available — the system will automatically insert visit, service, client, or branch details in their place. To add a variable to the template, click Add variable, then choose the one that matches the meaning.
After adding a variable, use a space to separate the variable from the main text and from other variables.
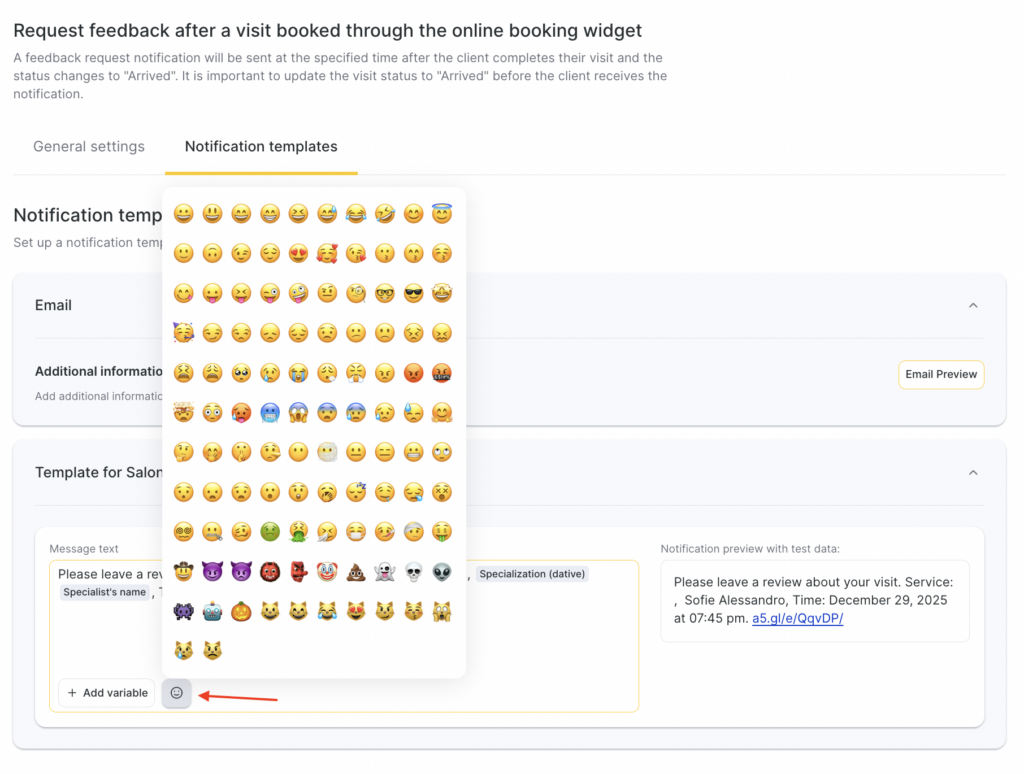
- In SMS notification templates, you can use emoji. To do this, click the emoji button and select the one you need from the suggested options or add your own.
Standard templates with variables
Please leave a review about your visit. Service: Services in visit, Specialty (genitive case) Staff member name, Time: Appointment date and time. Review form link
Please leave a review about your visit Appointment date and time. Review form link
Leave a review about your visit Appointment date and time. Review form link
Example
“You will help us get better if you share your impressions about your visit. [review form link]”
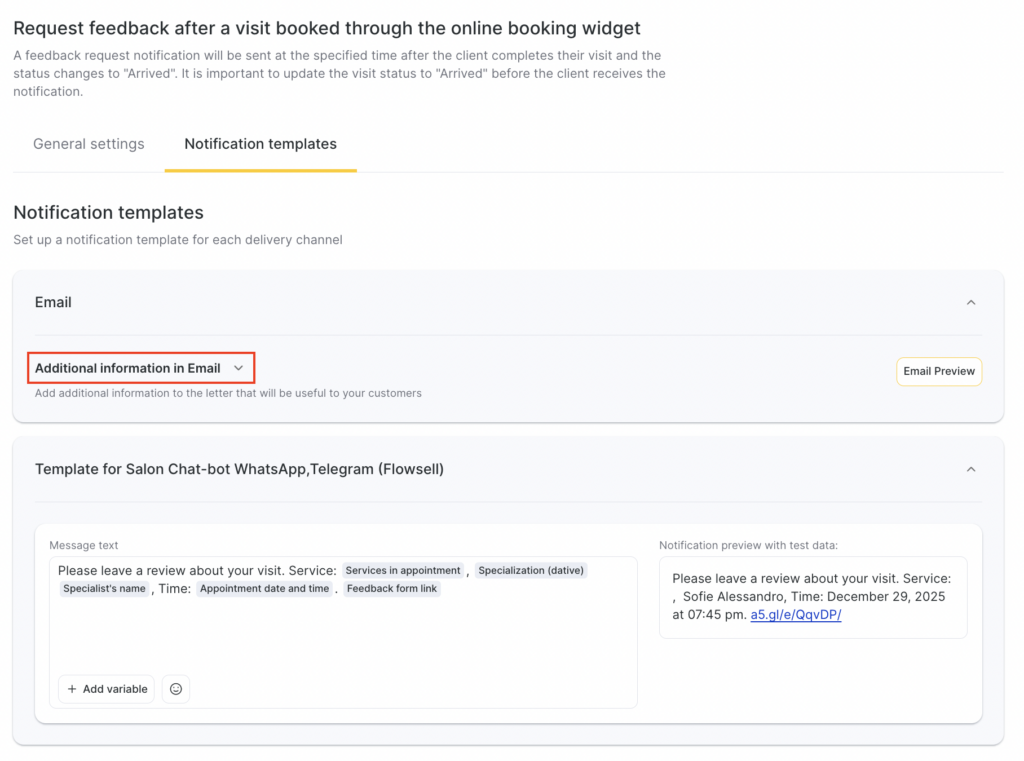
- For the Email channel, template editing is not available, but you can add additional information. For this:
- When setting up notification templates, go to the Additional information in email tab.
- Enter extra text, upload an image, or add a link.
- Click Save.
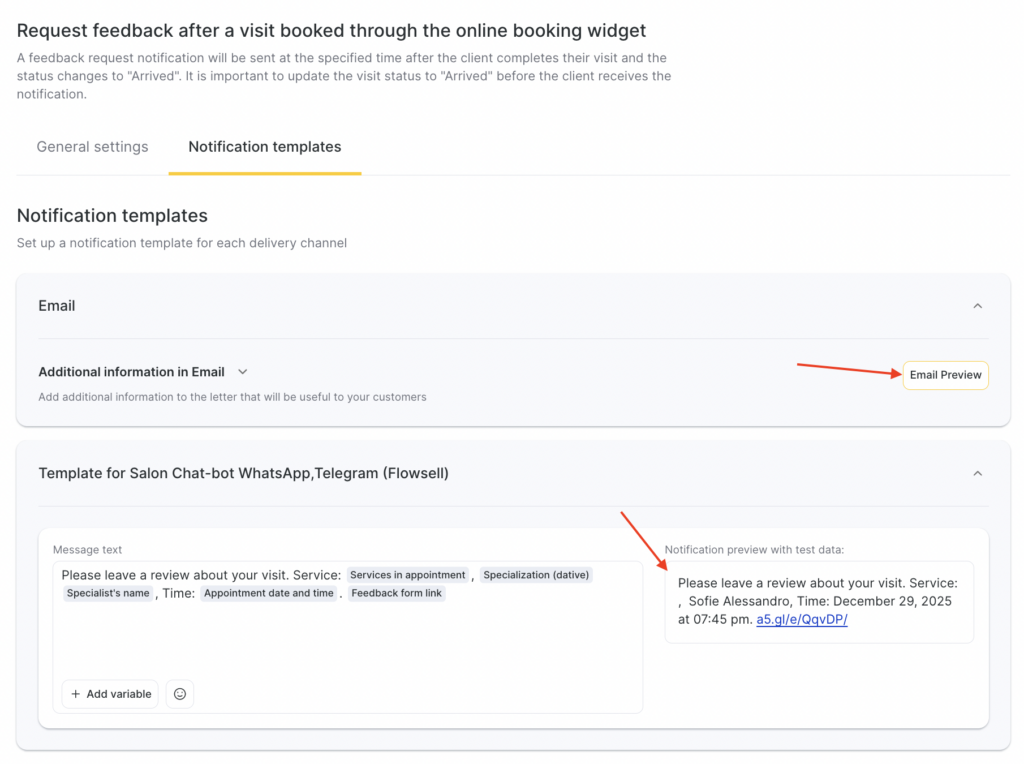
For all notification templates, preview is available — how the message will look when sent to a client, team member, or receptionist, including variables.
Read more about notification template setup in the article.
Completing the setup #
After finishing the configuration, click Save in the bottom-right corner of the page.
To enable the notification, return to the Notification types tab and switch the toggle to the active state. To disable it, switch the toggle off.

To the right of the notification name, you will see the names of the sending channels that are enabled for this notification type.
Sending notifications #
The review request is sent after the number of minutes/hours you specified, if the client was moved to the Arrived status before the notification generation is completed.
Before generating and sending the notification, the system checks the visit date and time, the notification type settings, and how much time has passed since the visit ended.
The main condition is that the visit must be moved to Arrived. The status must be changed no later than the notification generation interval.
For example, if the review request is sent one hour after the visit, and the visit ended at 11:00, the status must be changed by 12:00. If the status is changed later, the notification will not be generated and will not be sent to the client.
Important
To avoid errors when generating review request notifications, it is recommended to change the status in advance before the visit ends.

