
In Altegio, you can create custom fields in the appointment card and in the client card. This is very convenient if, in addition to contact information, you also need to specify service-related information during booking.
Important
Custom fields can be configured in the chain interface (Settings > Custom Fields) and then used in any location of the chain selected in the field settings. You can also display custom fields created in the chain in online booking widgets.
Custom fields can also be configured in the location interface, in which case they will only be displayed in the location where they were created.
Examples of Custom Fields #
- For appointment: contract number, appointment ID (in another CRM), etc.
Examples of display in the appointment window:

- For client: car make and number, child’s name, patient’s diagnosis, etc.
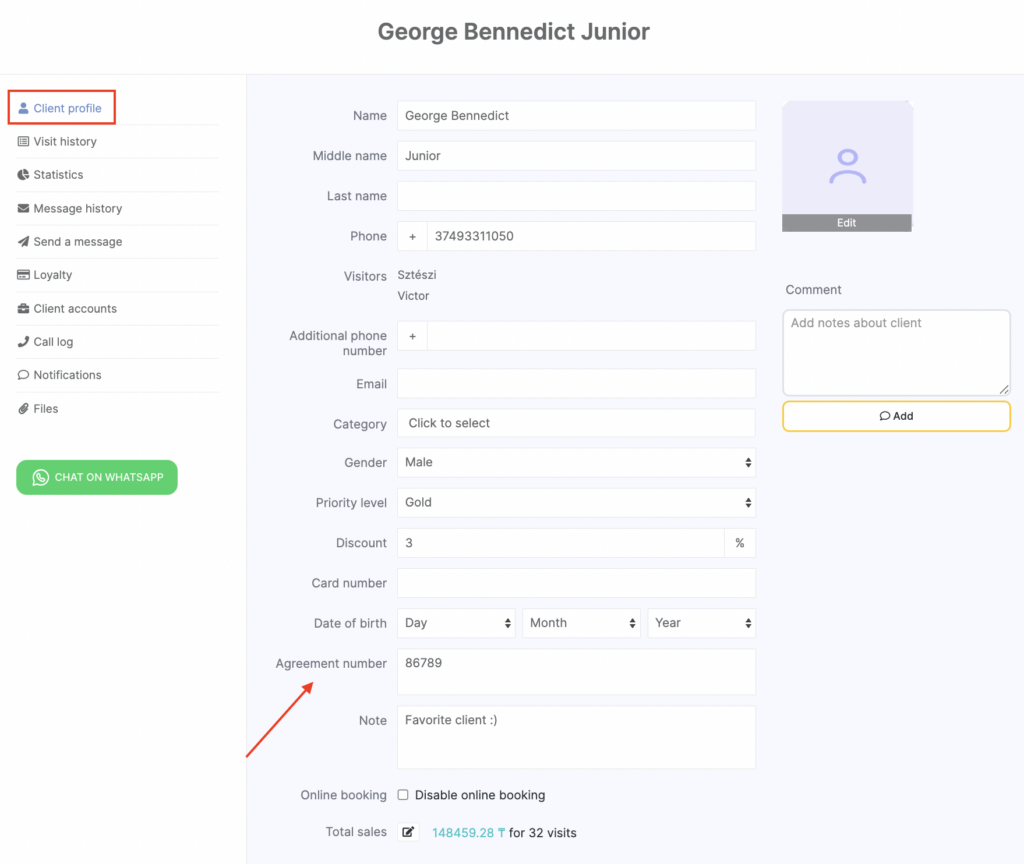
Examples of display in the client card in the all clients list:
Setup and Editing #
- In the chain interface, go to Settings > Custom Fields.
- Select which options you want to add: appointment details or client data. Go to the appropriate tab and click Add field.

- Enter the field name. Note that if you plan to display this custom field in the widget, clients will see it during online booking. If the display setting in the widget is not enabled, the field will only be visible to team members with access to the location.

- Select the data input type:
- Text — the field can be filled with any text manually.
- Number — only numbers can be entered in the field.
- List of values — a dropdown list of values appears when clicking the field. Allowed values must be entered separated by commas.

- Date — a calendar appears where you can select a date.
- Date and time — a calendar appears for selecting a date, plus a field for specifying a time.
- Specify whether the user (team member with access) can edit the custom field. Grant the team member access rights to view and edit custom appointment fields (see details at the end of the article).
- To display the field in the appointment window/client card, check the box Show field in admin interface.
Choose how the field should be displayed.
For appointments:
- To always show the custom field in the left block of the appointment window, select Always show in appointment editing window.
- To make it available only under Advanced fields, leave the box unchecked.
- For client data (both options can be active at the same time):
- To always show the field in the client card in the client database, select Always show in client editing window.
- To hide the field under the Additional parameters link in the client card, leave the box unchecked.
- To always show the field in the right block of the appointment window, select Always show in appointment editing window.
- To hide it from the right block, leave the box unchecked.
- Choose whether the field should be displayed in the widget on the data entry screen.
Important
If enabled, the field will appear in all widgets of the selected locations.
The “Date and time” input type is not available for online booking, but all other formats are supported.
You can also make a field mandatory.
- If mandatory, the client cannot book until the field is filled.
- If optional, the client may fill it in if they wish, but leaving it blank will not affect the booking.
- Be sure to select the locations where the custom field will be available. Even if your chain has only one location, you must still select it for the field to work.
- Click Save.
- To delete a created field, click the edit button next to its name, then click Delete. Enter the word “Delete” to confirm, and click Delete again.

Additionally, you can set up custom fields in Online Booking > General settings section, within Client data entry setting.

Location interface #
Custom fields can also be configured at the location level. To do this:
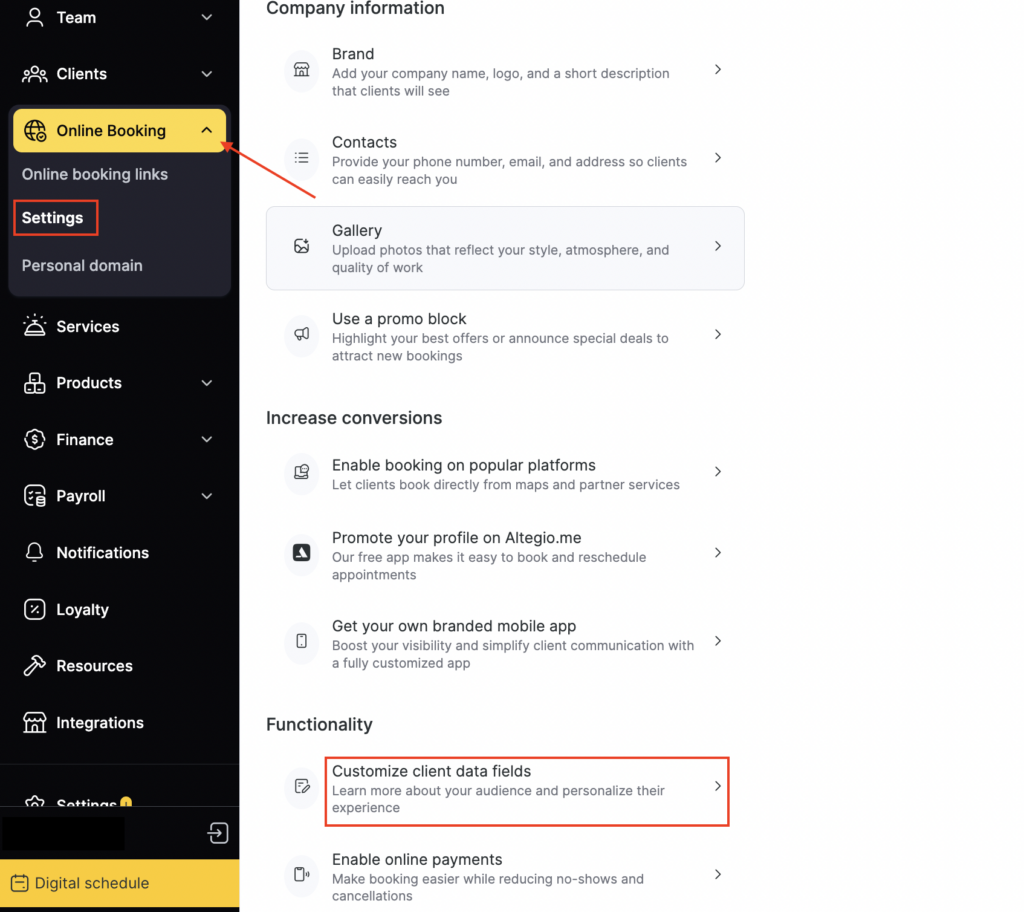
- In Administration mode, go to Online Booking > Settings > Functionality > Customize client data fields.
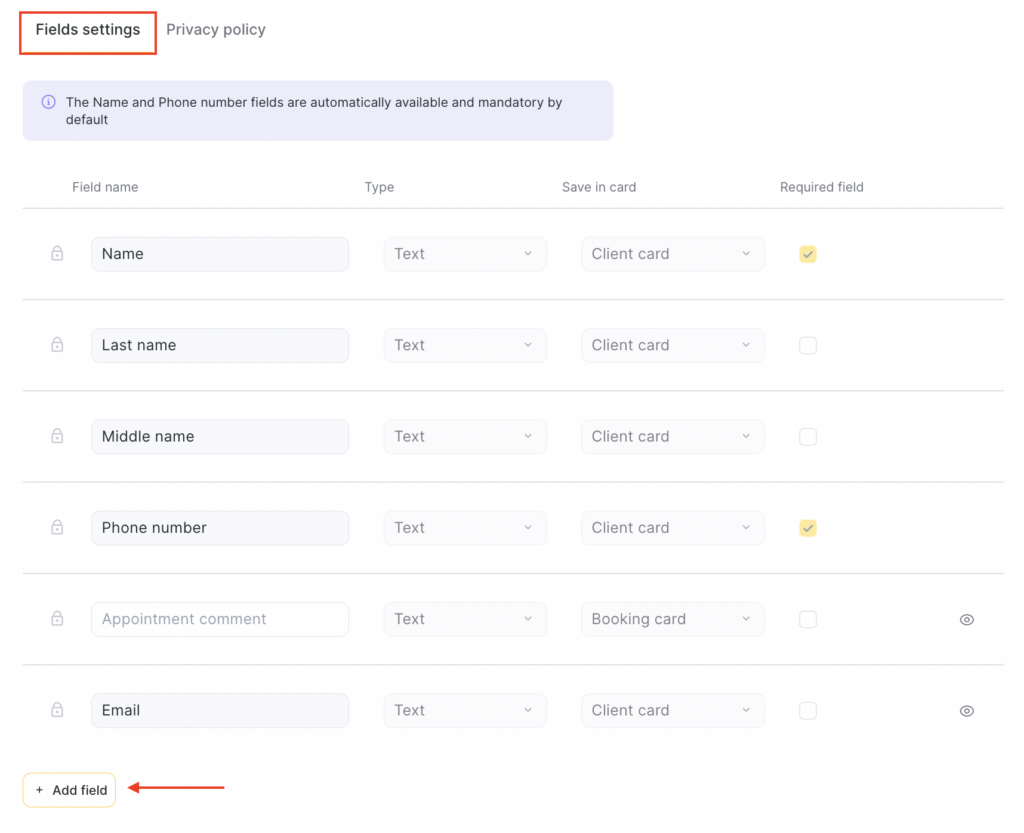
- On the Field settings tab, click Add field.
Access rights #
To configure access rights in a location, go to Team > Team members list, click the team member’s role in the Access column, and open the Access rights tab. Be sure to click Save after making changes. See more about user access rights setup here.
- In the Booking window section, check:
- View appointment custom fields
- Change bookings
- Change appointment custom fields

- To view and edit client custom fields, in the All Clients section, check:
- View client custom fields
- Edit client custom fields


