
Once you’ve filled in the sections with basic, additional information, settings and services, you can set up a work schedule for your team. You can assign a schedule to team members in several ways:
- Through the Team > Work schedule section;
- Through the Team > Team members list section;
- Through the through the Appointment Calendar;
- Through the Altegio mobile application;
In this article, we’ll explore how to assign work schedules using the Appointment Calendar feature.
Adding team member to the schedule for the current day #
- Access the Appointment Calendar and choose the date you want to schedule. The schedule for the selected day will open.
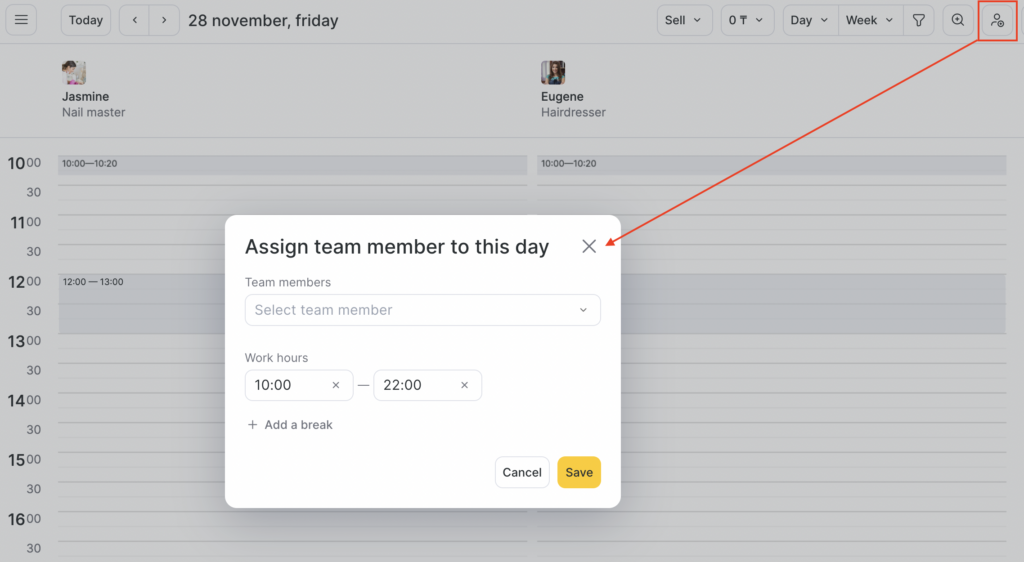
- Look for the button with the human silhouette icon in the upper right corner and click it.
- From the list of team members, select one or multiple team members you wish to add to the schedule. Specify their working hours directly or add a break by clicking Add a row. You can also set different working hours for each team member, excluding the break time.
- Once you’ve made the necessary adjustments, click on the Save button to save the updated schedule.
Editing work schedule through Appointment Calendar #
- Access the Appointment Calendar and choose the date you wish to edit. The schedule for the selected day will open.
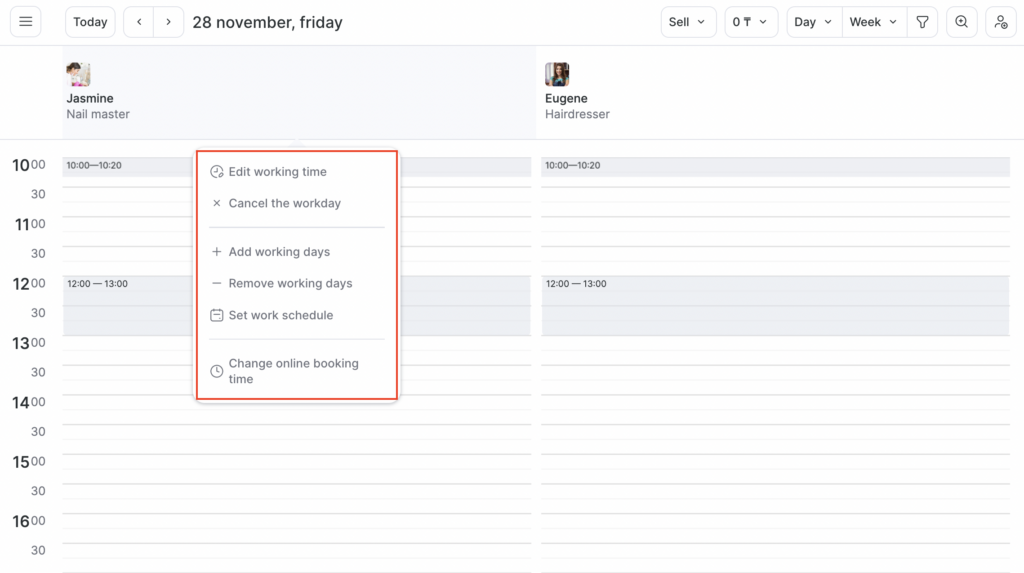
- Locate the team member whose schedule you need to change and click on their name.
- A menu will appear with several options for editing the schedule:
- Edit working time
- Cancel the workday
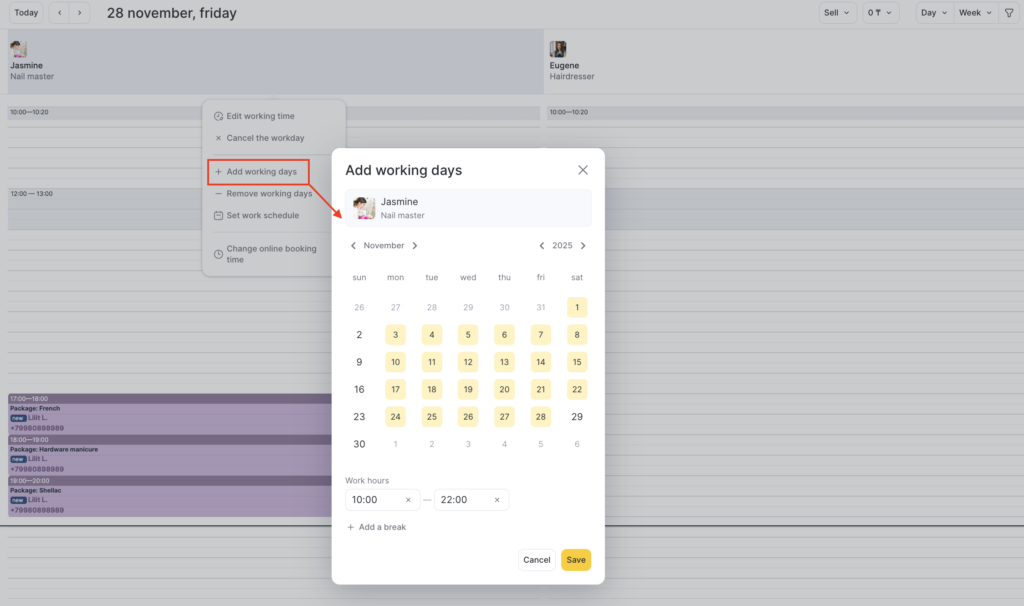
- Add working days
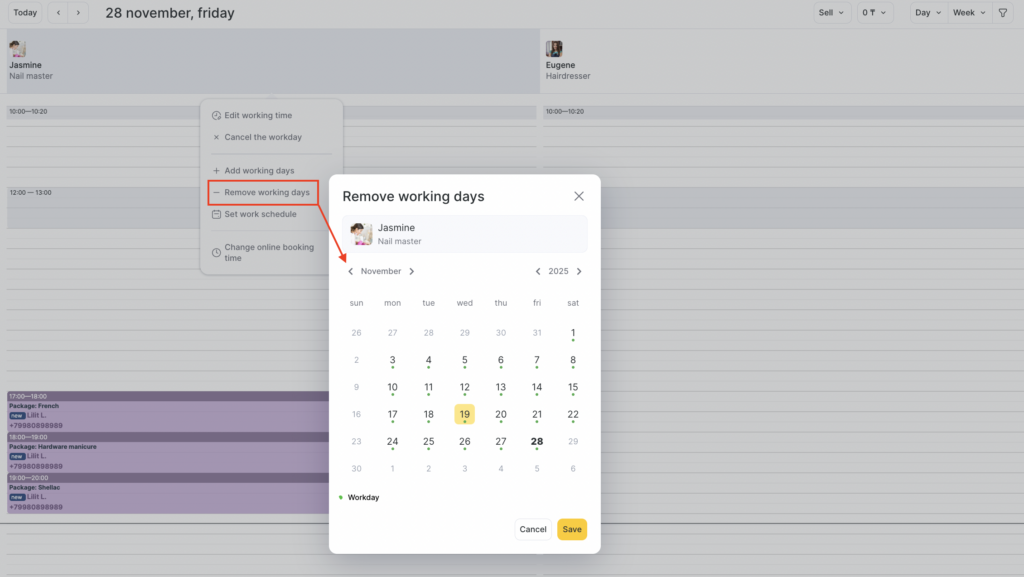
- Remove working days
- Set work schedule
- Change online booking time
Adding a break to the schedule #
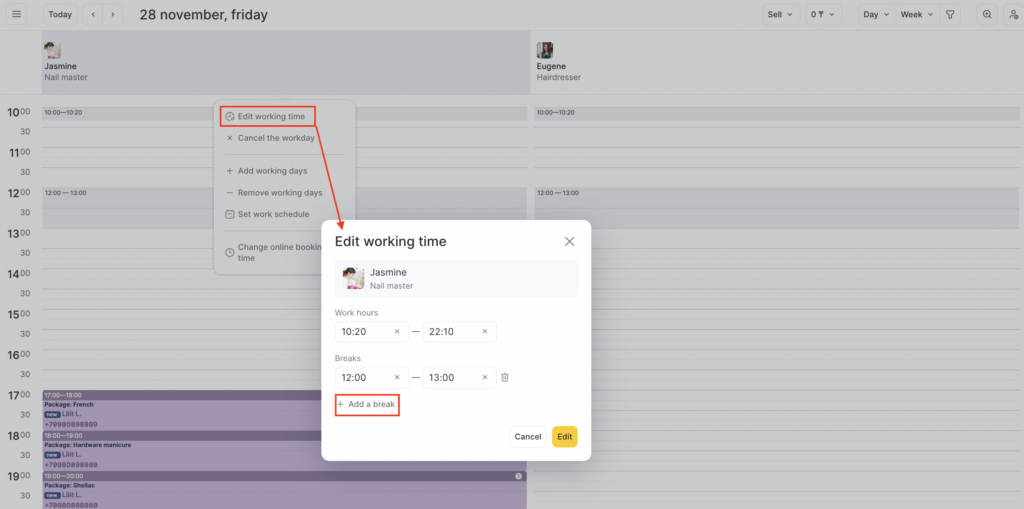
To include a break in the schedule, first, select the desired team member name. Next, click Edit working time, Add a break. Don’t forget to click the Save button to apply the break to the schedule.
If you need to add another break, simply access the action menu, and create a new break as needed.
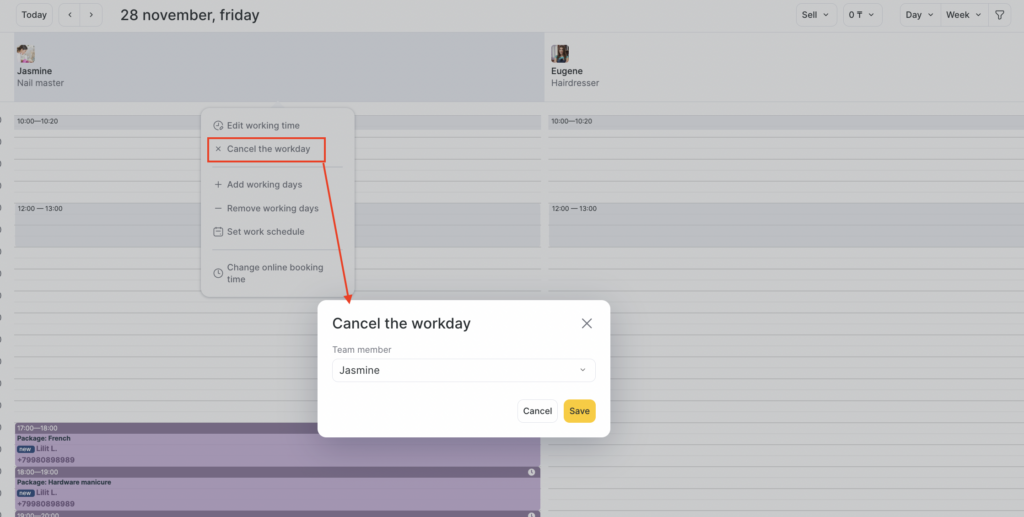
Canceling workday #
To cancel team member’s workday, make sure you chose the desired team member from the list and click on the Save button. Once saved, the team member will be removed from the schedule for the selected day.
Note
If the team member has existing bookings for the selected date, not rescheduling or canceling them will cause the workday to reappear in the schedule. To avoid this, make sure to reschedule or cancel the bookings first, and then proceed to cancel the workday again to ensure it is removed from the schedule.
Adding workdays #
- In the modal window that appears, choose the necessary dates on which you want to add workdays.
- Specify the working hours for the selected dates.
- Once you have set the working hours, click the Save button to add the workdays to the schedule.
Removing workdays #
To remove specific workdays, uncheck the corresponding working days by clicking on the dates.
After selecting the dates to be deleted, click the Save button to confirm the removal of the workdays from the schedule.
Note
If you want to adjust the start and end times of a team member’s working days, follow these steps:
1. Delete the existing working days from the schedule.
2. Afterward, Add working days again with the updated beginning and end times for the day. This will apply the new working hours to the team member’s schedule.

