Altegio allows businesses to accept cashless online payments from clients through the online booking widget and by sending a payment link. Once you have signed a contract with a payment processing partner (learn more about connecting Stripe), you need to configure the settings in Altegio.
Important
Altegio does not charge any commission for payments. The bank commission depends on the selected payment provider.
Connecting and Configuring Online Payments #
Go to Finance > Online Payments or Settings > Finance > Online Payment sections.

Choose the Payment Method #
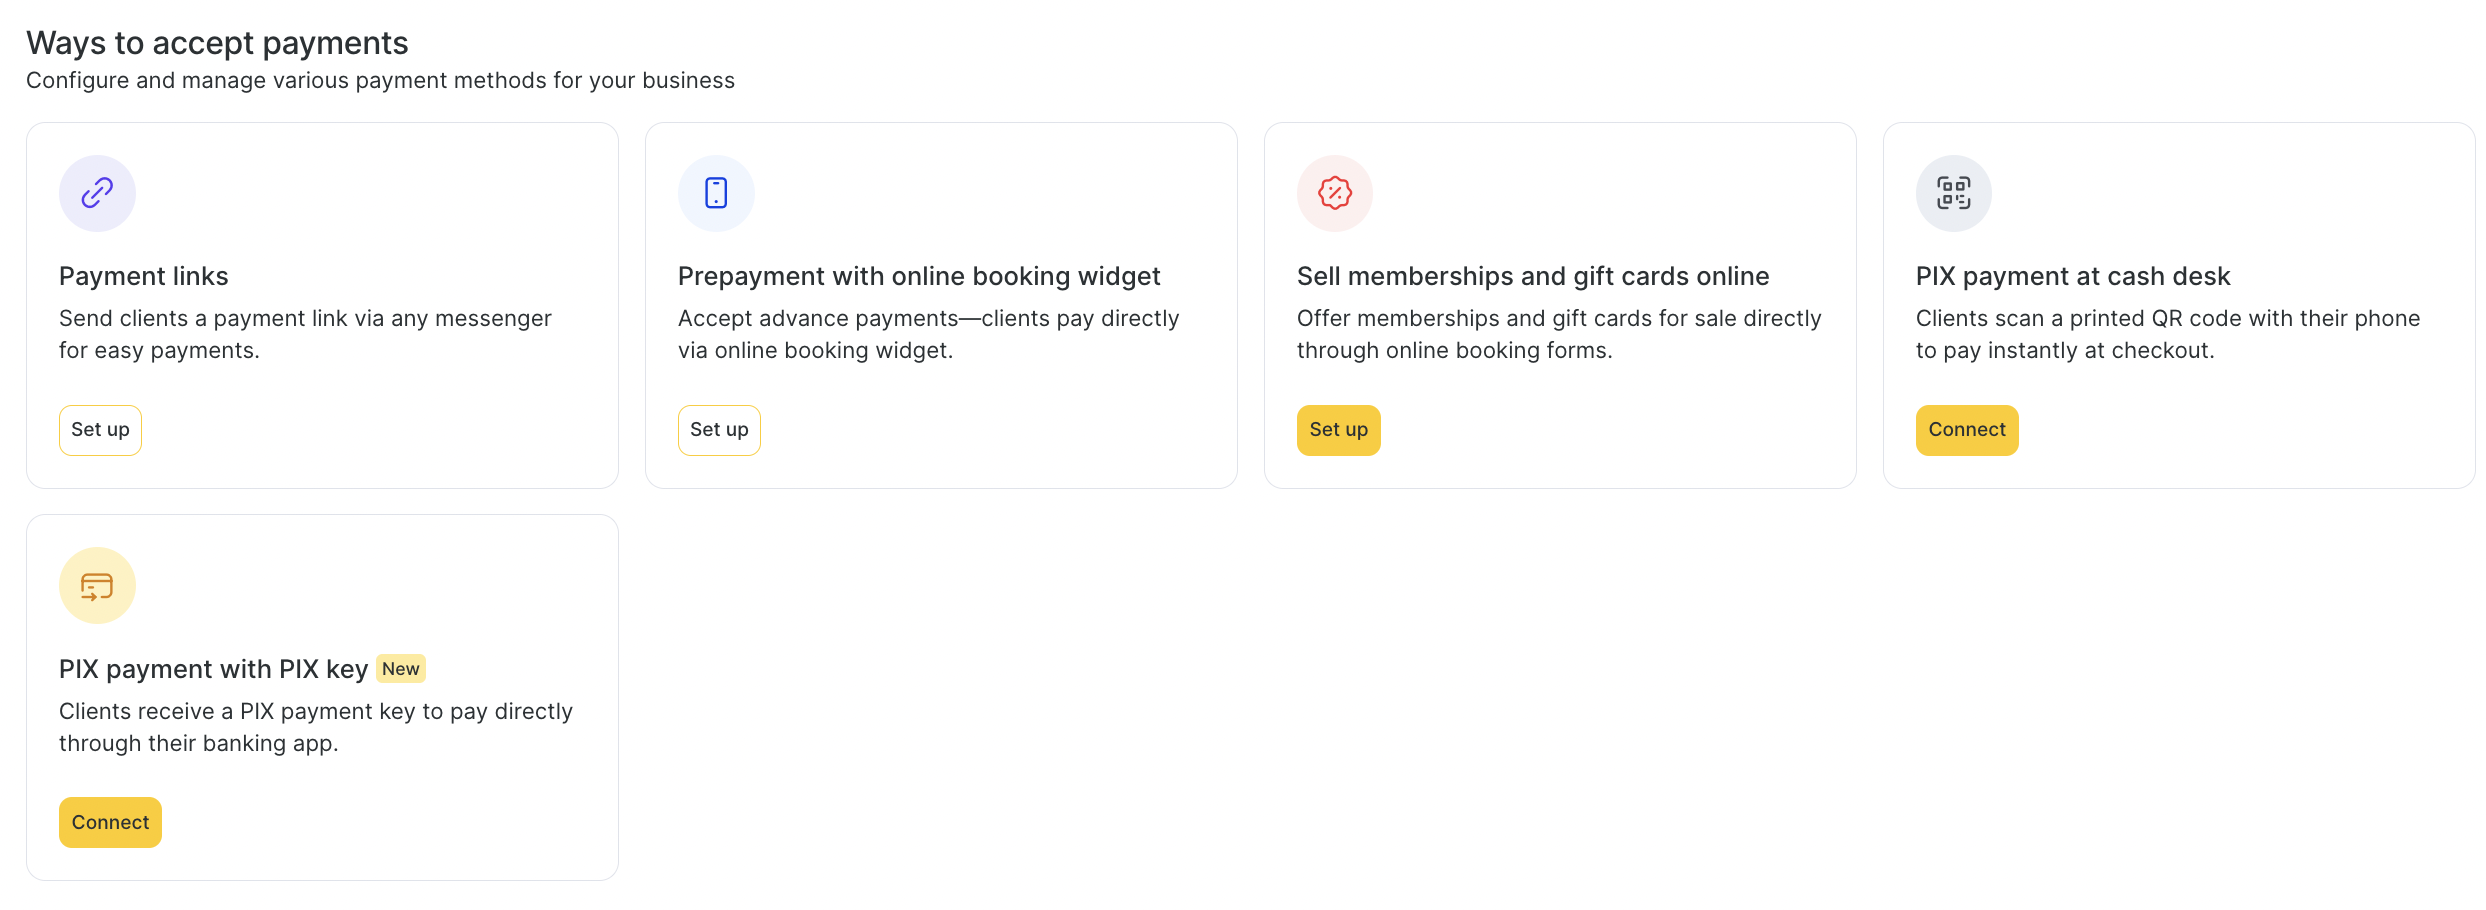
Select the preferred online payment method from the provided options.

Payment Links
Overview:
This method allows you to collect payments from clients by sending them a unique payment link. The link can be shared via any messenger or communication channel (e.g., WhatsApp, email, SMS).
Use Case:
Ideal for remote or manual bookings when the client isn’t booking through the online system.
How It Works:
- Generate a payment link from the platform.
- Send the link to your client via messenger or email.
- The client completes the payment securely online.
Setup:
Click Set up to enable this payment method in your system.
Prepayment with Online Booking Widget
Overview:
Enable clients to make advance payments directly through the online booking widget as they schedule their appointments.
Use Case:
Useful for reducing no-shows and ensuring upfront commitment.
How It Works:
- Client selects a service and booking time via the widget.
- They are prompted to pay in advance to confirm the booking.
- The appointment is finalized only after payment is completed.
Setup:
Click Set up to activate prepayment for online bookings.
Sell Memberships and Gift Cards Online
Overview:
Offer digital memberships or gift cards directly through your online booking forms.
Use Case:
Perfect for upselling loyal clients or providing gift options during holidays and promotions.
How It Works:
- Set up memberships or gift cards in your system.
- Clients can purchase them online without needing a direct appointment.
- Payment is processed immediately at the time of purchase.
Setup:
Click Set up to start offering these digital products.
PIX Payment at Cash Desk
Overview:
Clients can scan a QR code printed at your checkout counter to pay instantly using the PIX system.
Use Case:
Designed for in-person payments where a physical checkout exists.
How It Works:
- A QR code is generated and printed/displayed at the point of sale.
- The client scans the code using their phone.
- Payment is completed instantly via their banking app.
Connection:
Click Connect to integrate and begin accepting payments with a checkout QR code.
PIX Payment with PIX Key (New)
Overview:
Allows clients to make payments by using a PIX key generated for your business, directly from their banking app.
Use Case:
Ideal for remote or digital payment requests when there’s no physical interaction.
How It Works:
- A unique PIX key is generated and provided to the client.
- The client uses this key in their banking app to send the payment.
- Payment is received directly to your business account.
Connection:
Click Connect to enable PIX key-based payment support.
In the Online Payments section of a location, you can configure all online payment methods except for the online sale of memberships and gift cards. Those are configured via chain interface.
After clicking “Set up” or “Connect” for this payment method, the Online payments section will open.
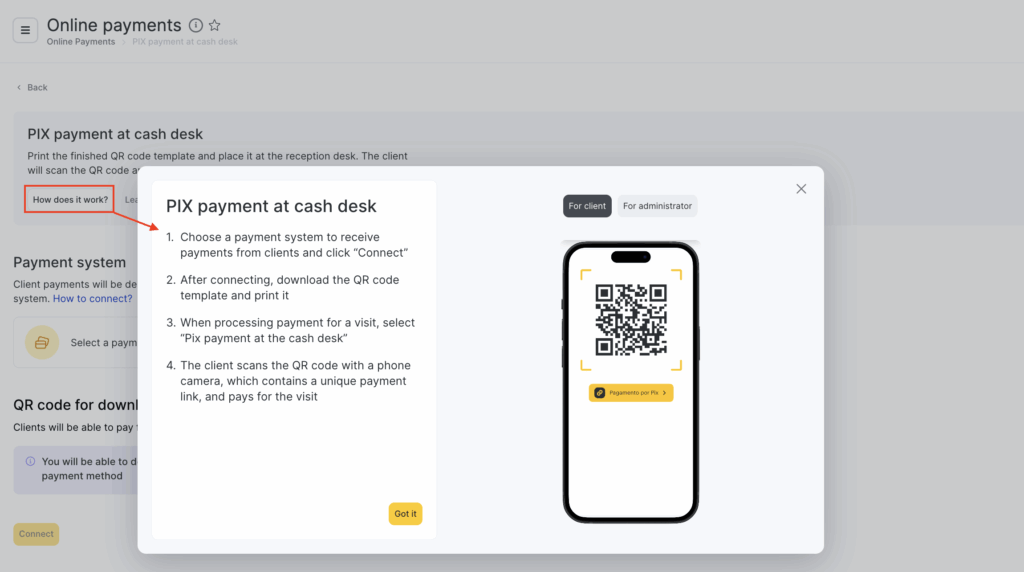
Click the “How does it work?” button in the settings card.

A pop-up window like this will appear with a guide.
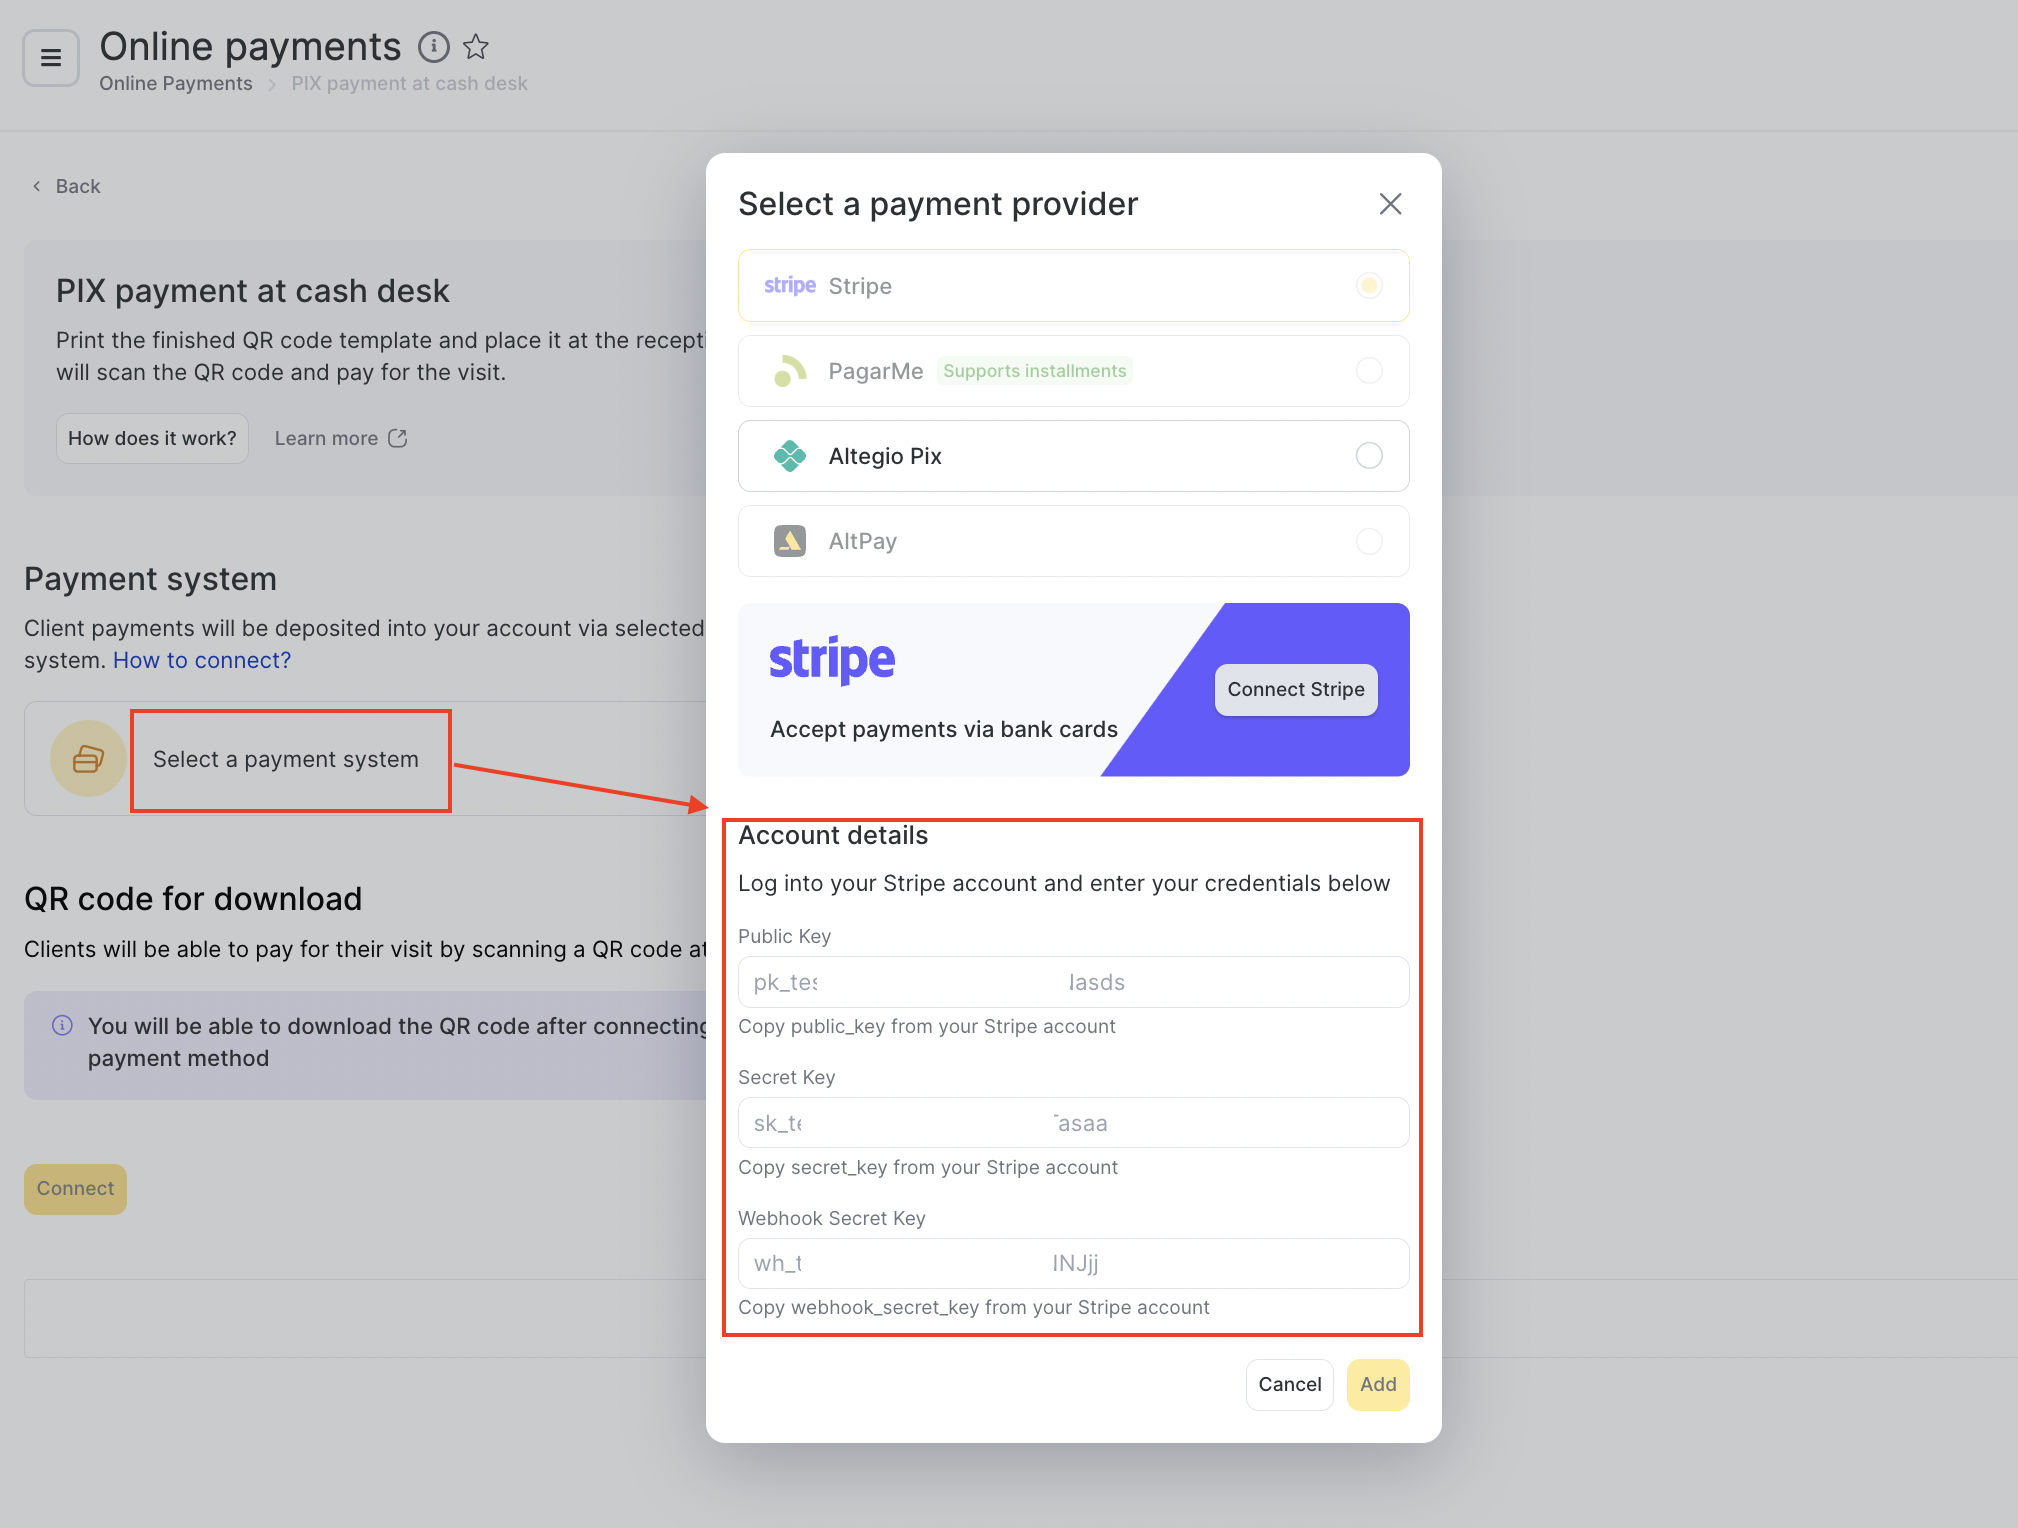
Enter Your Payment System Credentials #
Provide the necessary details from your payment provider account to enable online payments.
These details can be found in your payment provider’s dashboard or sent to you via email/messaging platforms (depending on the provider).
If you haven’t yet signed a contract with a payment provider, you can proceed with the connection from this section.


