
Automatic notification for a client to confirm an appointment.
Within the specified time before the visit starts, the client will receive a message with the appointment details and a request to confirm.
Unlike the notification type Confirmation of a client appointment created via the online booking widget, there is no need to call the client to clarify details — they can confirm the appointment themselves after receiving the message.
It is used to reduce no-shows. The notification also helps automate routine processes and reduce the workload for receptionists.
Important
• A confirmation request notification is sent only when the visit status is Waiting for client. If the visit has any other status, the notification will not be sent.
• After the client confirms the appointment via the notification, the visit status will change to Client confirmed automatically. If the visit was prepaid online, the status will also change.
• The cost shown in the message is taken from the service price set in the service settings.
• If the client does not tap the confirmation button after receiving the message, the appointment will still remain in the schedule and its status will not change.
Setup and editing #
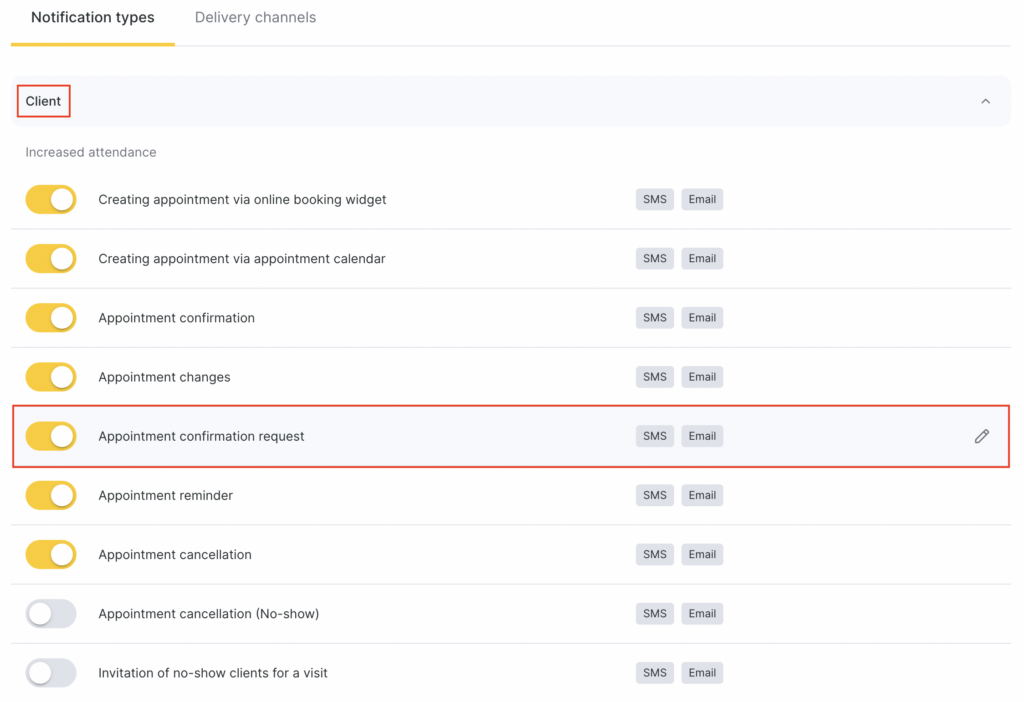
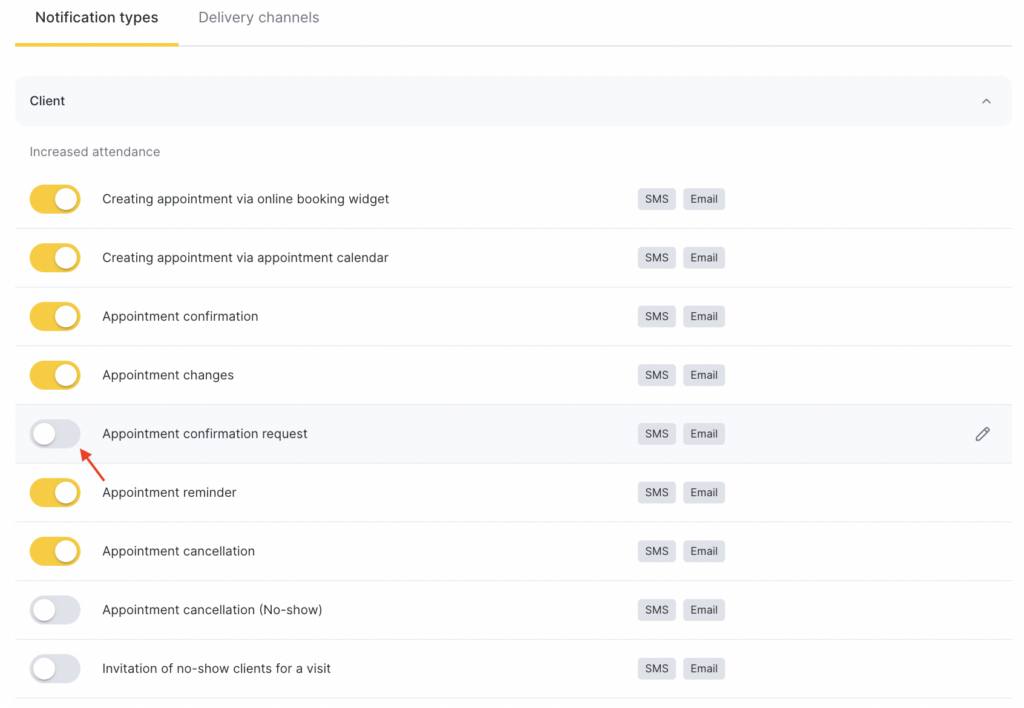
- In the Administration mode, go to Notifications section, and open the Notification types tab.
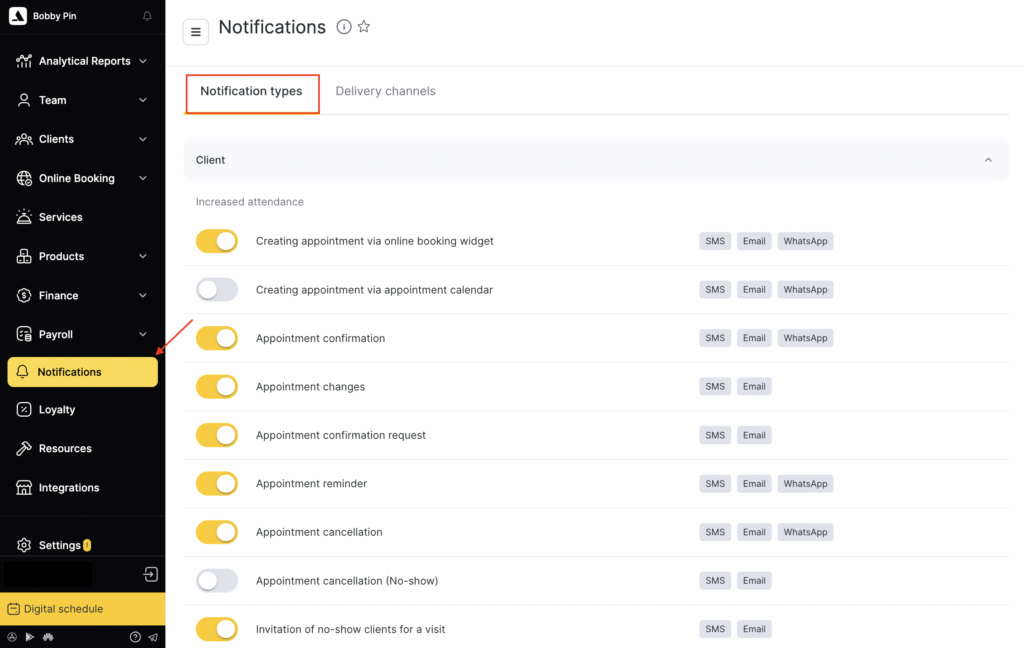
- In the Client section, select Appointment confirmation request, by clicking the notification name or the pencil icon.
- On the General settings tab, select the sending conditions. You can choose to send the notification a certain time before the visit or choose a specific time. For more details about sending scenarios via different channels, see the article.
- Send request (N hours before the visit). This option becomes available if Send at selected time is not checked. You can choose to send it 1, 2, 3, 4, 5, or 6 hours before the visit, or 9, 12, 15, 18, 21, or 24 hours before.
- Sending time. To enable this option, check Send at selected time. Choose the time when the notification will be sent, for example, 14:00. The notification will be sent to all clients at the selected time if they have an appointment the next day.
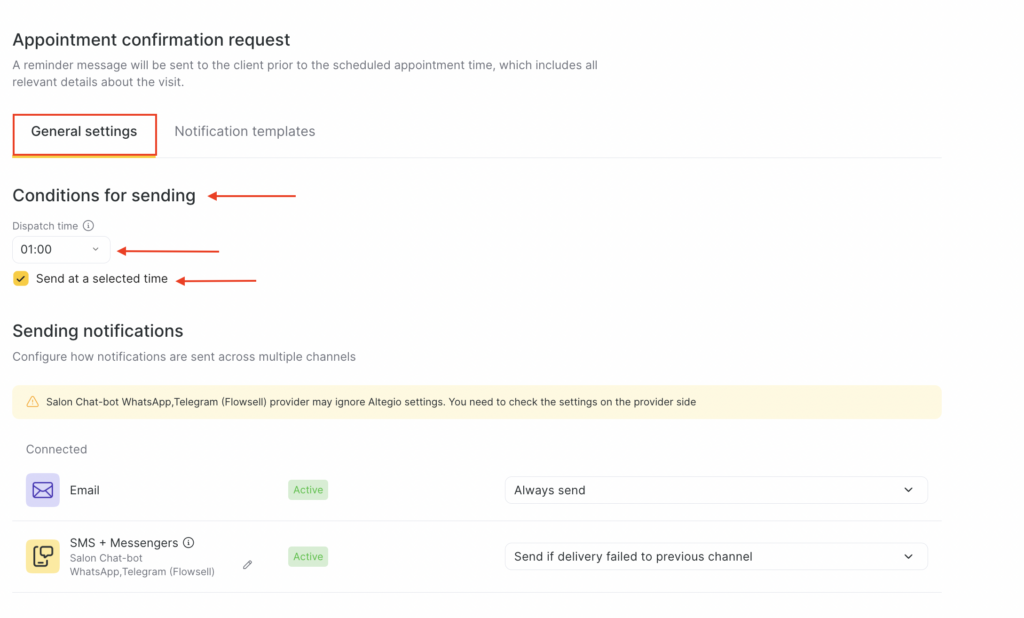
- Configure how notifications will be sent via multiple channels. For more details about sending scenarios via different channels, see the article. Available channels:
- SMS/chatbots
- Branded app
After configuring the sending scenarios, configure the templates for different channels. For more details about setting up notification templates, see the article.
Templates #
- When editing the notification on the Notification templates tab, you can set different text for each available sending channel.
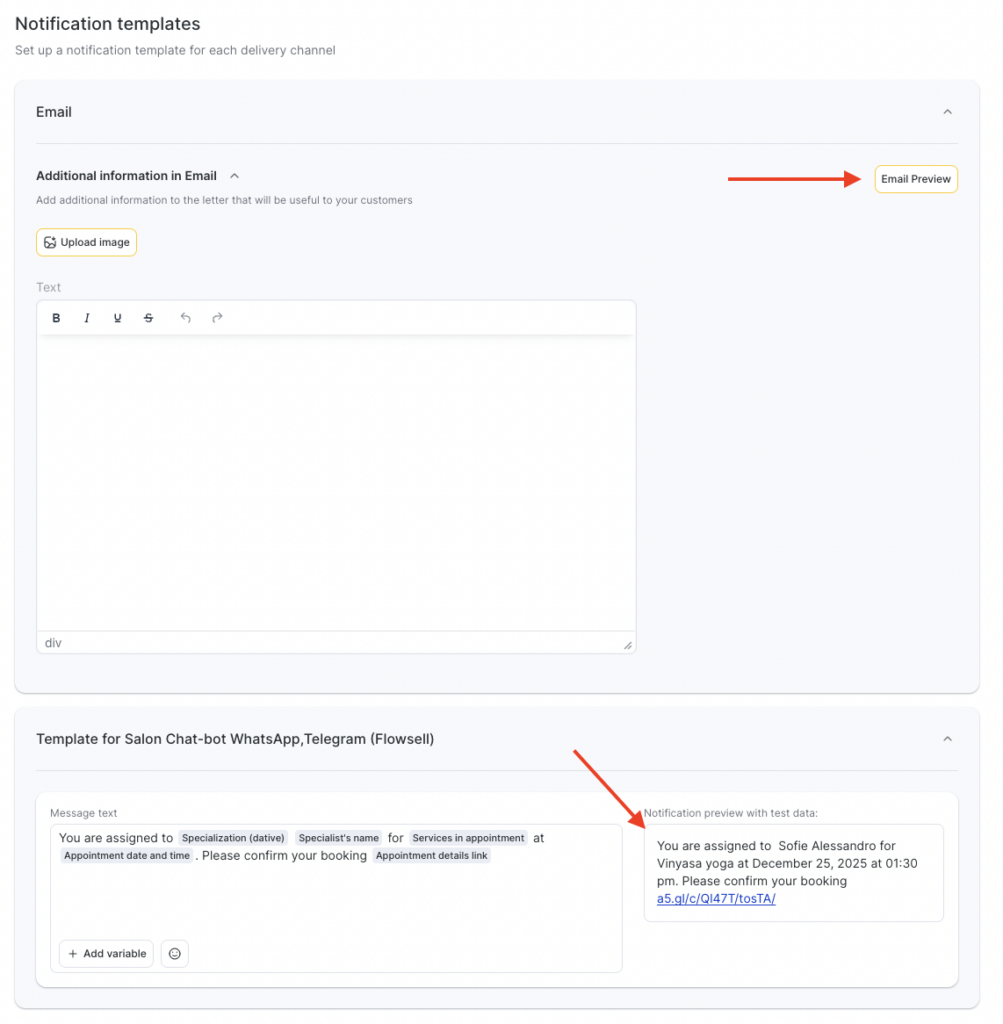
- For the SMS template, variables are available — they will automatically be replaced with visit, service, client, or branch data. To add a variable to the template, click Add variable, then choose the one that fits the context.
After adding a variable, use a space to separate the variable from the main text and other variables.

- In SMS notification templates, you can use emoji. To do this, click the emoji button and choose one from the list or add your own.
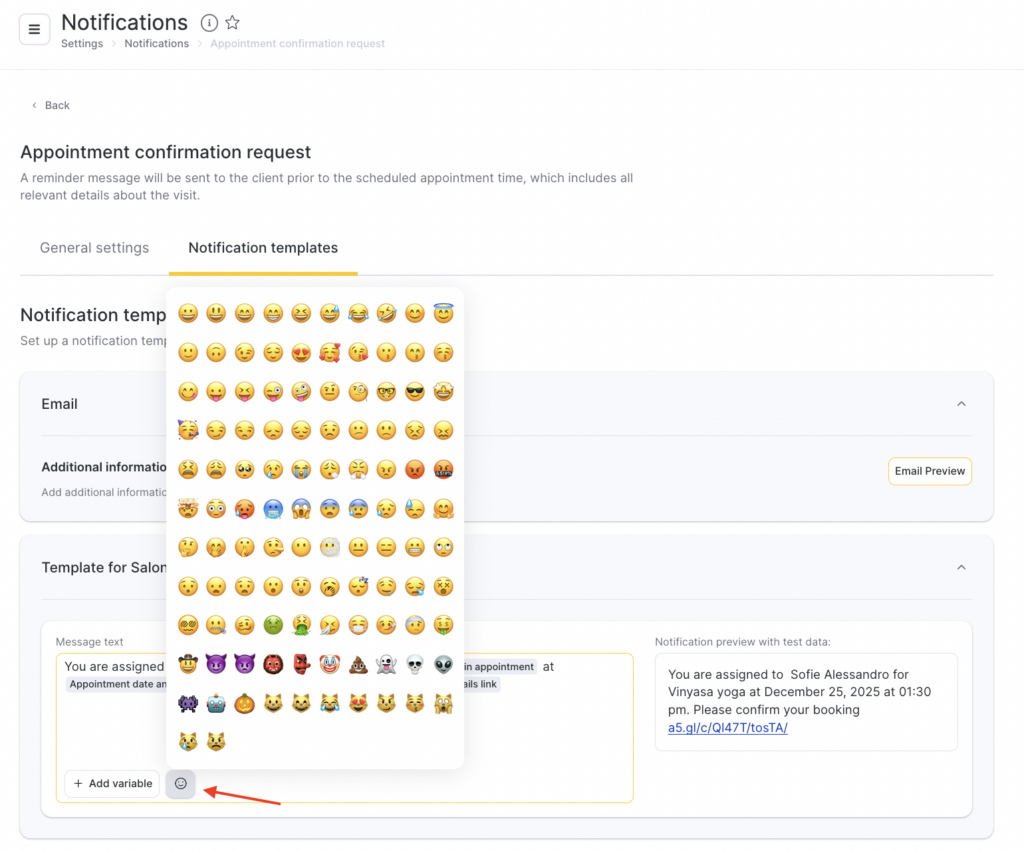
Default template with variables
You are booked with Staff specialization (genitive case) Staff name for Visit services on Appointment date and time. Please confirm your appointment Link to appointment details.
Example:
You are assigned to barber Azamat for Beard trim on 04.09 at 12:30. Please confirm yourbooking [link to appointment details]
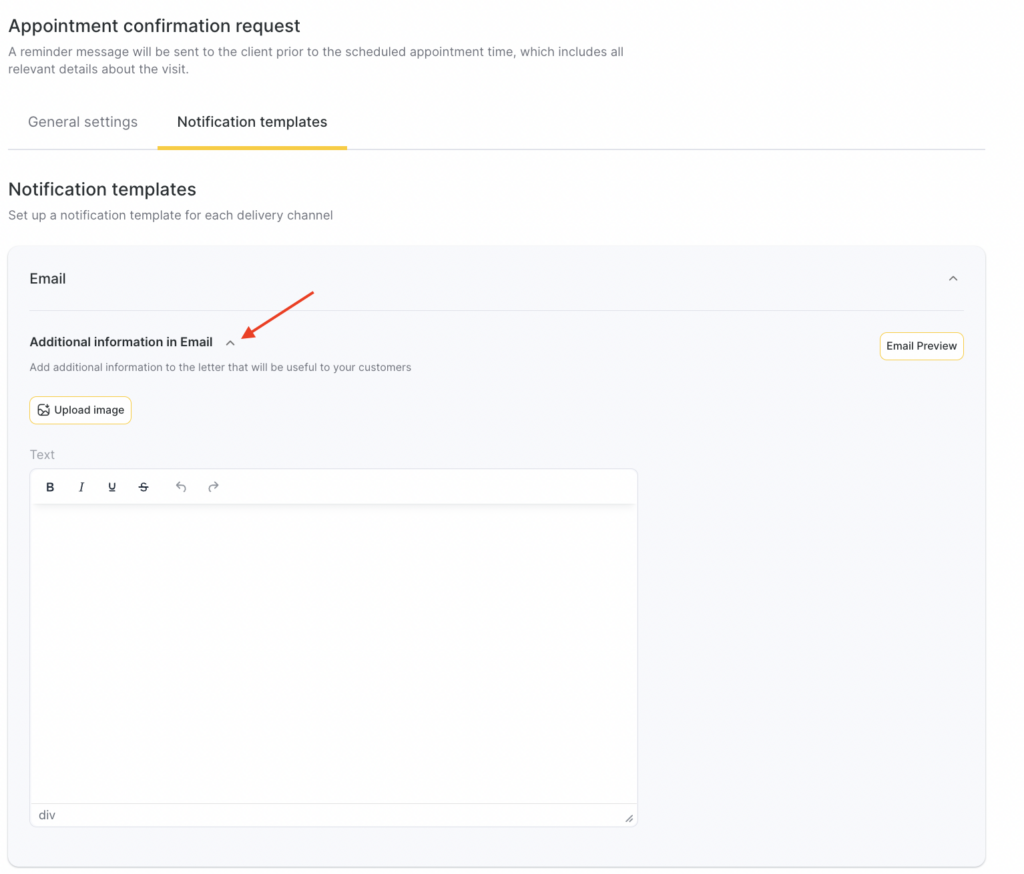
For the Email channel, template editing is not available, but you can add additional information.
To do this:
- When setting up notification templates, go to the Additional information in email tab.
- Write additional text, upload an image, or add a link.
- To see what the email will look like, click Email preview.
- Click Save.
For more details about setting up notification templates, see the article.
A preview is available for all notification templates — showing how the message will look when sent to a client, staff member, or administrator, taking variables into account.
Completing the setup #
- After completing the configurations, click Save in the bottom-right corner of the page.
- To enable the notification, return to the Notification types tab and switch the toggle to the active position. To disable the notification, switch the toggle to the inactive position.
To the right of the notification name, the enabled sending channels will be displayed.
Sending the notification and confirming the appointment #
The appointment confirmation request notification is generated and sent within the specified time before the visit, and the visit must have the Pending status selected.
For example, if the confirmation request is sent 24 hours before the visit, the appointment must be created no later than 24 hours before the visit. If the visit is created later, the notification will not be generated because, at the time the condition is checked, the visit did not exist yet.
If the visit status is changed to Arrived, No-show, or Confirmed before the notification is sent, it will not be sent.
After the message is sent, a Confirm appointment button will appear on the appointment details page.
When the client clicks Confirm appointment and confirms on the appointment details page, the status Confirmed will be set. No authorization or additional actions are required to confirm. After the client confirms the appointment, the visit status will automatically change to Confirmed.

