In Altegio, it is possible to search for clients directly in the Appointment Calendar without switching to the visit window or client database.
With the calendar search you can:
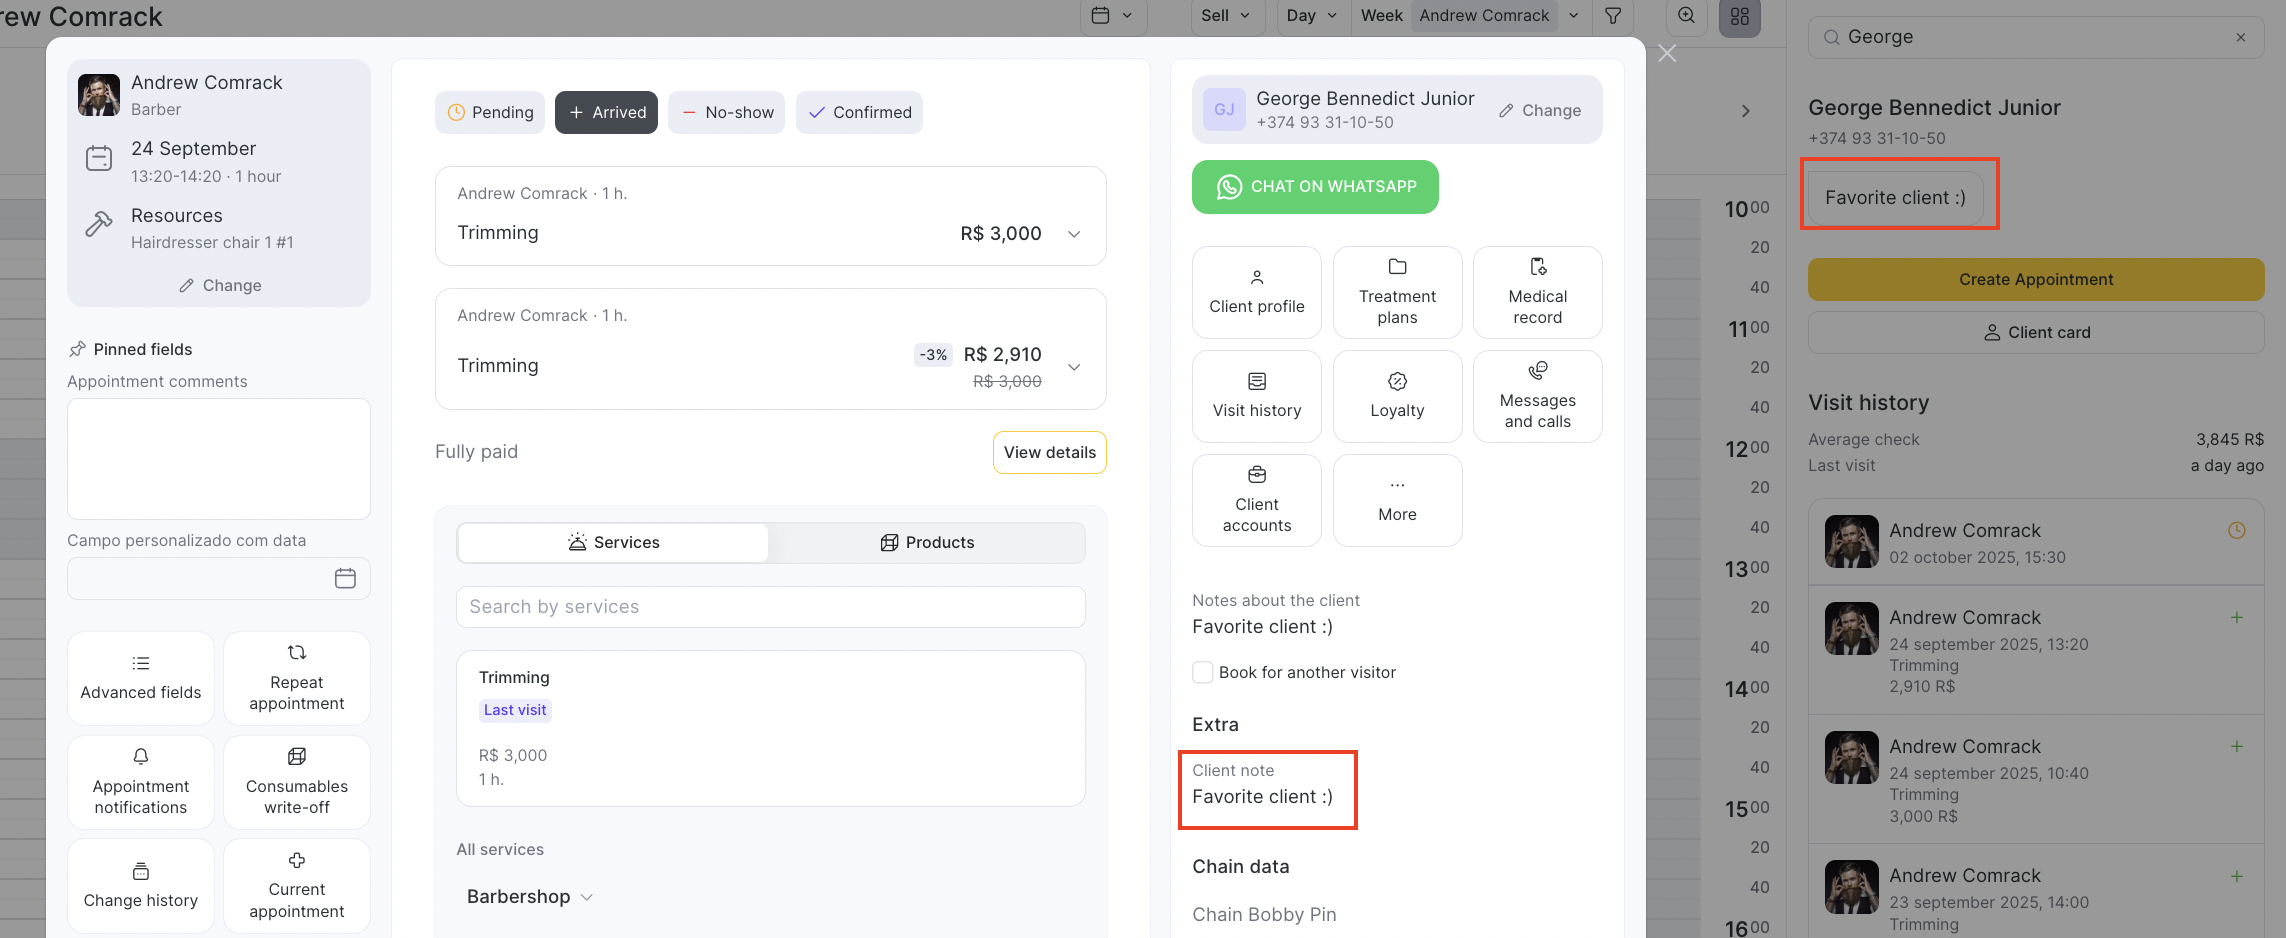
- Quickly find a client by name or phone number.
View categories assigned to the client.
View notes added to the client’s card.
View the visit history without switching to the client’s card in the database or the visit window.
Open past or upcoming client appointments/events in the calendar.
Go to the weekly schedule of the team member the client was previously booked with, to choose an available time.
Copy the client’s data, which will automatically be added to an individual appointment when it is created.
How it works #
- In the appointment calendar, click the button with the square icon in the top right corner.
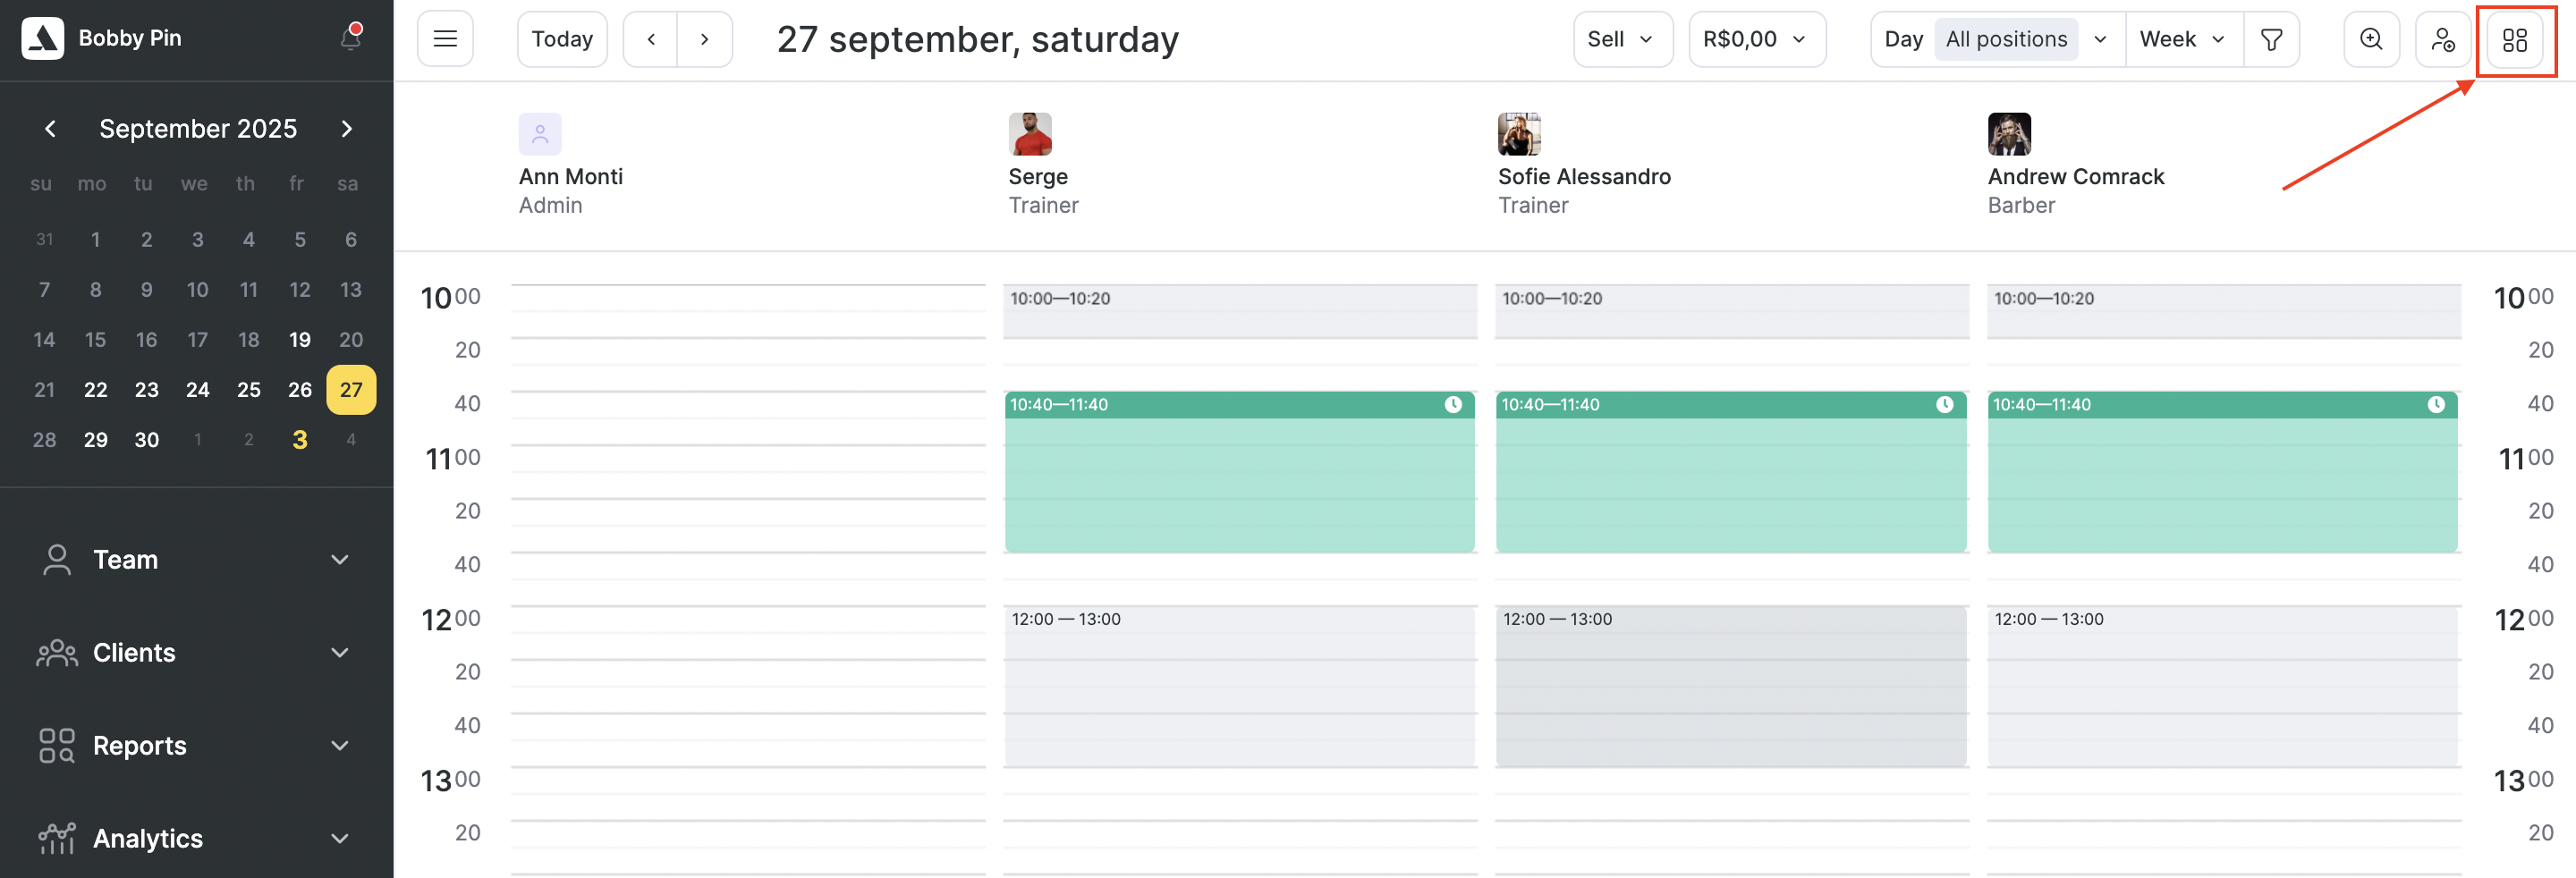
- A client search panel will open on the right side.

- Enter the client’s name or phone number and select them from the dropdown list.
If the client is not displayed but the data is correct, it means they have not yet been added to the client database within All Clients section. In this case, you need to create an appointment in the calendar, after which the client will be automatically added to the List. You can also manually create a client card in All Clients (see article for details).
- Next, you can work with the client’s visit history and appointments.
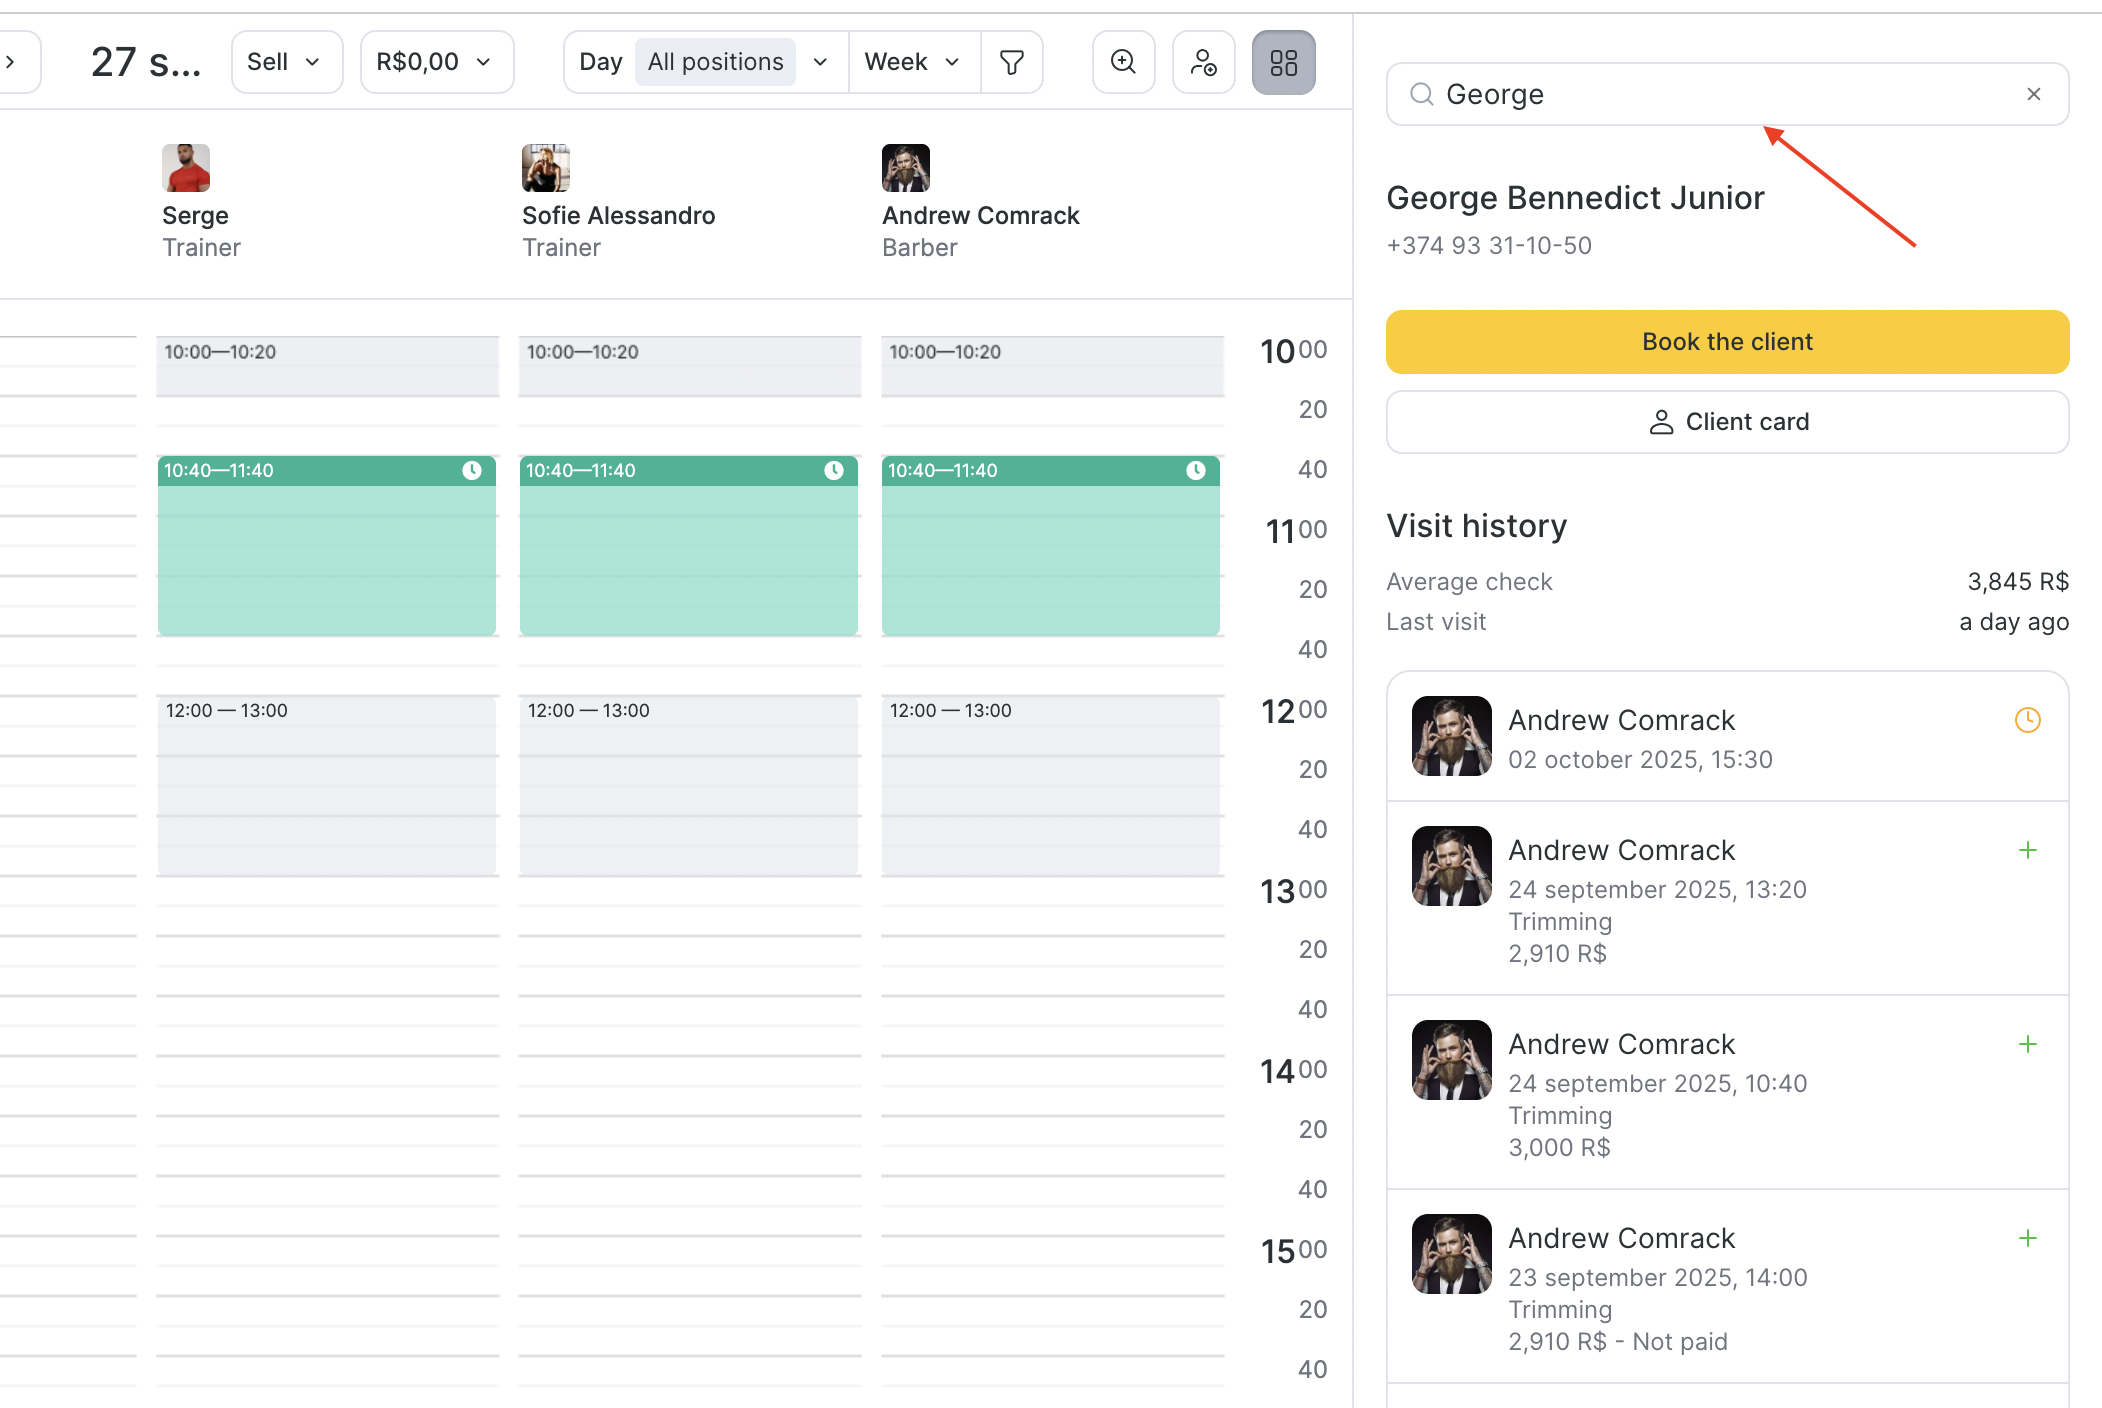
The search panel will display the client’s recent appointments, professionals they were booked with, services they received, paid amounts, and locations they visited.
Important
Purchased products, discounts, and appointment comments are not displayed in the visit history in the calendar. This data can be viewed in the client card in the visit window or client database.The maximum number of appointments displayed in the search panel is 25. All appointments can also be viewed in the client card in the visit window or client database.
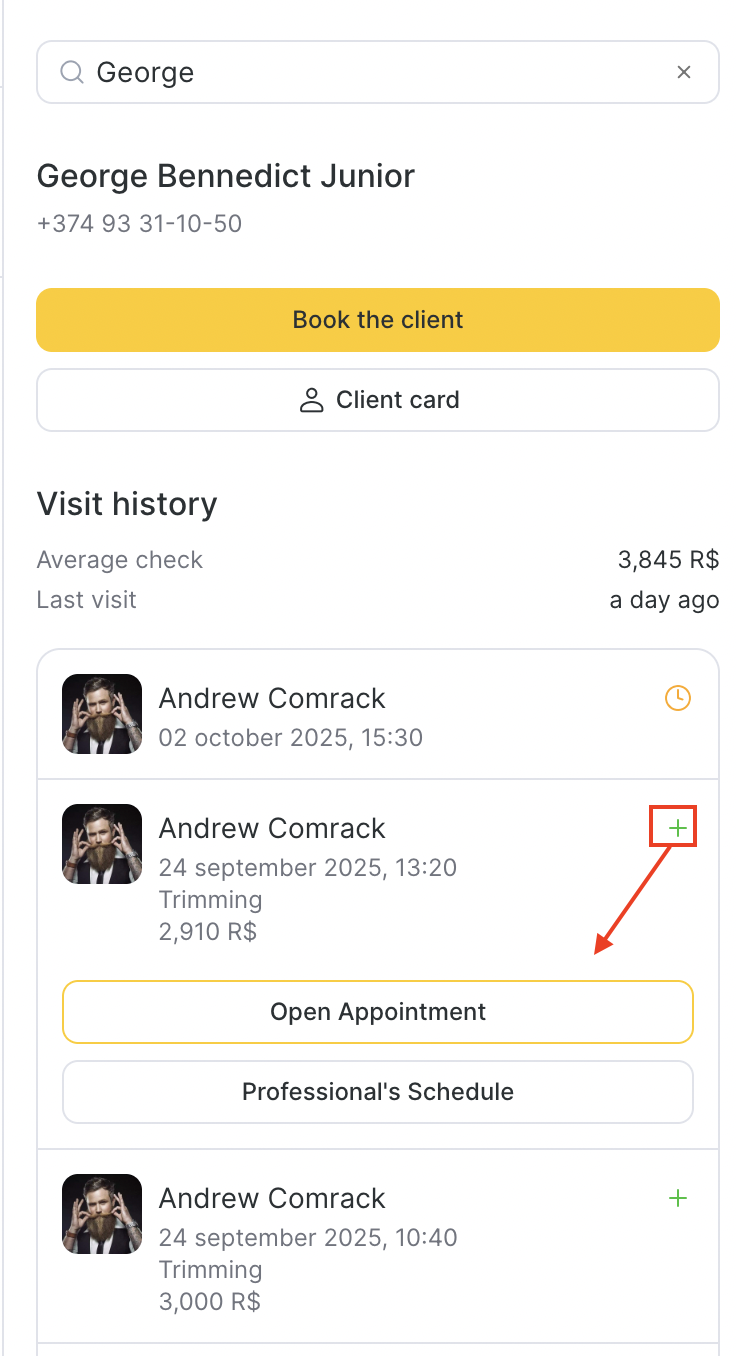
- To open a visit, select it from the list and click Open Appointment.
- To rebook with a team member, click Professional’s Schedule. The weekly schedule will open in the calendar; choose the desired time and create a new appointment.
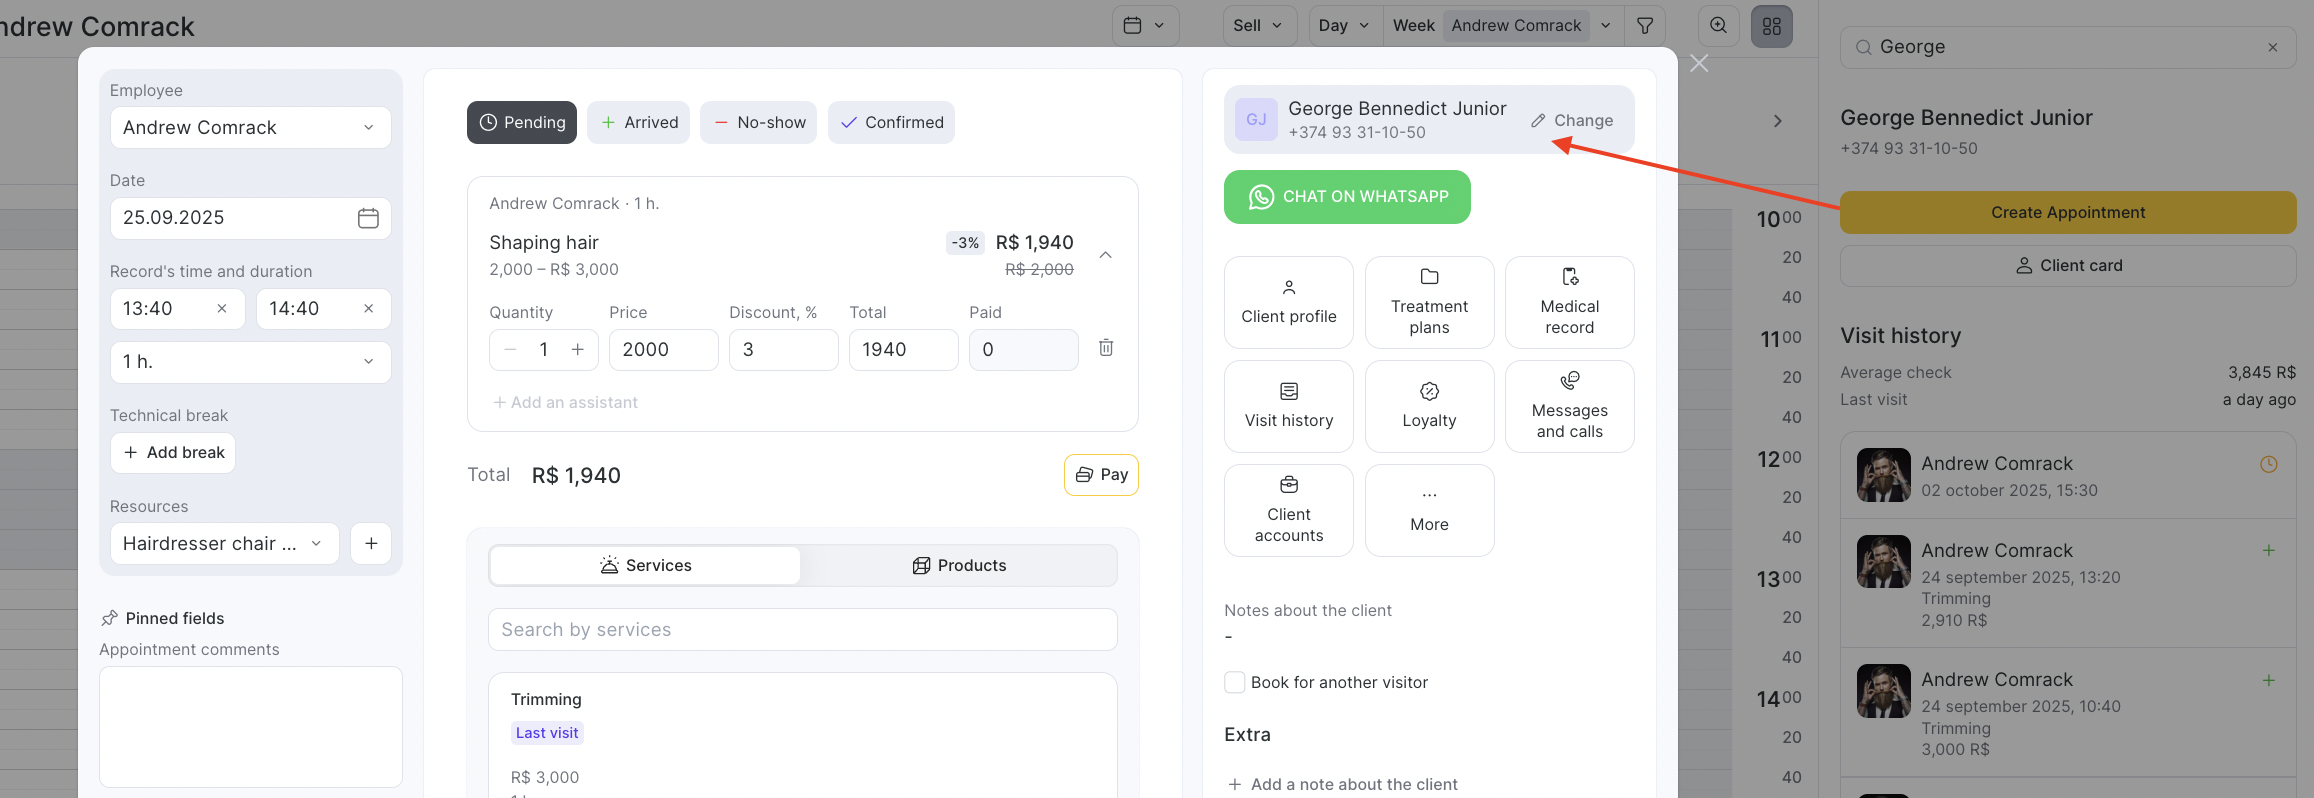
- To quickly book a client, click Create Appointment. The client’s data will be copied and automatically added when creating an appointment in the calendar.
Important
The Create Appointment button works only for individual appointments. For group events, the client’s data must be added manually.
- To make a note visible in the search, it must be added to the client card in the client database or visit window.
Notes
Search is available in the appointment calendar and can be opened/closed with a single button.
The panel remains open when switching days in the calendar.
The panel remains open when switching to any calendar mode, such as Weekly team schedule or Resources.
Client search in the appointment calendar is available only in the web version of the program.