
An automatic notification about changes to visit details.
The notification is sent to the client immediately after the team member, services, time, or date of the visit is changed. In the notification settings, you can choose the conditions under which it will be sent — if the client rescheduled the appointment themselves and/or if the appointment was changed by a team member.
This notification is used to inform clients that changes have been made to their appointment.
Setup and editing #
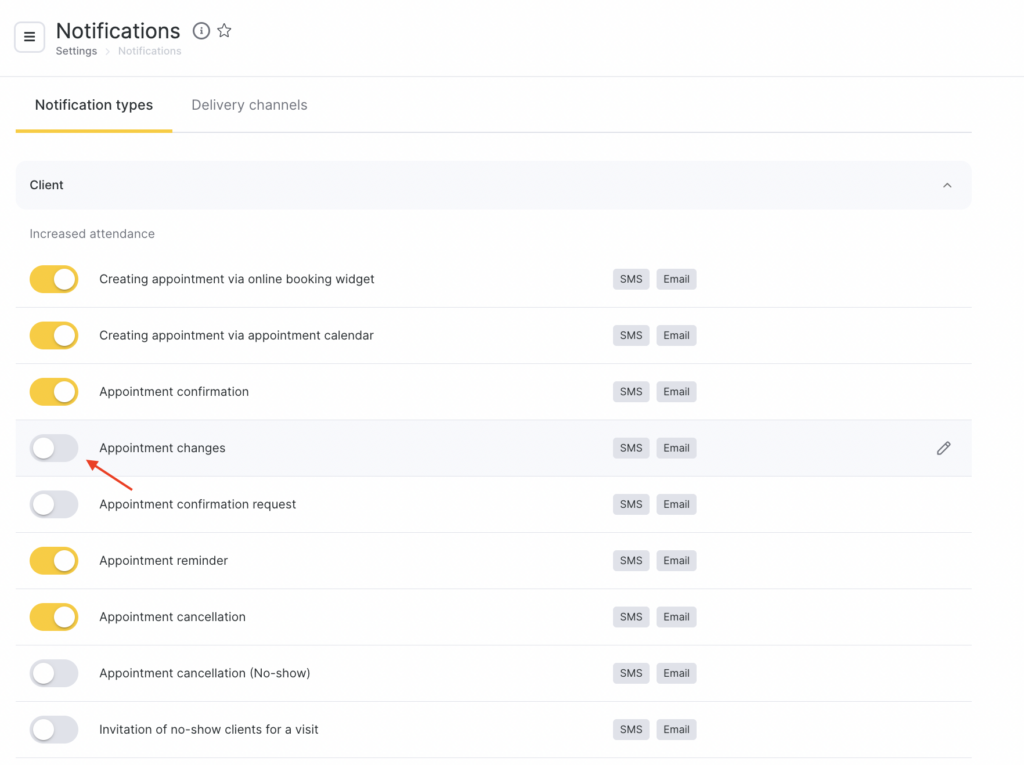
- In the Administration mode, go to Notifications section and open the Notification types tab.
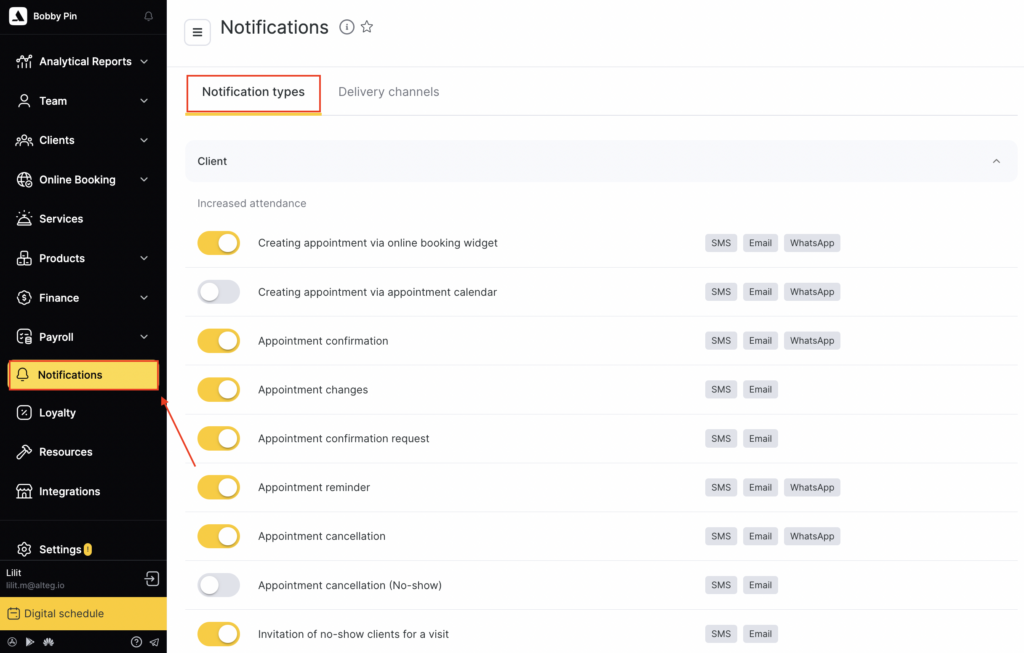
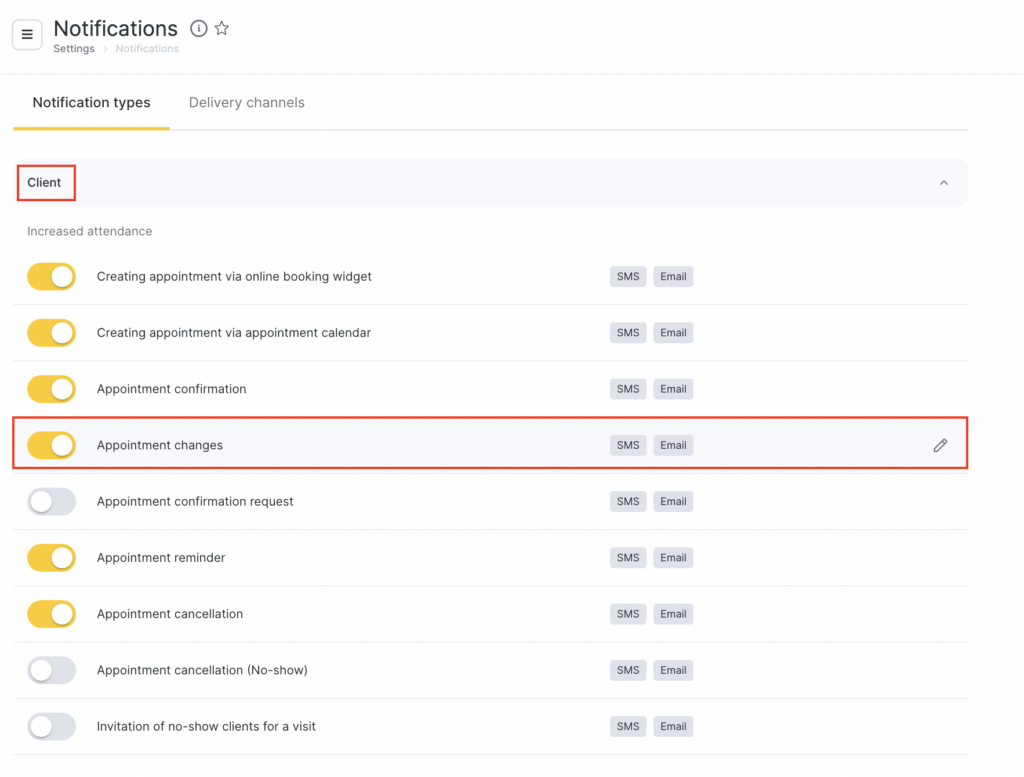
- In the Client section, select Appointment changes by clicking the notification name or the pencil icon.
- On the General settings tab, choose the sending conditions.
Appointment time change
The notification will be sent if the visit time changes by the selected value:
- Any (always sent)
- More than 5 minutes
- More than 10 minutes
- More than 15 minutes
- More than 30 minutes
- More than N (1–24) hours
Source of the appointment change
The notification will be sent if changes were made in the selected way. You can select one option or both:
- Client changed the appointment online. For example, if the client moved the appointment to a different date or time. For the client to be able to reschedule on their own, this option must be enabled in the online booking settings. Read more about these settings here.
- Changes were made by team member. If an employee or administrator changed the appointment details — staff member, service, date, or time. Changes can be made only if the user has the required access rights. Read more about permissions setup here.

Next, configure how notifications will be sent via multiple channels. More details on notification sending scenarios across channels are provided in the article.
Available sending channels #
- SMS / chat-bots
- Branded app
After setting up the sending scenarios, configure templates for each channel. More details on template setup are provided in the article.
Templates #
- When editing the notification on the Notification templates tab, you can set different text for each available sending channel.
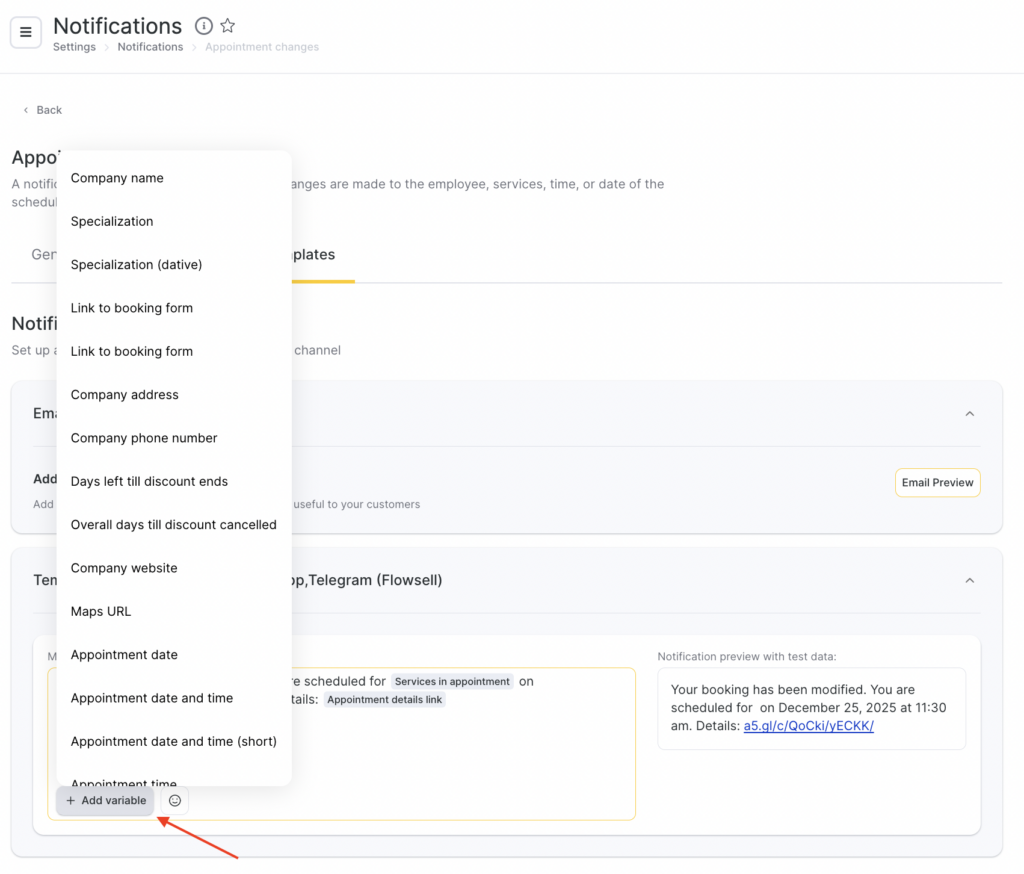
- For the SMS template, variables are available — the system will automatically insert visit, service, client, or branch data in their place. To add a variable, click Add variable, then choose the one that fits the meaning.
After adding a variable, use a space to separate the variable from the main text and other variables.
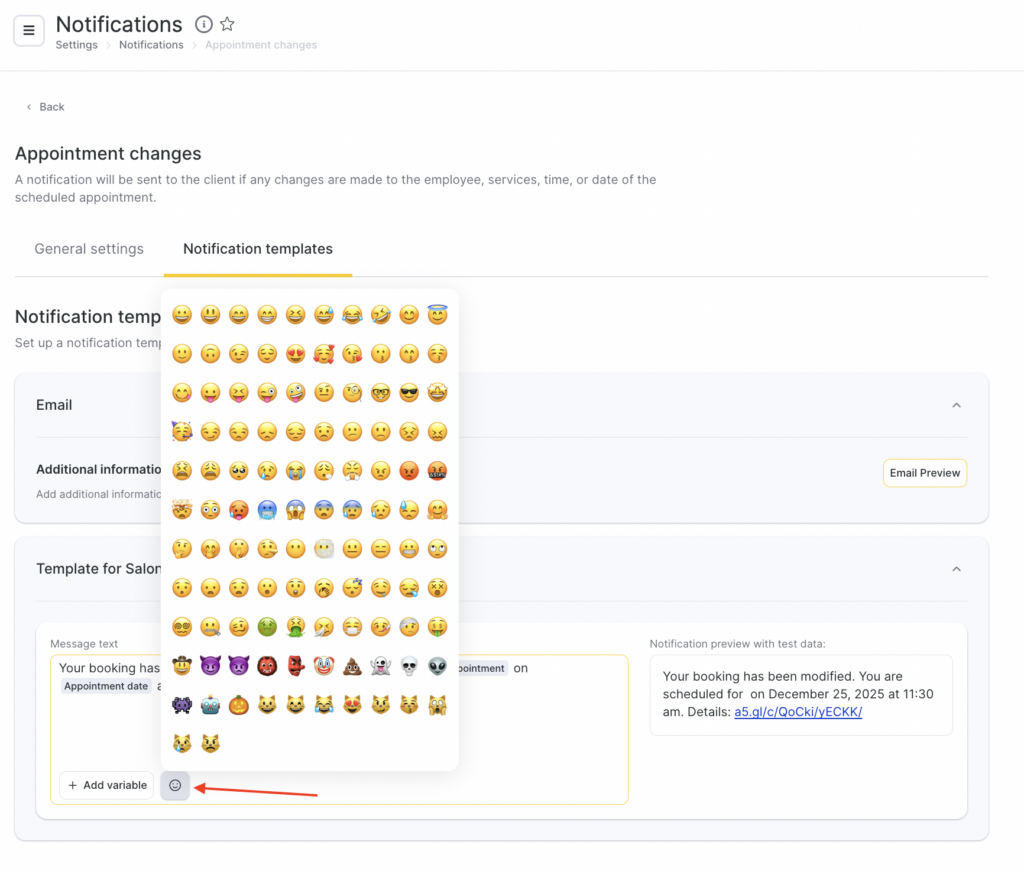
- In SMS notification templates, you can also use emoji. To do this, click the emoji button and choose one of the suggested options or add your own.
Standard template with variables
Your booking has been modified. You are scheduled for Services in visit on Appointment date at Appointment time. Details: Link to appointment details
Example:
Your booking has been modified. You are scheduled for on December 25, 2025 at 11:30 am. Details: [link]
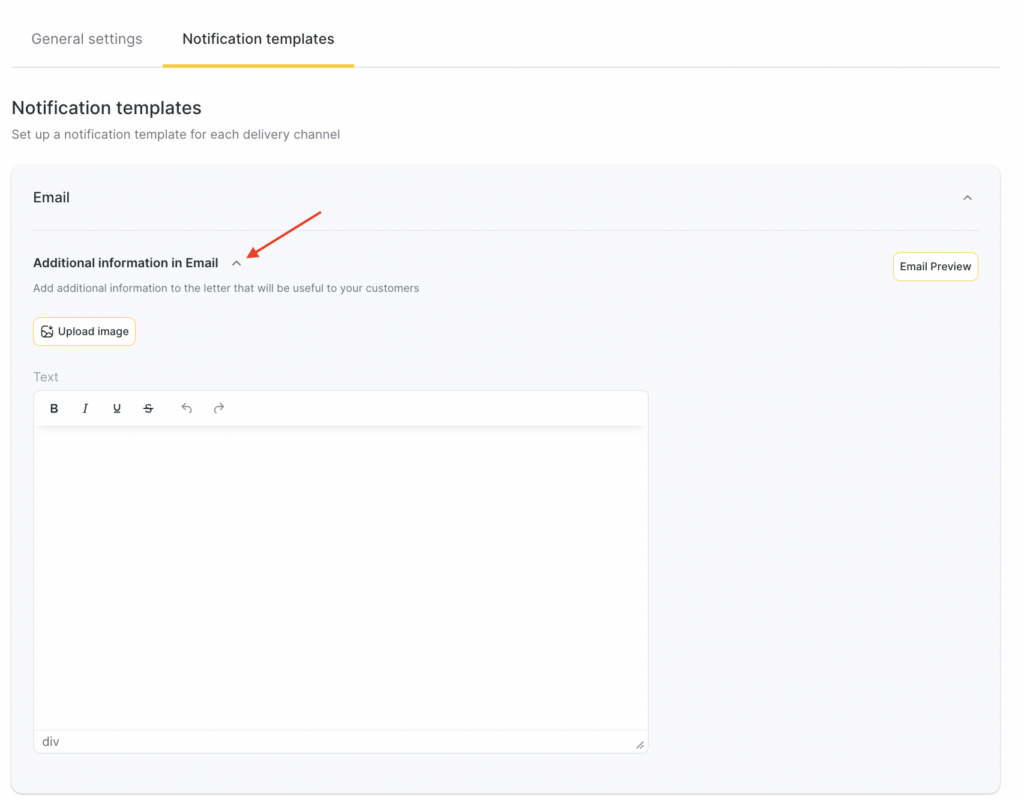
For the Email channel, template editing is not available, but you can add additional information.
To do this:
- When setting up notification templates, open the Additional information in email tab.
- Enter extra text, upload an image, or add a link.
- To see how the email will look, click Email preview.
- Click Save.
More details on template setup are provided in the article.
For all notification templates, preview is available — how the message will look when sent to a client, team member, or receptionist, including variables.
Completing the setup #
After finishing the configuration, click Save in the bottom-right corner of the page.
To enable the notification, return to the Notification types tab and switch the toggle to the active state. To disable it, switch the toggle off.
To the right of the notification name, you will see the names of the sending channels that are enabled for this notification type.

